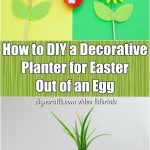
As a spring holiday, Easter invites us to celebrate life and renewal. This year, in that spirit, why not try making a planter out of an egg? This video tutorial will show you how.

For this project, you will need an ordinary egg, some paint, double-sided tape, paper, a pair of scissors, some plant seeds and wet cotton, and a hole puncher.
In the video, I chose to use spray paint. This made it easy to cover my egg evenly, and it was a big time saver. If you prefer, however, you can use a paintbrush to apply paint to your egg.
I used red paint, but you could choose any color you want. You could also go with a combination of colors if you prefer.
I did use one specialized tool for this project which you might not have at home. My hole puncher can create heart-shaped holes.
If you do not have something like this, you could instead use a pair of scissors to create the little heart shapes by hand. This would take longer and involve some more painstaking work, but you should be able to achieve a similar finished effect.
Finally, I was able to grow my seeds into plants using some wet cotton inside the egg. You can try this or any other method you feel is appropriate for the type of plant you are trying to grow.
That is it for notes on supplies for this project. Find a quick list of materials and tools to reference below, along with written instructions to go with the video. Let's get started.
Jump to:
Egg Planter Step-by-Step Video and Photo Tutorial:
Materials:
- Egg
- Spray paint or regular paint
- Double-sided tape
- Paper
- Egg cup (to display your finished egg planter)
- Seeds and wet cotton (or whatever you prefer)
Tools:
- Scissors
- Paintbrush (optional)
- Hole puncher (heart-shaped)

Instructions:
1. You will need to remove a small section from the top of the egg. The easiest way to do this is to use a small pair of scissors to punch a hole through the top. You can then peel around that hole carefully until you have a gap that is wide enough for a small plant to grow up through.
If you do not have a small pair of scissors, you can punch a hole using a needle. Once you have the hole, you can wiggle the needle around until you have widened it enough to peel wit ith your fingers.

2. Once you are satisfied with the size and shape of the hole in the egg, empty out the white and the yolk from the inside.

3. Rinse the egg inside and out so that it is as clean as possible. Do not use hot water to do this, or you might compromise the strength of the egg, causing it to break.

4. Assuming you have a heart-shaped hole puncher, use it to punch four holes out of a piece of paper. It does not matter what color or type of paper you use since none of it will remain on the finished craft.
If you do not have this type of hole puncher, as discussed, you'll need to make do using a pair of scissors to manually create four heart shapes.

5. Apply some double-sided tape to the four heart shapes you cut out. Attach them to the side of your egg in a kind of “clover” formation. You will be removing them soon, so there is no need to press extra hard when you apply them.

6. You may now cover your egg in paint. As mentioned previously, you can use a paintbrush or you can spray paint your egg instead. Cover the surface completely. After the paint is applied, allow the egg to dry completely.


7. Once the paint has finished setting, carefully remove the four heart-shaped pieces of paper you attached earlier. They will leave behind a pattern on the egg, which looks like a clover.

8. Your egg planter is now ready to use. All you need to do is put the seeds inside to grow. I placed mine in some wet cotton, and stuffed that inside the egg.


9. All you need to do now is put your planter on display in a cup and set it somewhere ideal for sprouting your seeds. You can watch as the plant grows up through the top.

Watch Your Plant Grow During the Easter Season
This is a great project to do on your own, but it can be especially fun to do with kids, who will love watching the seeds sprout up.
Once the sprout has got an adequate start, you can transfer it out of the egg planter and into a permanent pot or plant it outdoors if you prefer.
Now that you know how to make an egg planter for Easter, you can probably think of many ways you can adjust this craft to personalize it. Instead of creating a clover shape using the hearts, for example, you could create a row of them around the circumference of the egg.
Another idea, if you have a regular hole puncher only, would be to create polka-dots all over the egg.
You also can choose to simply decorate the egg using nothing but paint and your imagination.
Looking for other creative DIY egg decorating ideas for Easter? We have many exciting crafts waiting for you to try on our site.
Easter Projects
To get started, you can watch a video tutorial that teaches you how to create a rustic Easter egg decoration using twine. Next, you can turn an Easter egg into a cute bunny decoration. Love the unicorn trend? Indulge your obsession by creating whimsical unicorn Easter eggs! And don’t forget to decorate your plastic Easter eggs, too.
Have fun with all of these easy Easter craft tutorials, and check back soon for more. We’re always adding fresh videos for you here at DIYnCrafts!


Leave a Reply