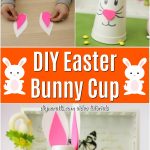
If your goal this year to is to stay thrifty but still creative with your DIY Easter projects, this latest video tutorial is for you! In it, you’ll learn how you can take an ordinary Styrofoam cup and transform it into a cute Easter bunny.

This project has a very low cost, thanks to the materials literally consisting of nothing more than a regular Styrofoam cup, some white cardboard or cardstock, and a pink foam craft sheet. This makes it a fun, affordable and easy Easter craft if you are on a tight budget.
Jump to:
You’ll notice that I listed hot glue under “Tools.” This is what I use for pretty much everything, and for me it worked fine for this craft. But I have heard some people complain that they have a hard time working with hot glue and Styrofoam.
If that is the case for you, there are glues which have been made specifically for Styrofoam which you can use for this and other Styrofoam craft projects. They come in tins, tubes and cans, and are known as “POR” and “UHU.”
I’ve also heard that yellow carpenter’s glue can work just fine on Styrofoam as well, so that may be a more mundane alternative if you happen to have some sitting around. Some folks also use white glue with Styrofoam and do not report any problems.
One type of glue that you should not use with Styrofoam under any circumstances is any form of super glue. When the two make contact, they can react in a dangerous way, reportedly releasing cyanide vapor. Obviously, that is not something you want anything to do with.
Anyway, with the chemistry lesson out of the way, let’s get started on this easy and cheap Easter craft project! Below, you can find all the materials and tools which you are going to need.
Again, just go with whatever type of glue you find works best for you, so long as you don’t try superglue or any similar product.
Along with the materials and tools list, there are written instructions to go with the video tutorial. Read along as you watch, and have fun making a Styrofoam Easter bunny!
Step-by-Step Tutorial with Detailed Instructions:
How to Make a Cute Easter Bunny Cup Decoration

Looking for a way to decorate your home for Easter, but want to keep things cheap and simple? Our latest video tutorial shows you how you can transform an ordinary Styrofoam cup into a cute Easter bunny. Watch now and follow along to make your own!
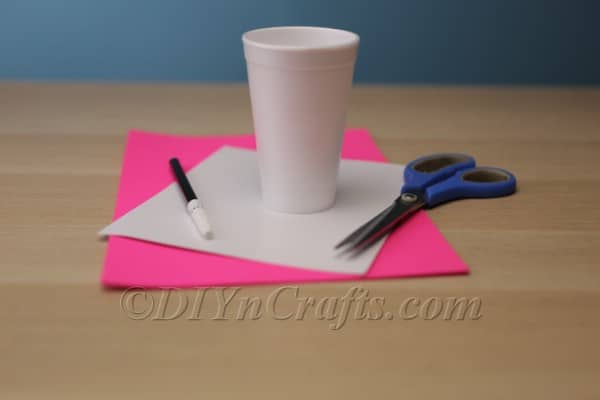
Materials
- Styrofoam cup (or plastic cup)
- White cardboard or cardstock
- Pink foam sheet
Tools
- Scissors
- Black marker
- Hot glue and glue gun
- Pen or pencil
Instructions
 The first step is to fold the white piece of paper in half.
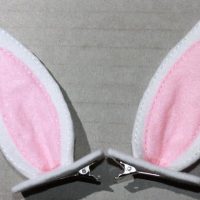
- Once you have done this, use a pen or pencil to draw the outline of a bunny ear. While you are sizing it, remember that the Styrofoam cup you are using will be the bunny rabbit itself. Make the ear as large or small as you want with that in mind.
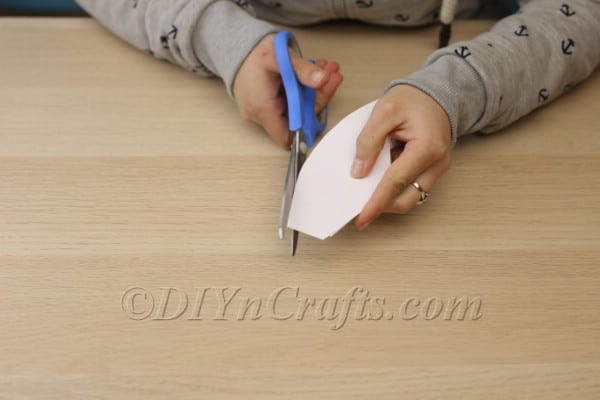
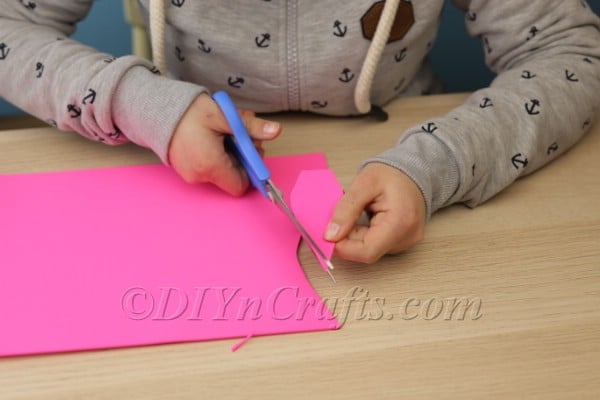
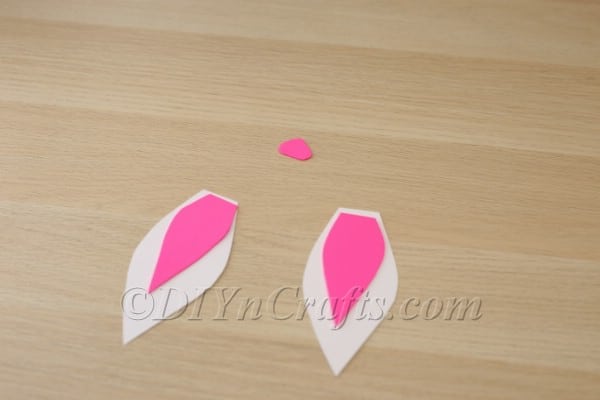
- Using a pair of scissors, cut around the outline of the ear. Because you have folded the paper in half, you will end up with two identical bunny ears.
- You have now created the outer ears for the bunny, but you still need the pink inner ears. For this, you will use the pink foam sheet.
- As with the outer ears, you can cut two identical inner ears out simply by folding the foam sheet in half before you cut. Try and make the shape as closely resemble that of the outer ear as possible.
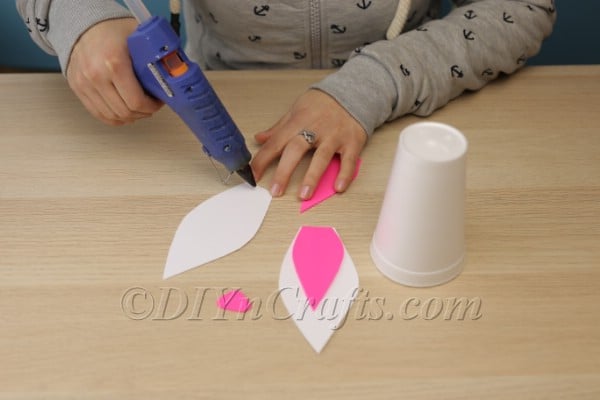
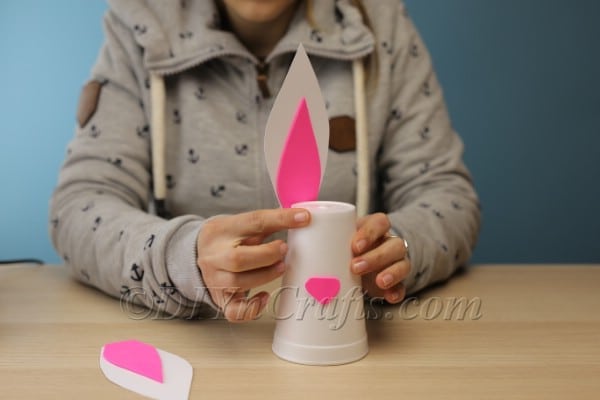
- You can now use hot glue (or whatever other type of glue you have decided to use) to attach the inner ears to the outer ears in order to complete them.
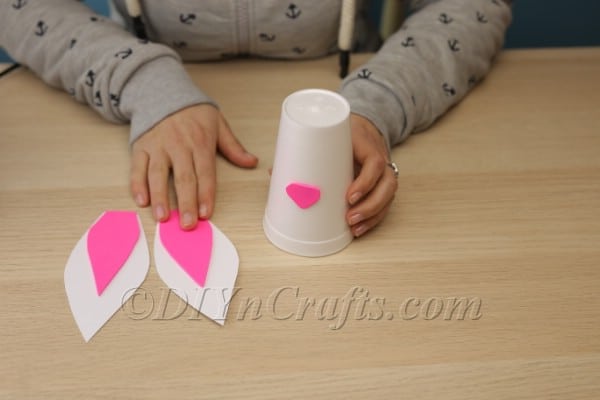
- You'll use the same pink foam sheet to cut out the shape of the bunny’s nose. Glue this onto your Styrofoam cup. Note that the cup should be upside-down. This makes the bunny more stable on the surface where you choose to display it. It also ensures that the top of the bunny’s head is not wide open (that simply would not do; bunny’s heads should always be properly closed).
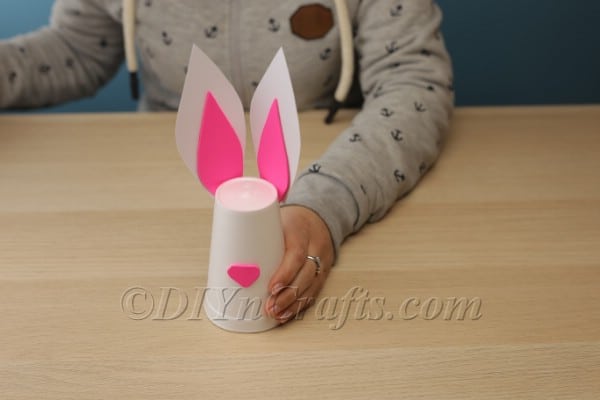
- Once you have the nose in place, glue on the bunny's ears. It'll look best if you glue them onto the back of the cup.
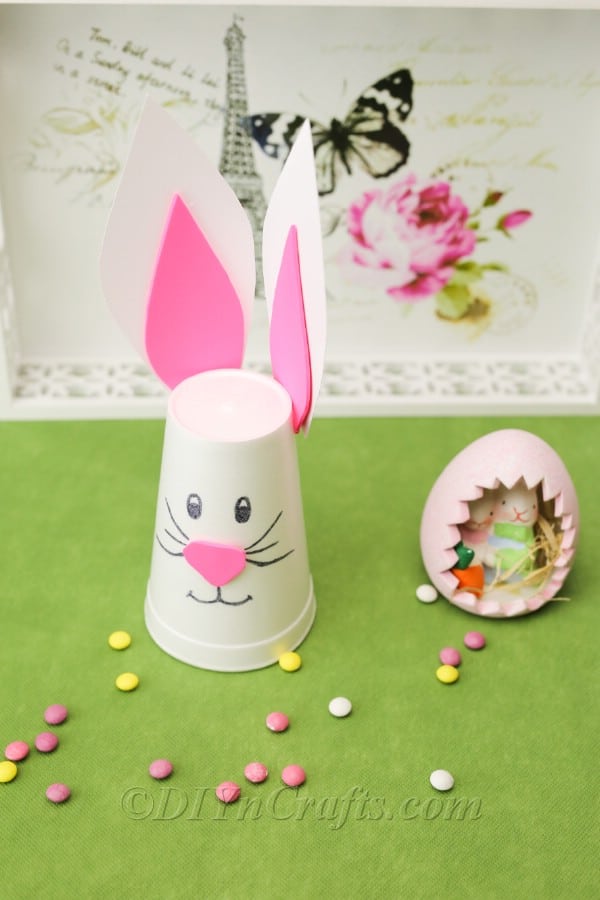
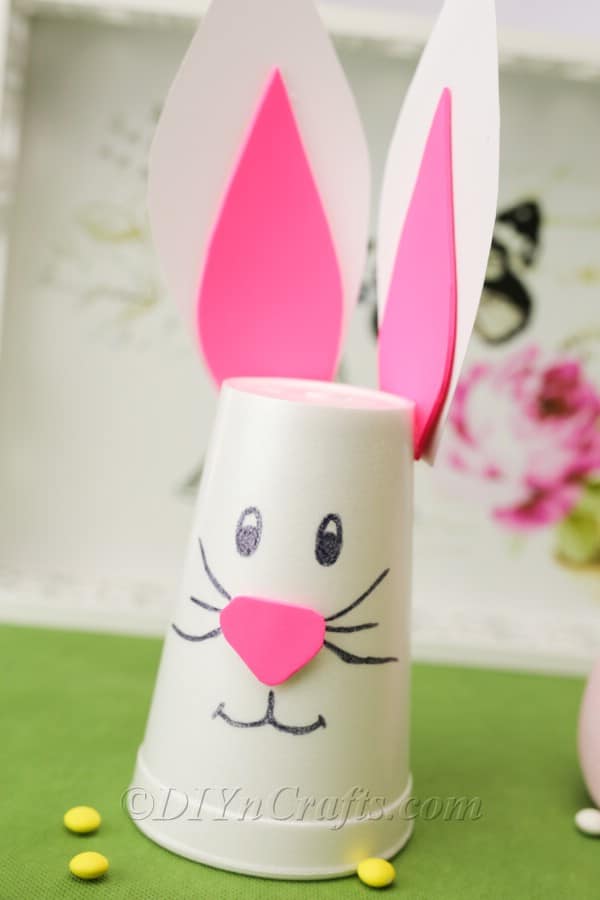
- You now simply need to draw on the rest of the bunny’s features using a black marker. Draw the eyes above the nose, and the whiskers extending from the nose. Your bunny is then complete and ready to display!

 The first step is to fold the white piece of paper in half.
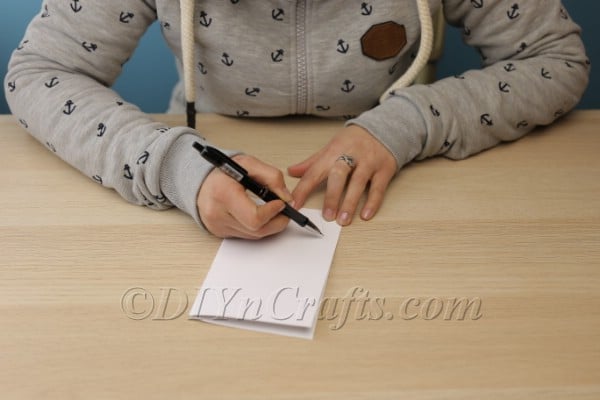
Recommended Products
As an Amazon Associate and member of other affiliate programs, I earn from qualifying purchases.
This Cheap But Adorable Easter Bunny Craft Can Bring Heaps of Easter Joy
I hope you had as much fun doing this project as I did making this video for you! Because it is an easy project with simple steps and materials, it is the perfect cheap and creative Easter activity for adults and children alike.
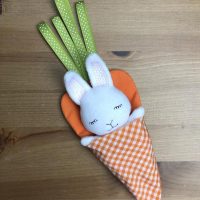
If you are still looking for more easy and cheap Easter craft ideas, check out some of the other video tutorials I have put together for the holiday. If you enjoyed this project, I think you will also like making Easter bunnies using other simple materials and methods.
Easter Projects
For example, in this video tutorial, learn how to repurpose a planter into a cute Easter bunny. You can also discover how to make adorable painted bunnies out of clothespins.
Finally, find out how you can make a plastic bottle into an Easter bunny. This project is extra fun because the bottle can hold treats. Enjoy, and check back soon for more tutorials!


[…] Project Source: Cute Easter Bunny Cup […]