


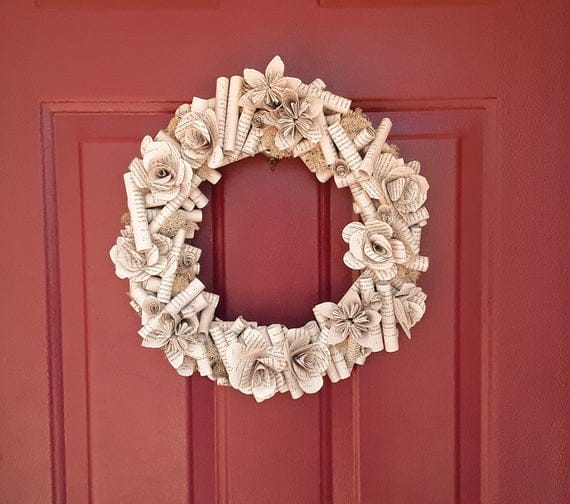
In an effort to use up more old book pages, I decided to try out this method for making flowers. This rustic style fringed old book page wreath is super easy to make and versatile. I love that it uses a rolled paper flower style I love making, and is great for year-round decorating. Whether you use it at the holidays or as a wreath between seasons, you are going to love this craft.

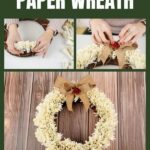
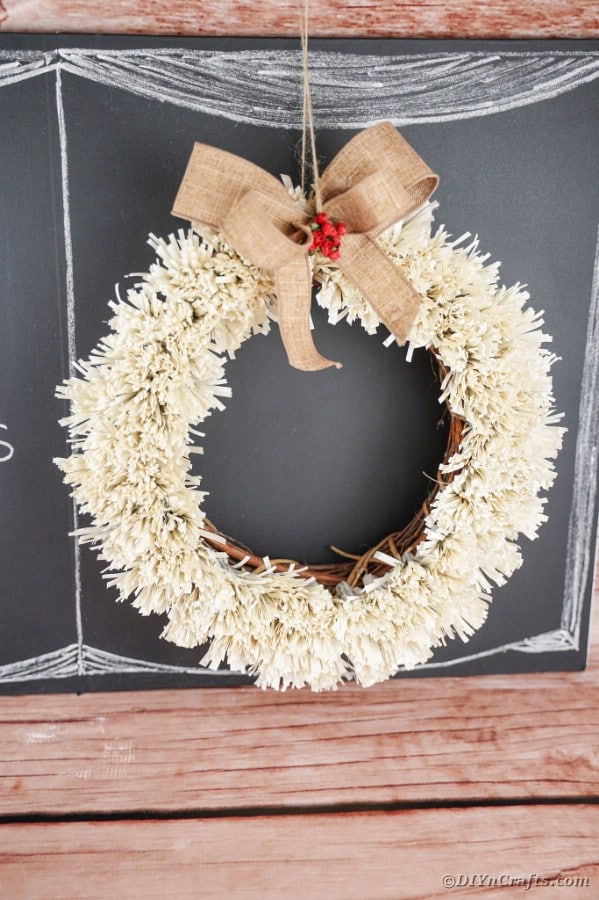
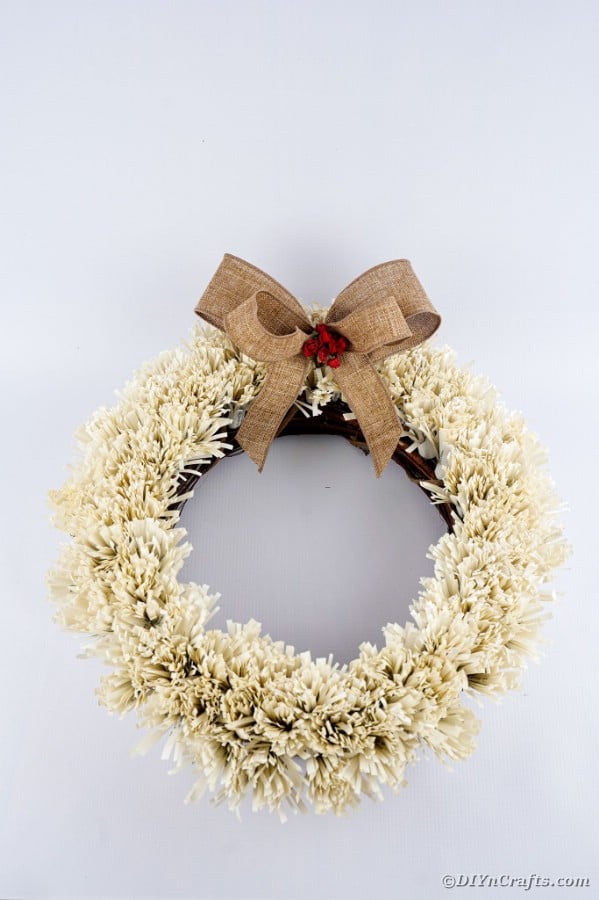
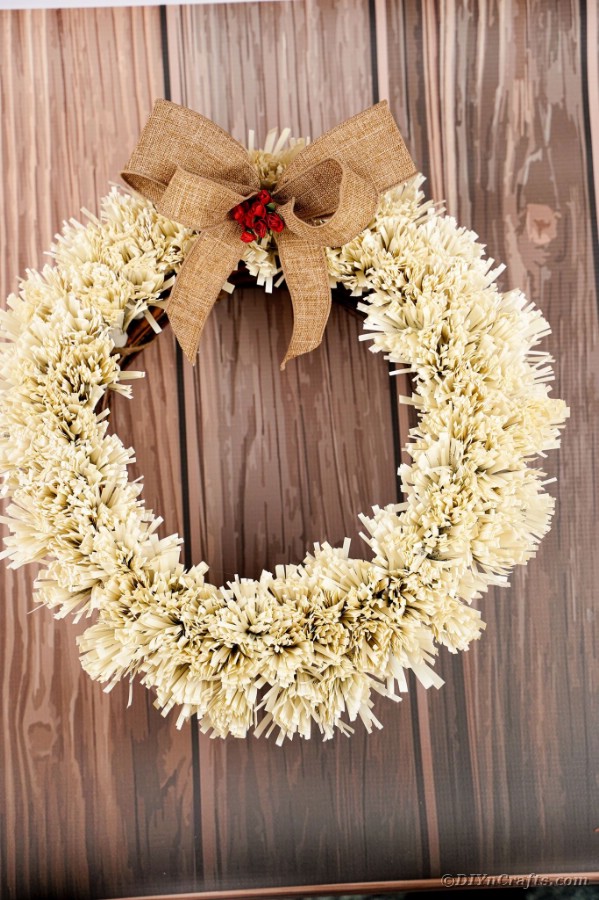
Fringed Old Book Page Wreath
I've made tons of flowers wreaths, folded wreaths, and a variety of styles for holidays and themes. I haven't, however, used this fringed paper flower style before, and am really in love with how it turned out. It paired really well with the grapevine wreath form, and it really came together easily.
While this takes a bit of time to create so many fringed flowers, it is worth the effort. The flowers are very easy to make, they just take a little extra time. You can add customization to the wreath, use it for different decor needs, add to your door, wall, or mantle. The possibilities with this are many which makes it a perfect craft project for anyone and any home decor.

How Can I Decorate This Wreath?
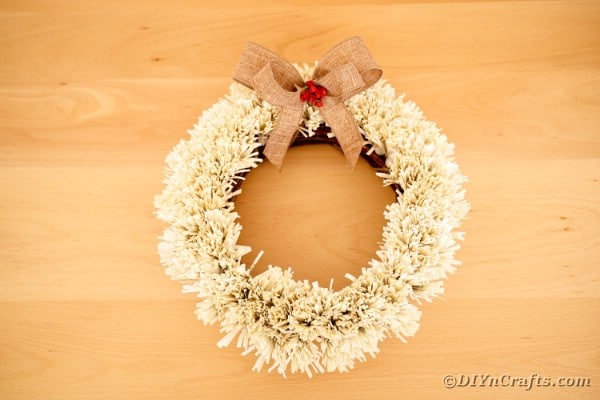
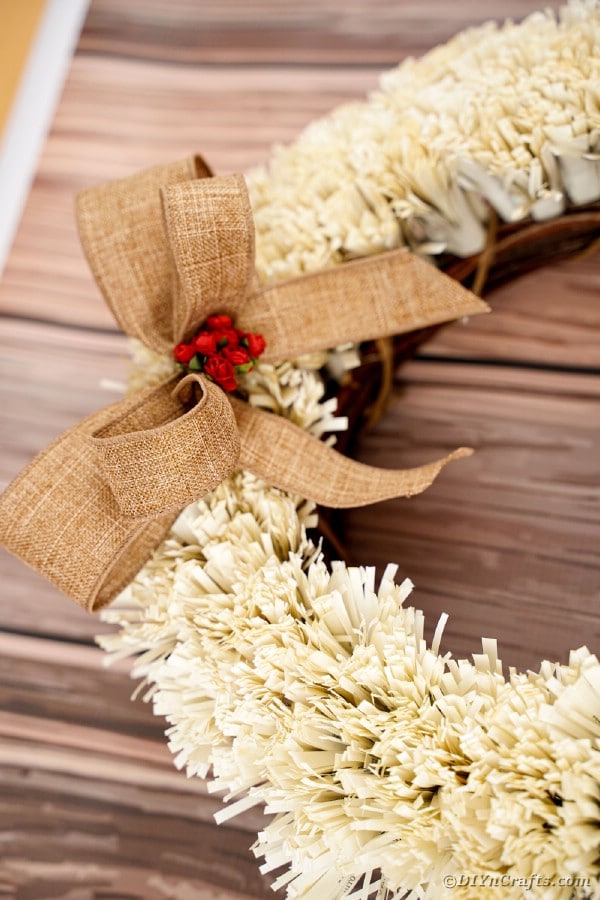
I added a simple bow and berries to the top of my wreath. This would fit really any holiday, but you can decorate however you prefer. Making a wreath your own is a must and this one is super easy to customize.
- Wrap colorful ribbon around the wreath at an angle.
- Use different wide ribbon and flowers to create the bow at the top.
- Add several pieces of twine or ribbon onto the bottom of the wreath to look more like fringe.
- Glue artificial flowers at random places around the wreath form.
- Spray glue onto the wreath and dust with glitter.
- Stain or paint the pages and let dry before rolling into flowers.
- Use spray paint to add hints of paint around the wreath in various colors for a tie dyed look.

Can I Use Different Wreath Forms?
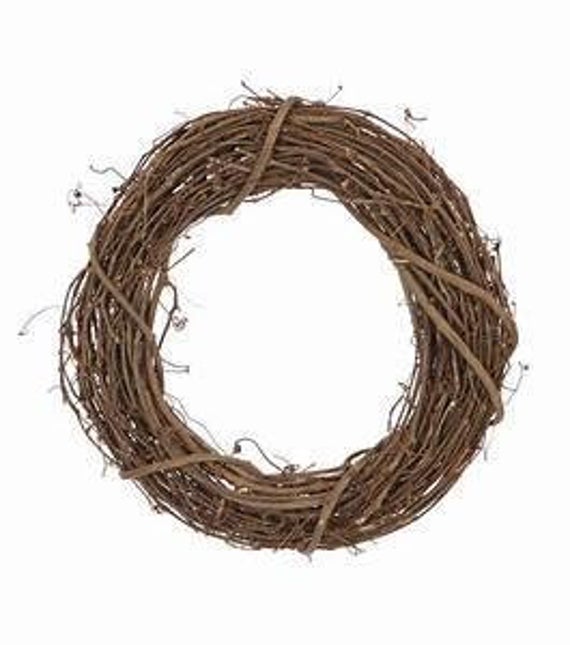
I chose a grapevine wreath for added country and rustic style. That doesn't mean you have to use that same wreath form. The goal is, however, to make this look pretty. If you go with a different option, like Styrofoam or wire, I suggest wrapping in a colorful fabric or ribbon to cover the wreath form.
You can even use a simple piece of cardboard cut into a circle wreath shape. Just glue the fringe flowers onto the form as you would with this grapevine wreath to create the look you prefer. Get creative and make this your own unique style.
Can I Use Different Paper Other Than Book Pages?
Of course, you can use any paper you want for this project! Just cut the paper into rectangles approximately the size of a 5"x7" book would be naturally. You can use craft paper, construction paper, scrapbook paper, or even coloring book pages. Pick what you prefer and add to the wreath to give it your own favorite color and style.
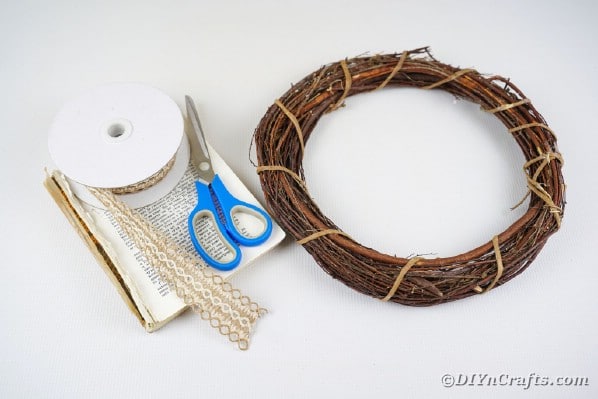
Supplies Needed
- Grapevine wreath
- Old book pages
- Lace ribbon
- Fake berries
- Scissors
- Hot glue gun
- Hot glue sticks or hot glue rope
How to Make a Fringed Old Book Page Wreath
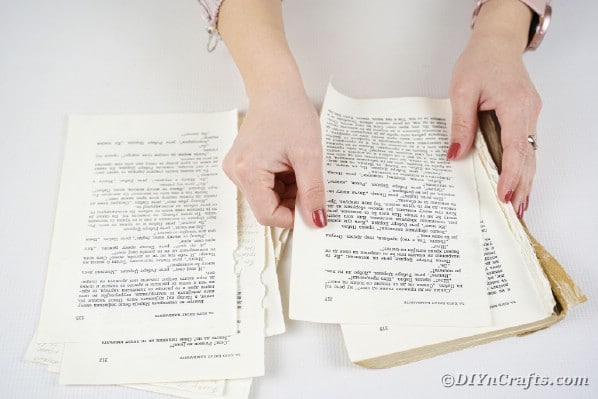
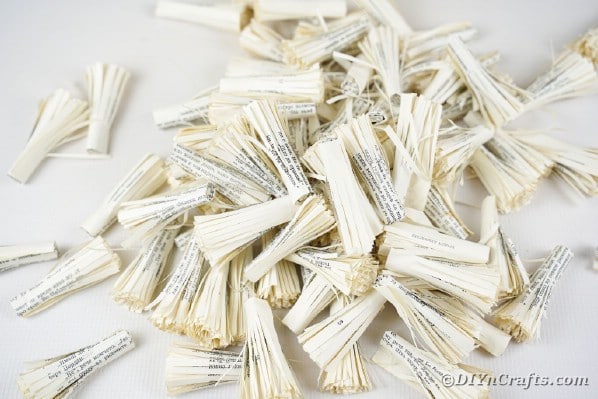
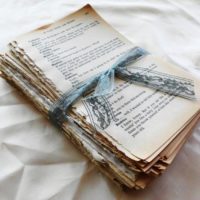
Tear pages from an old book. You will need 40-50 pages for this wreath using an average grapevine wreath form.
Fold the book page in half vertically and start cutting thin strips through the paper leaving the middle fold in tact.
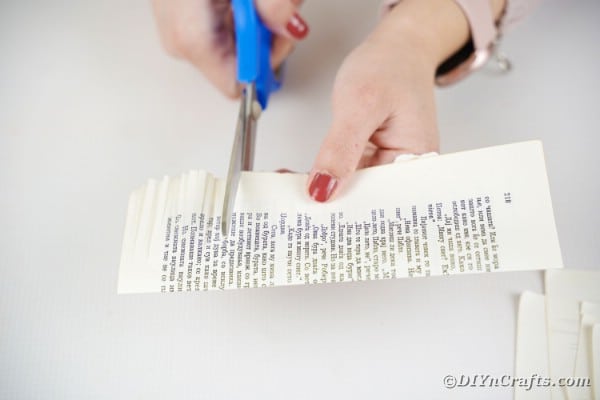
Continue until the entire page is cut into a fringe and then unfold it so the middle is solid, but the outer edges are fringed.

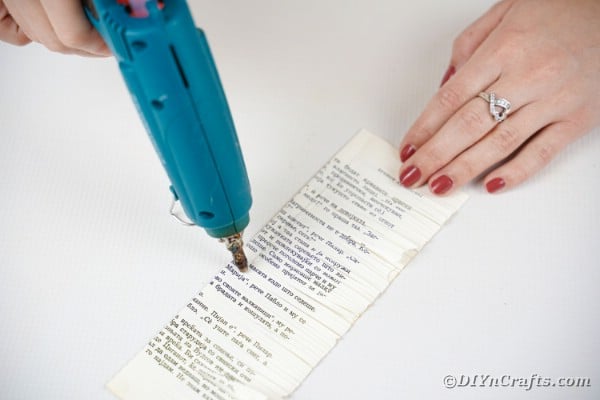
Add a bit of glue along the center of the page then fold it back in half and press to seal that center area together.
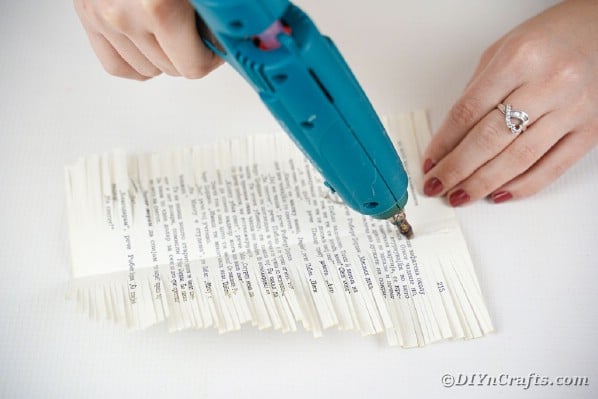
Now, add a strip of glue along the solid edge.
Begin rolling the paper so that the solid edge is sealed and the fringe is loose.
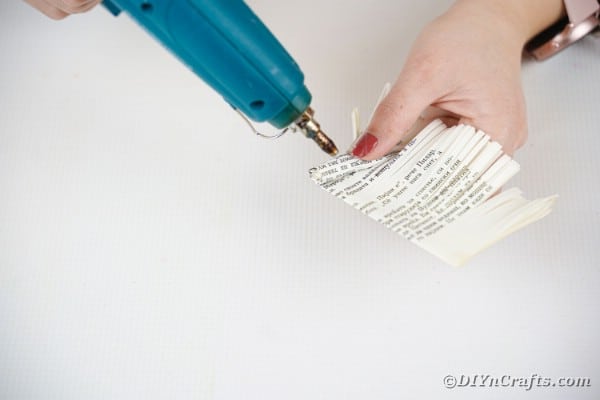
Continue rolling gluing as needed to secure.
Add additional dabs of glue once complete to seal, then set aside.

Repeat this process for the rest of your book pages.
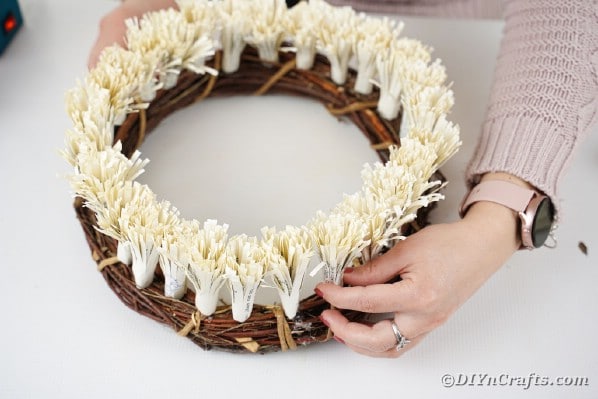
When all fringe flowers are ready, you will begin gluing them onto your grapevine wreath by adding a dab of glue to the bottom and setting them onto the wreath so they are straight with fringe at top.
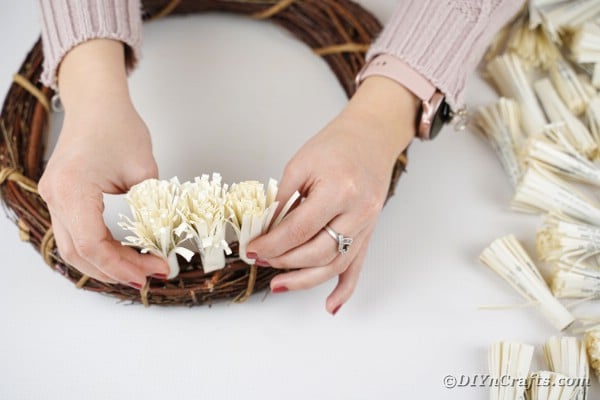
Continue doing this gluing them just far enough apart on the wreath that they can fluff out a bit but still touch on the sides.
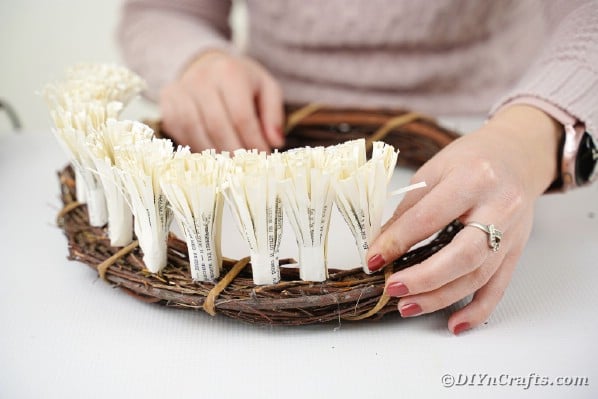
Do this until the entire wreath has a single row of flowers. Go back at this point, and glue a second row of thee paper flowers around the wreath between the existing ones.
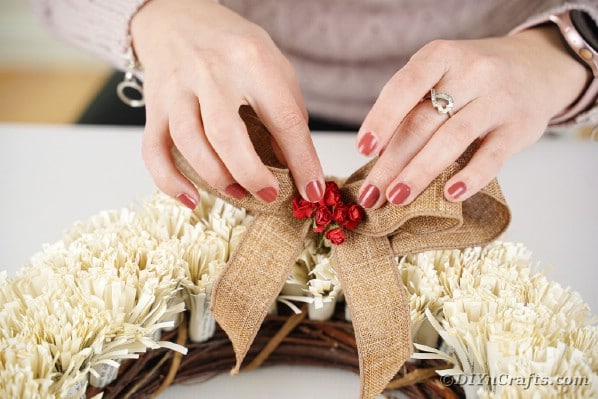
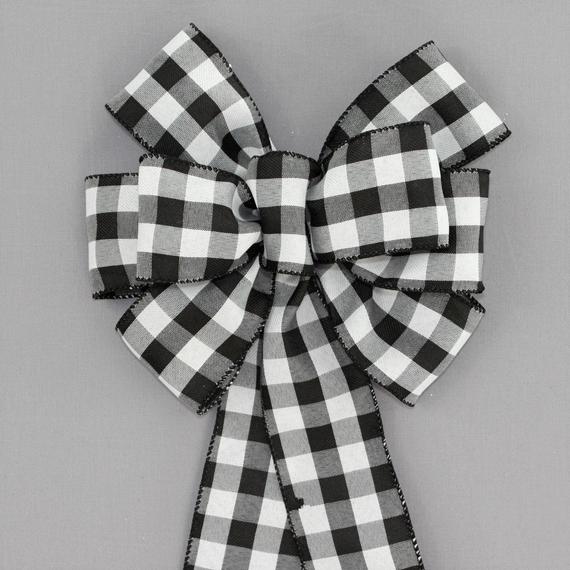
Once you are satisfied with the number of paper flowers on the wreath, you will then cut a strip of ribbon and form a bow.
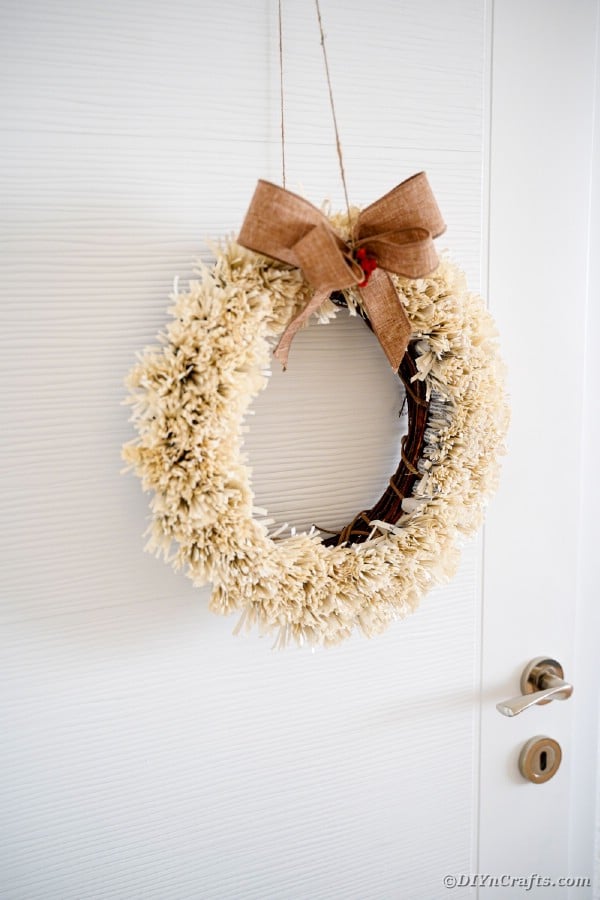
Glue the bow, with some fake berry accents to the top of the wreath.
Hang on your door, mantle, or wall.

If you have leftover book pages and want to create more, I have tons of great projects for you! Start with this simple folded book page wreath and then turn to this origami book page wreath. Of course, you can't go wrong with a great folded book page wrapped wreath.
This burlap book page rose wreath is a gorgeous addition to your country chic or farmhouse style decor. If you have a new graduate in your life, you can make this book page scroll wreath. Another favorite is this paper fan book page wreath.
Crafter's Tip
If you want to add something unique to your wreath, pick up one of these custom wreath bows on Etsy and glue to the top. They are a beautiful addition that helps support small businesses.
Rustic Fringed Old Book Page Wreath
Fall in love with this rustic fringed old book page wreath. A gorgeous upcycled wreath for decorating your home year round!
Instructions
- Tear 40-50 pages from an old book;

- Fold each page in half vertically, and then cut thin strips through the paper from the open side inward leaving the middle fold in tact;

- Continue this process until the page is cut into a fringe then unfold and add a bit of glue along the middle fold;
- Fold the page back over sealing it together in the middle and leaving the ends open;
- Add a bit of glue on the bottom strip of the page, and begin rolling it so the fringe is on top and the solid part of the page is on the bottom;
- Continue until this forms a small fringe paper flower;
- Repeat this process until all pages are now flowers;
- Glue these flowers onto the wreath staring a single row and gluing the bottom solid edge so that the fringe is standing straight up;
- Once you have a single row of these flowers on the wreath, go back and glue additional rows to fill in and create a fluffy appearance;
- Fluff out the fringe a bit, then create a bow from ribbon and glue it to the top of the wreath;
- Add fake berries or flowers to the center of the bow;
- Hang your wreath on the door, mantle, or wall of your home!

Notes
Feel free to add different styles of bows and ribbon to the wreath to match the season or your preferred home decor.
Recommended Products
As an Amazon Associate and member of other affiliate programs, I earn from qualifying purchases.
Finished Project Gallery


Leave a Reply