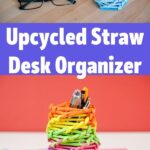


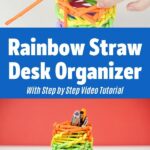

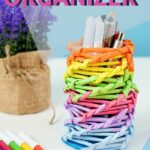
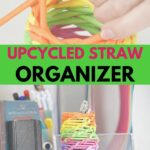
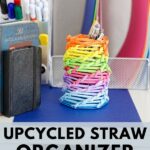

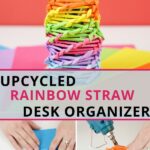


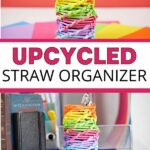

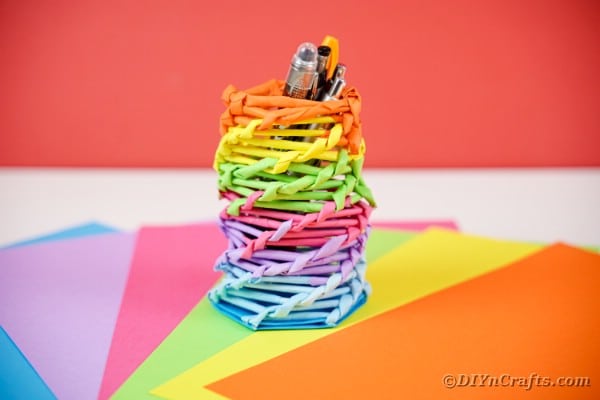
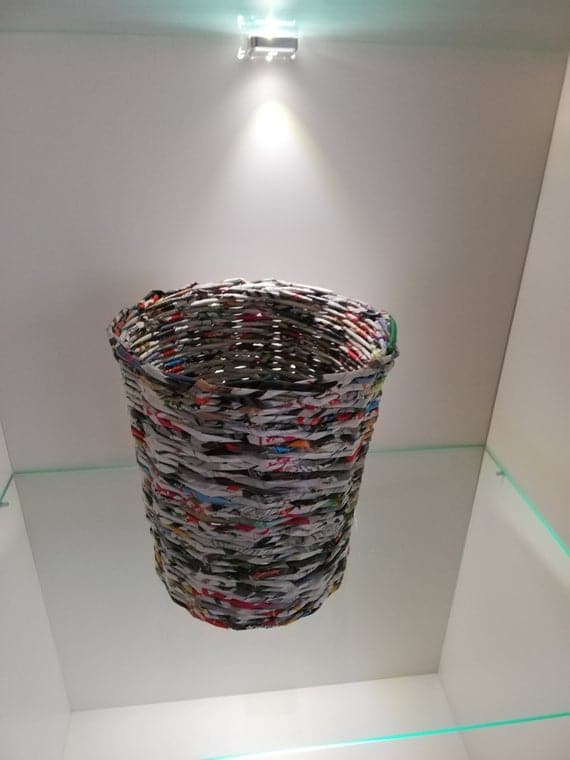
I have always been a fan of rainbow-themed items, and this little upcycled straw rainbow organizer can be a super fun project. If you've never thought to use straws as a base for a craft, now is the time to get started. This was one of many projects in recent months that used paper or plastic straws as a huge part of the project. I am really pleased with how this turned out and can't wait to share it with you!

Jump to:
Rainbow Organizer Can
Every child of the 1990s remembers Lisa Frank. Lisa Frank's items were always sparkling, full of unicorns, and a lot of rainbow colors. While they weren't necessarily all rainbows, they definitely had that colorful look we all loved. I had the pencil case, folders, binders, and, of course, a few of the mechanical pencils. So, when I started making this, I knew right away it would fit that theme.
If you are like me and love recycling, upcycling, or repurposing something - then you will enjoy this project. This little can is much sturdier than you would think and is ideal for a ton of different uses. Don't stop with one. Make a few and add them throughout your home!

If you are looking to organize your home right now, I have tons of great ideas to help you! Here are some great stuffed animal organizers, desk organizers for your office, and, my favorite, amazing shoe organizers.
Would Regular Straws Work?
When you are making one of these, you can use regular plastic straws or you can use paper straws. Either type of straw will work well fairly well for this. I enjoyed making my own homemade paper straws so I could get them just the right color and length I needed.
If you are using the traditional plastic straws when making this organizer, you can use recycled plastic straws. You will want to wash them well, and then let them dry. If using paper straws, you will want to use new straws.
I keep a big bag of plastic straws in my cabinet that was purchased about ten years ago for a birthday party. That bag of 500 straws comes in handy for projects like this, but if you need to grab more, Dollar Tree is ideal for picking them up cheaply.
Making a straw out of paper like shown is really fun, but does take a significant amount of time. For things like this, I really find the time spent making it worth every second for the result.

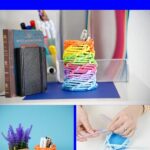
What Can I Use This For?
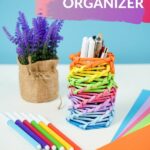
Obviously, this is great for use on your desk to hold items, but there are tons of great ways to put it to use in your home! Below are a few of my favorite ideas and ways I have put this little rainbow organizer to use in my house, but feel free to use it any way you wish!
- Store pens, pencils, or markers on your desk or art table.
- Use for holding makeup brushes on your vanity.
- Add combs and hair clips in the bathroom.
- Use on a picnic table for utensils or napkins.
- Hold paper clips or binder clips on your desk.
- Use for holding clothespins in the laundry room.

Supplies Needed
- Rainbow colored craft paper
- Hot glue gun
- Glue sticks or glue rope
- Ruler
- Pen
- Dowel or skewer
- Scissors

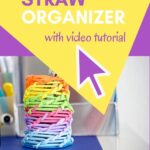
How to Make a Straw Organizer Can
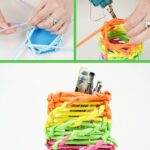
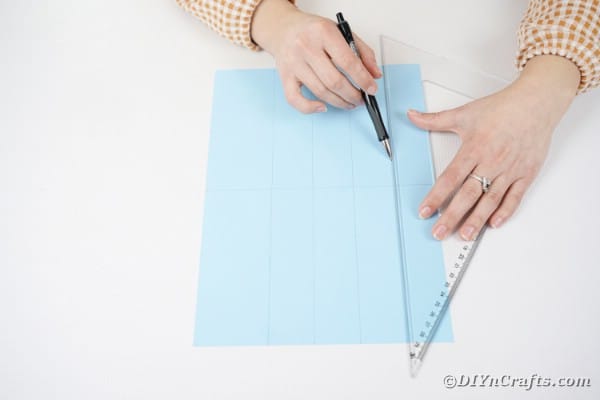
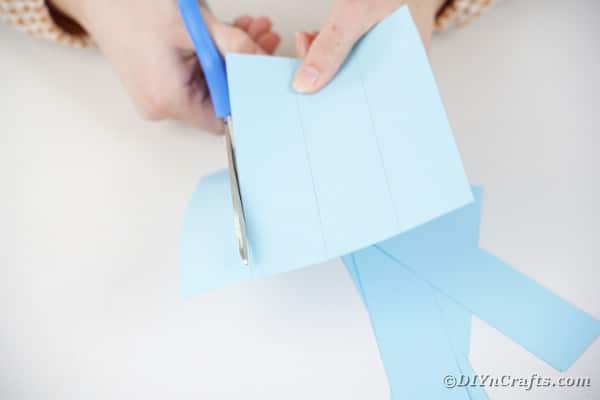
Choose 7 colors of paper. Now, using a ruler, draw a line to divide the paper in half horizontally and vertically.

Then, you will divide each of these sections in half so you have 6 sections marked off on vertically on each paper.

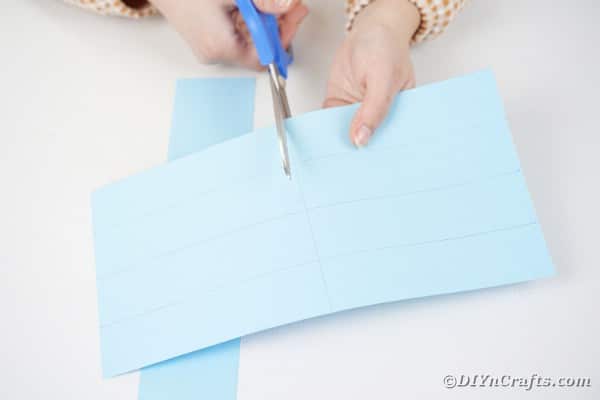
Cut the paper in half along the line.

Then cut out each strip of paper. You will end up with 12 strips of paper per piece of paper. Repeat this process for all 7 pieces of craft paper.

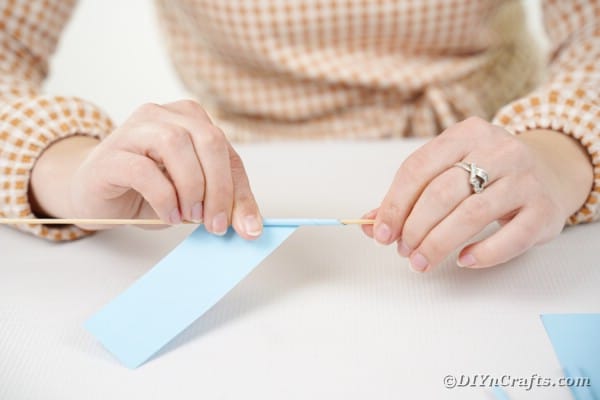
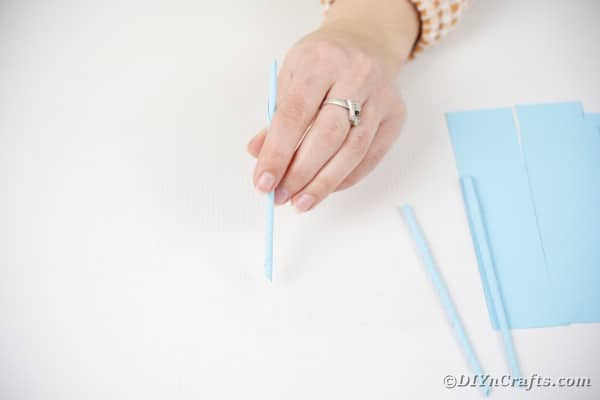
Now, you will use your chopstick, skewer, or similar stick and start rolling the paper over it to form a straw cylinder.

Glue the end of the paper onto itself so both ends are open, but the paper is secured together and stays in place.

Repeat this process for all of the individual strips of paper.

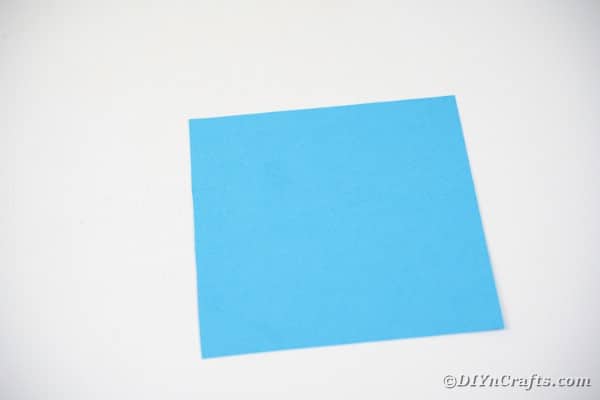
Now, cut out a square of paper around 8"x8".

Fold this paper in half.

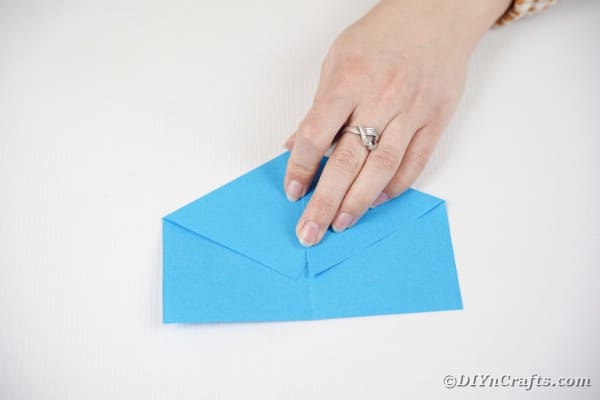
Unfold that paper, and fold it over in a triangle. Fold the pointed end of that triangle over.

Then, fold the bottom side up.

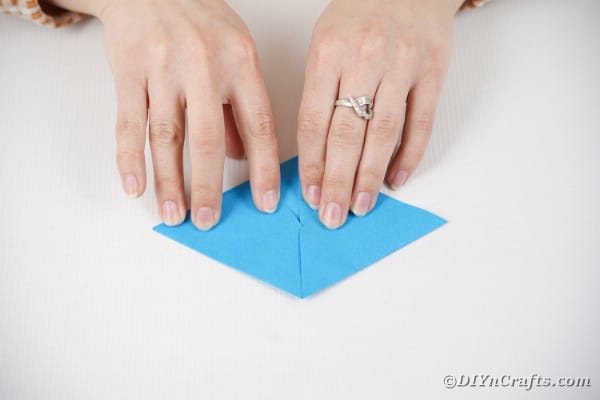
And the other side up. You'll have a diamond shape at this point.

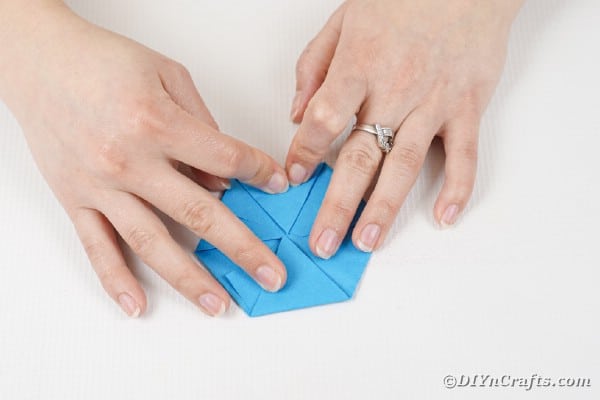
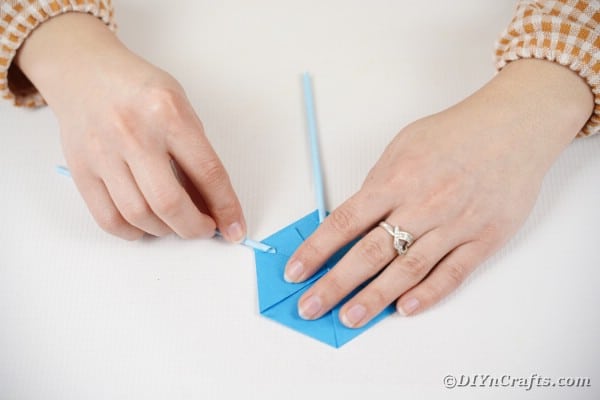
Finally, fold all corners inward so you end up with a six-sided polygon piece of paper.


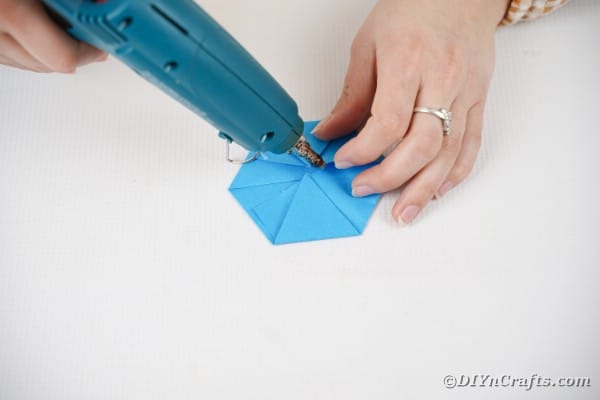
Glue the folds together to secure them, and repeat this process for another piece of paper so you have two of these six-sided pieces.

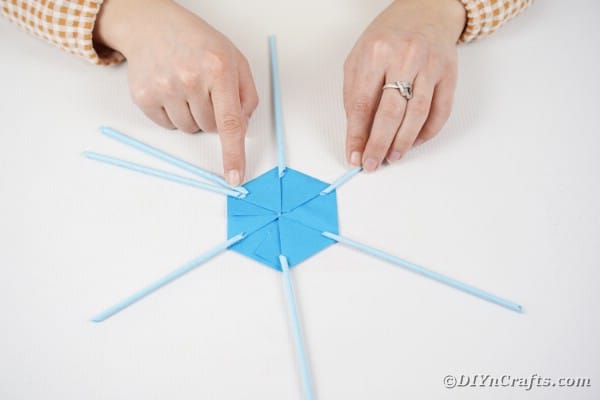
Now, you will glue a straw on each point of this paper.

Add a second straw next to one of these.

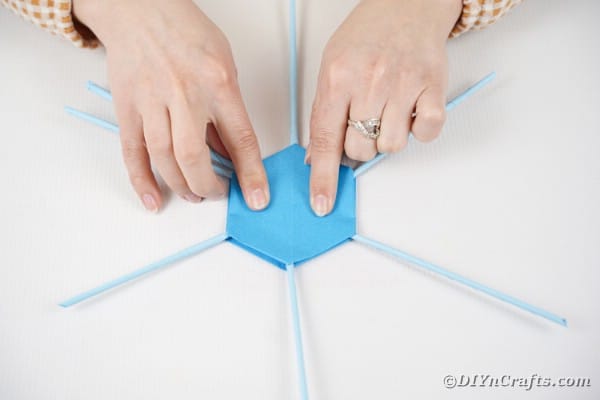
Now, top this with the second polygon and glue in place.

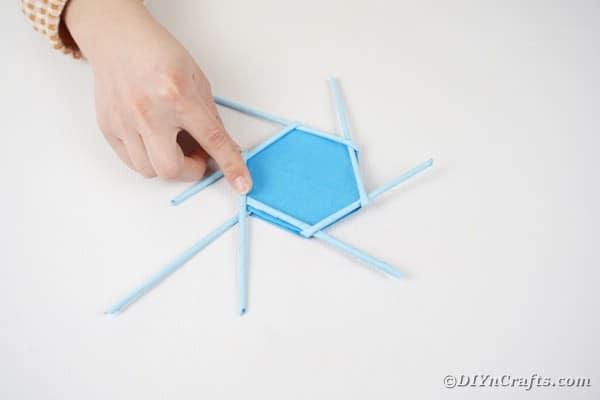
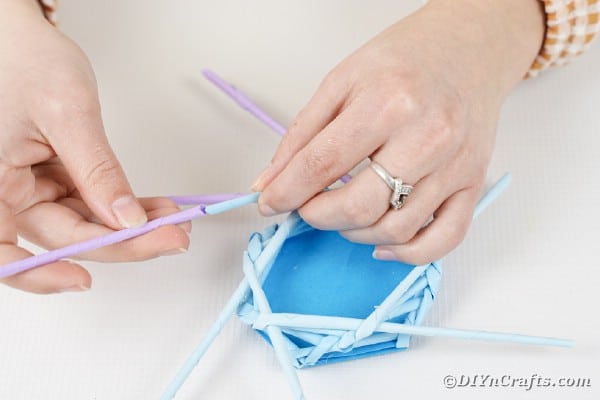
Your next step will be to fold each of these straws over to the left lining it up against the bottom of the polygon.

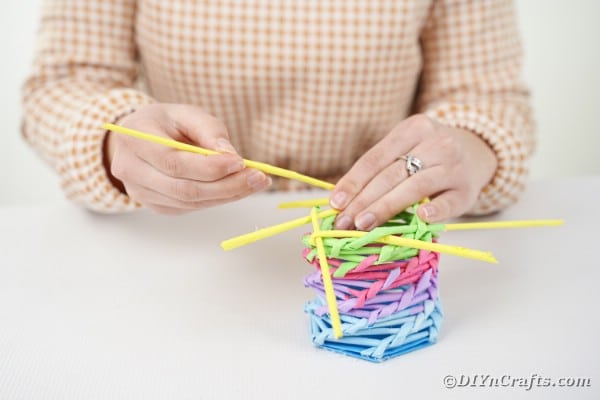
Continue this wrapping over-each-other method and add in additional straws connected to each one as you move upward and run out of paper straws.

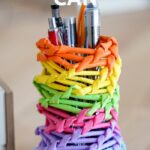
Once you go through all of one color, move to the next. I used the blue straws first, then purple, pink, green, yellow, and orange. You can create yours with any color pattern you prefer.

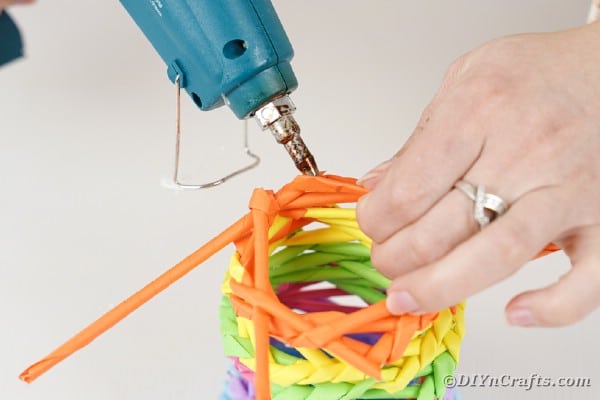
Once you are done and have used all of the paper straws you made, you will secure the very end with glue.

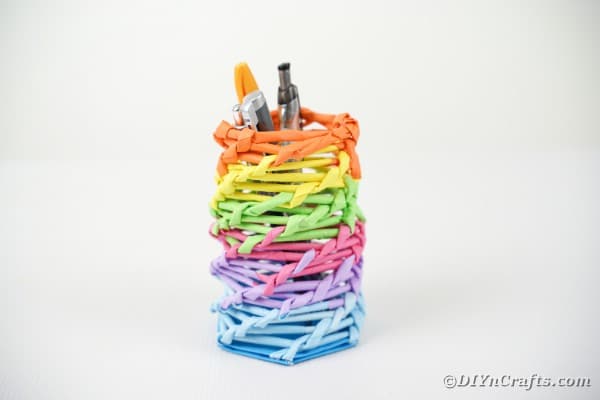
Let this dry, and fill it with your pens, pencils, or makeup brushes!


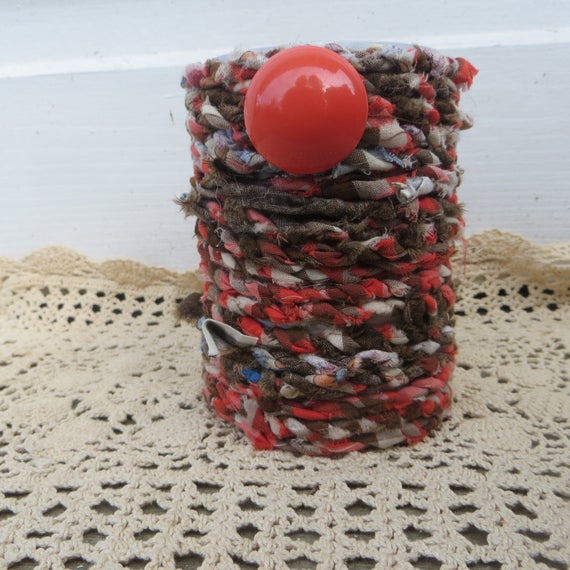
I have made many similar-styled organizers with various upcycled or repurposed items that you may want to add to your collection. This decorative tin can organizer is a super cute idea. You might like the milk carton organizer or this old cardboard box organizer. I love creating something out of nothing!
You might also like this framed jeans pocket organizer or even this sewing kit pincushion jar organizer. So many cool ideas for repurposing while keeping things orderly!
Crafter's Tip:
If you want to skip the step of wrapping the straws in paper, just grab them in the colors you want. Most plastic straws come in large packs of multiple colors, but you can buy packs of all the same color. I like to order straws for crafting on Dollar Tree online. It's so easy to fill a cart with items I use frequently and have shipped right to my door.
Cute DIY Paper Straw Rainbow Organizer Can
Make your own unique paper straw rainbow organizer can with just a bit of glue, paper, and time rolling and folding paper!
Materials
Tools
Instructions
- Use a ruler to draw a line to divide each piece of paper in half both horizontally and vertically;

- You will divide these sections so that you have 6 equal portions vertically;
- Cut the paper in half along the line;
- Then cut out all 12 strips of paper and repeat this on all 7 pieces of paper;
- Now, start rolling each strip of paper on the dowel or skewer and gluing the ends in place so it slips off the dowel creating a homemade paper straw;
- Repeat this with all strips of paper;
- Now, you will use a square of paper to create a polygon shape;
- Fold it in half, then unfold the paper and fold it over in a triangle;
- Now fold each pointed end in so that you have created a diamond shape;
- Then fold those ends in to create a 6-sided polygon;
- Glue the folds of paper in place, and repeat this process so you have 2 of these polygons;
- Now, you will glue one of the paper straws on all 6 edges;
- Then glue a second straw next to one of these;
- Glue the second polygon on top of this to seal these bottom straws in place;
- Now fold the straws over to the left so that they are lined up against the bottom of the polygon;
- Continue folding around in this same pattern until you run out of paper, then slip another paper straw into the end and continue;
- When you run out of one color, add the next color and so on;
- Once you reach the top, you will glue the last bits of paper straws in place;
- Now you can fill with pens, pencils, and markers!
Notes
This can be made in any color you prefer. I loved rainbow, but you can make this in team colors, solid colors, or colors that match your office decor.
Recommended Products
As an Amazon Associate and member of other affiliate programs, I earn from qualifying purchases.
Finished Project Gallery


Leave a Reply