
I am in love with how simple and elegant this low braided bun hairstyle looks. With simple steps anyone can follow, this takes drab hair right to fab in minutes. If you have long hair, this is ideal for creating a new bun that is sleek but feminine. This tutorial also works for medium lengths of hair, but if your hair is shorter than shoulder length, it most likely won't work well for you.

Jump to:
Low Braided Bun Hairstyle
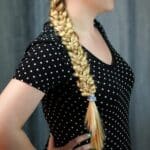
I love braiding my hair, but sometimes, a simple braid can look a little immature in the workplace. This idea combines the sleekness of a low bun with the beauty of simple braids. Add in an accent of beaded headband, and you have a gorgeous style that looks beautiful for date night, workdays, or just an easy day at home.

What Should I Use to Keep My Bun in Place Longer?
If you have a problem with your bun falling out or even with too many "flyaway" hairs, I have some great tips for you. First, I always recommend that when you are putting your hair up in a braid or updo, you do so on a day when you haven't washed your hair. Freshly washed hair is much more likely to fall out of style.
The other tip I always use, is to use a bit of pomade, gel, or mousse in your hair before you start styling. These items will allow your hair to stay flat and smooth for longer. A light spritz of hairspray after the hair is in place can also be a good idea.

If you want more great hairstyle tips, make sure to check out some more of my favorites! This half up half down hairstyle is perfect for any length of hair and is super easy to create. If you have shorter hair, you'll love these stress-free hairstyles for short hair. So many great options. Of course, you don't want to forget about hair health. Check out these awesome hair mask recipes to really make your hair look incredible, no matter the style.
Tools I Use
Other hair tools I love:

How to Create a Low Braided Bun Hairstyle
Begin by combing and detangling your hair so it is smooth and ready to be styled.
Step 1
Divide the hair, leaving the front part away from the back, as shown. This is to create two main sections of hair before adding in the hair band.

Step 2
Now, you will add the beaded hair tie or headband, leaving the front portion in front of the tie.

Tie to secure at the nape of the neck as shown.

Step 3
Next, you will gather the back section of hair as if you are going to create a low ponytail.

Step 4
Instead of securing with a hairband, you will twist the hair, and then loop to create a hair knot bun. Twist the hair and wind it around itself so that it is easy to loop through, as shown.

Secure this bun with bobby pins all around. This can be secured with a hair rubber band before twisting if you prefer, but this simple method usually holds in place perfectly.

Step 5
Now, you will go back to the front portions you divided off earlier. Starting above the ear, you will begin braiding that section, bringing it back toward the bun as you go.

Continue this process until you reach the bottom of that section of hair, then secure it with a small hairband. If you want to make sure the braid stays intact, you can use a small amount of hair gel and gently apply it over the braid before pinning it in place.

Step 6
Once you have that front portion braided, you will now wrap it around the bun starting from the top side, securing it in place around the bun with bobby pins.

Repeat this process with the other side, following the same steps to keep a tight small braid and bringing over to secure above and around the bun.
Step 7
Once both sides have been braided and wrapped around the bun, you will make sure all is secure with final pins and hairspray. Wrap both side braids from the top criss crossing over each other and pinning around the bun to keep in place. You can use the same pins to attach both sides if you don't want to add too many bobby pins to the style.

Now your hair is done! If you wish, you can add additional beaded accents on the braids.

If you do not want to use a beaded headband, you can use any ribbon, basic headband, or even simply a few barrettes to divide the hair.


Constance Evatt
Nice instructions/photos. I look forward to giving it a try 🙂
(Maybe have the print darker in this comment section. Very, very difficult to see the gray colored font.
Also, in the first step of your instructions, it reads...
front "porch"
instead of
front "part."
Best wishes to you.
Vanessa Beaty
Hi Constance, must be autocorrected! 🙂 Good job spotting it. We will change the theme soon and it will be more readable.