
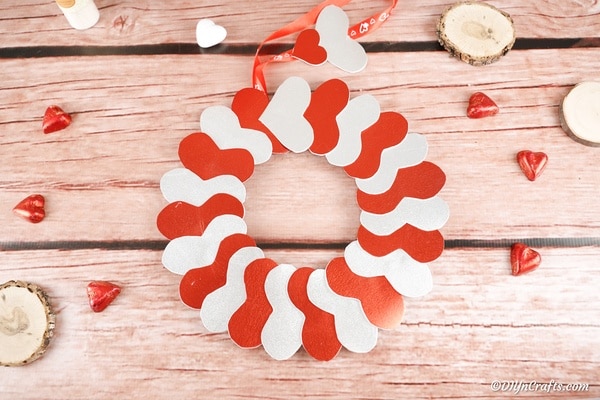
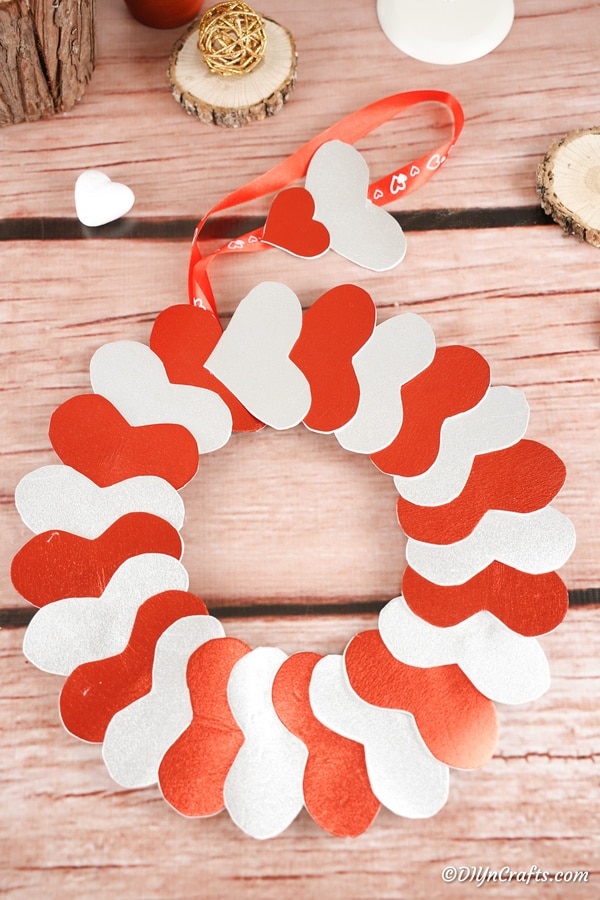
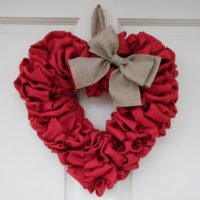
This fun heart Valentine's Day wreath is such a cute and easy addition to your decor! A simple cardboard form, some custom-made glitter hearts, and glue create this fun decoration. I love that I can make this with craft items already on hand, and it looks stunning when hanging on my front door. Have fun customizing your own wreath!

Jump to:
Heart Valentine's Day Wreath
Wreaths are one of my favorite things to create. They are usually very easy to complete, and they really add a bit of color and fun to your home and room. While they are traditionally hung on a door, I like adding them to a wall as a statement piece. Then, I can hang a garland around them or even just display pictures of my family next to the wreath.
This heart wreath is a great choice to make with kids. You can use different types of glue if working with children, or even use sticky-backed foam paper to tack the hearts in place without glue. Choose what works best for your needs.

Another of my favorite wreaths for Valentine's Day is this cute heart no sew fabric wreath idea! If you prefer something more elegant, this stunning floral wreath is probably my favorite on the site! For those who have more time and patience, this paper flower wreath is an excellent choice to make in your favorite colors.
Do I Have to Use Foam Paper?
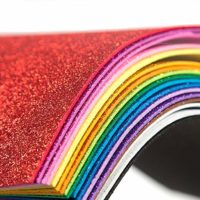
No, you don't have to use the glitter foam paper for your hearts. I find that it is thick enough to hold shape, and almost always inexpensive to keep on hand. If you prefer, you can use card stock, cardboard that has been painted, or even stickers you have put onto cardboard and cut out.

Have fun creating your hearts in the colors and styles you want so that your Valentine's Day wreath is truly unique and your own. Another great wreath idea is this photo wreath made from lids.
I love that this can be used during any season and is versatile for every holiday. Plus, it really shows off my kids and grandkids! For another wall hanging idea, you can add this rustic twig heart decoration to your wall.

Can I Use a Traditional Wreath Form?
There are many wreath forms out there to choose from. Foam, wire, and wooden are the most common. For this project, I find that making my own out of cardboard works best as the hearts are simply placed onto the flat surface.
If using a different type of wreath form, you might struggle as you would need to fill in more gaps with something other than simply the hearts you cut from foam paper.

My paper flower wreath is another example that was best made using a simple cardboard design, but it also shows how you can wrap a wreath form with burlap and then attach embellishments.
It might be what you need to work with an alternate form type. For more inspiration using multiple form types, check out this list of summer wreaths.

Supplies Needed
- Cardboard
- Silver glitter foam paper
- Red glitter foam paper
- Valentine's Day ribbon
- Scissors
- Craft knife
- Hot glue gun and glue or craft glue

Steps:
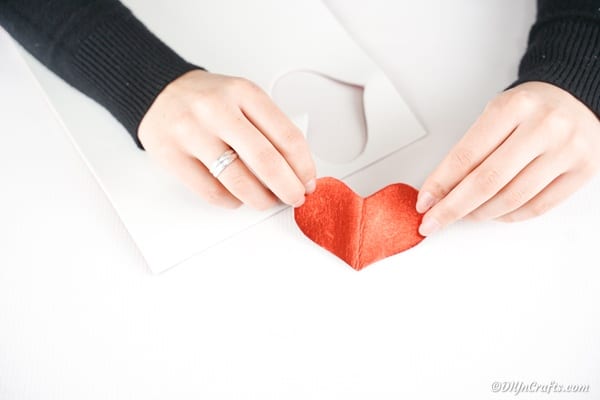
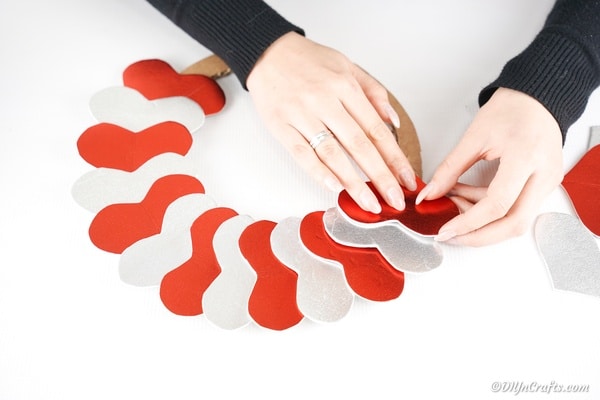
Begin by tracing a heart shape on the backside of one of the pieces of foam paper. This heart should be around 3" across at the widest point.

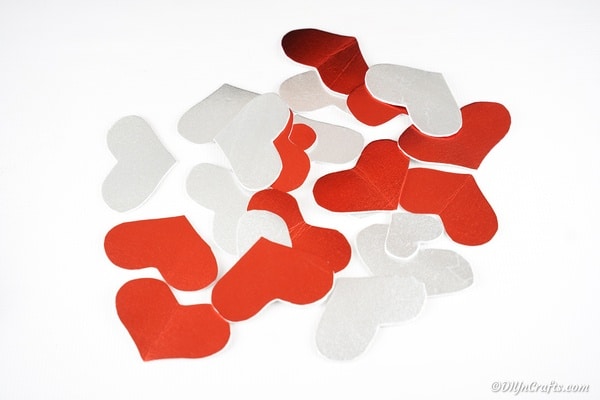
Cut out this heart, then use it as a template to cut out more in both red and silver until you have several hearts ready to glue in place. You may need to cut out more to cover the whole wreath. This depends upon how large you make the wreath.

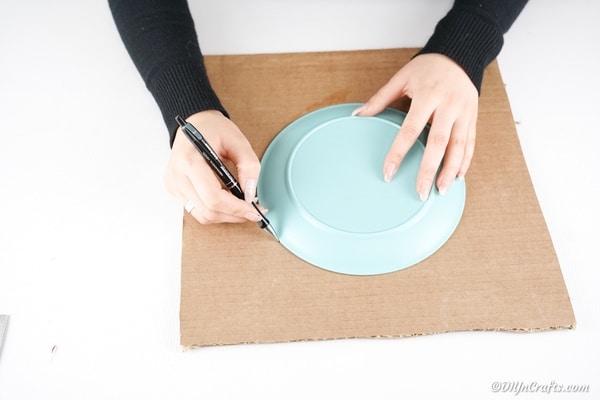
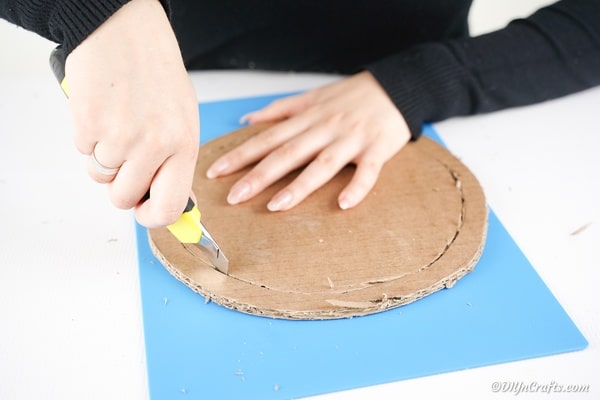
Now, place a small plate or bowl on top of the cardboard and trace the outside to create a circle.

Cut out the circle, then draw a circle on the inside, around 1" inside the circle. To create the form, you will then cut out the center part of the circle.

Now, you will begin gluing the hearts in place, glitter side up.

You will be alternating colors and overlapping them to create a simple pattern.

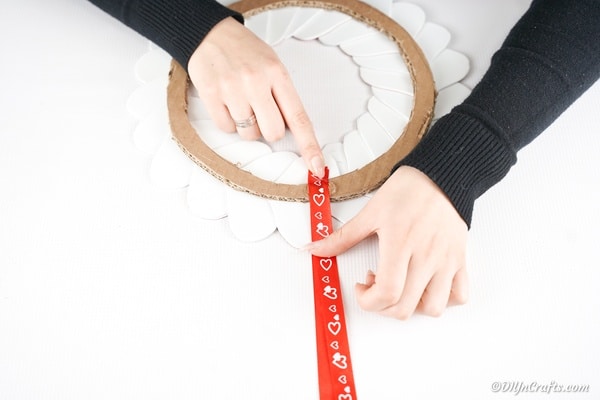
Once the entire form is covered in hearts, you can then cut a length of ribbon and glue in place on the back of the wreath for hanging.

I also added a few smaller hearts to the ribbon.

Printable Step-by-Step Tutorial:
Glittery Valentine's Day Paper Heart Wreath
A simple glittery heart Valentine's Day wreath is easy to make with scrap cardboard and your favorite colors of foam paper and glue!
Materials
- Cardboard
- Silver glitter foam paper
- Red glitter foam paper
- Valentine's day ribbon
Tools
- Scissors
- Craft knife
- Hot glue gun and glue or craft glue
Instructions
- Trace a heart shape on the backside of one of the pieces of foam paper;
- Cut out this heart, then use it as a template to cut out more in both red and silver until you have several hearts ready to glue in place;
- Next, you will use a plate or bowl to create a circle on cardboard for your form;
- Cut out the circle and then you will cut out the center part of the circle;
- Now, you will begin gluing the hearts in place glitter side up alternating colors and overlapping them to create a simple pattern;
- Once the entire form is covered in hearts, you can then cut a length of ribbon and glue in place on the back of the wreath for hanging;
- Add additional hearts to the ribbon if desired, then hang on your door!
Notes
Feel free to use different colors or even add additional smaller hearts or cut out phrases to the wreath for added flare.
Recommended Products
As an Amazon Associate and member of other affiliate programs, I earn from qualifying purchases.


Kelly | Pjs and Paint
I love this! It's such a cute wreath that kids can even help with, while still being a decoration that doesn't look too much like a kid made it! Haha
Nanny
I just love the shape of your hearts you should’ve gave us a template to print from