I love spring when the kids can finally get outdoors and play. Unfortunately, here in the South, it rains quite often during those spring months, which means I always like to have a few spring craft ideas in mind to keep the kids busy.
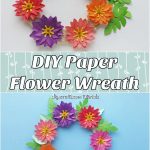
This spring craft involves making a paper flower wreath – and it’s easy enough for kids of all ages!

What You Need To Make This Paper Flower Wreath
To do this paper flower wreath DIY, you will need a few basic craft supplies, like:
- Colored Craft Paper
- Craft Glue
- Round Wreath Base
- Burlap
- Printable Flower Template

Jump to:
How To Download The Flower Template
When you have all of your craft supplies ready, just click on the link to download the paper flower template. It will open up a new window, and you can print off the PDF directly from the new window.
The template makes it easy to trace your flower and leaf shapes directly onto your craft paper, and then you just have to cut out your flowers and assemble your DIY flowery paper wreath.
Flower template (PDF Printable File) – Print off the free template to cut out paper flowers
What Ages Can Do This Floral Wreath?
This spring craft project is great for little ones of all ages. I tried it with preschoolers, and it worked beautifully. You may need to help younger children trace and cut out their flowers, but once you have them ready, even your toddlers can help with the gluing and assembly.
How To Make A Paper Flower Wreath
Once you have all of the supplies ready, you have printed off the template and cut out your flowers; the rest is really simple. You just glue the flowers into whatever design you want onto the wreath form.
This is a really easy and super cheap spring porch decorating idea.
Paper Flower Wreath Kids Spring Craft

List of Supplies:
1. Colored craft papers
2. Pencil
3. Scissors
4. Craft glue
5. Hot glue gun
6. Round wreath base
7. Burlap fabric
Instructions:
Step -1:
Prepare the patterns from the template by printing and cutting them out. Select green-colored craft papers and trace the leaf patterns on them. Cut out the traced leaves using scissors.

Step -2:
Select some pretty colored craft papers for the flowers. The more colors, the better! Now, trace the flower patterns on the selected craft papers and cut them out nicely. The flower template includes 5 patterns. 3 flower petal parts, 2 center parts (the spiked and the spiral patterns).

Step - 3:
Take the round wreath base and wrap it with burlap fabric.

Step - 4:
To make the flower, take the 3 petaled round cutouts and glue them one by one on top of each other. Keep the small cut-out on the top.

Step - 5:
Take the spiral cut out, start to roll the spiral from its outer edge, and continue to roll towards the center. Allow the rolled spiral to loosen up a bit, and then glue the rolled part with the center of the spiral pattern. Stick the spiked pattern on the center of the flower and then stick the rolled spiral pattern on the center of the spiked pattern.
Step - 6:
Similarly, create more flowers.

Step - 7:
Are all items ready? Grab the wreath base and prepare the hot glue gun.

Step - 8:
Start by adding the flowers to the wreath.
Step – 9:
Once you are done attaching the flower, grab the leaf cutouts and stick them between the flowers.

Step 10:
You can add as many flowers and leaves as you want. Just keep the color combination and arrangement nice, and it will turn out beautiful!

Happy spring crafting!


Jules
Beautiful wreathe, thank you for sharing
Ebere agbasonu
Simple flower template and easy instructions. Thanks a lot