
The days are certainly getting cold, aren’t they? It may not officially be winter yet, but it sure feels wintry to me. If temperatures are dropping where you live and frost is starting to form on the ground when you wake up, you are probably in search of some easy DIY holiday crafts that you can do while staying indoors, all cozy and warm.

Jump to:
Today, I have a new video for you to teach you how you can make an adorable handcrafted reindeer decoration using a pine cone and a few other simple craft supplies.
I came up with this project idea the other week when my son came home, bringing with him a whole armful of pine cones. He likes to collect things like this. Typically, they pile up in the corner of his bedroom. At first, he will find them fascinating. After a couple of weeks, however, they are quickly forgotten until I tell him to clean them up.
This year, I got to thinking that maybe all those pine cones could be useful for something other than cluttering the corner of my son's bedroom over the holiday season. He likes to do Christmas craft projects with me, so I asked myself, "What could we make out of pine cones that would be easy for him to do?"
After some experimentation with the pine cones and other materials, I managed to turn one of them into a cute reindeer. I knew this project would appeal to my son, and sure enough, he had a blast making these, and he was excited that I found something cool to do with the pine cones.
Below, you can find all the materials and tools that you need for this project. You probably already have a few of them (maybe most) in your craft room, ready to go. I have written step-by-step instructions for you to go along with the video.
Please note that if a younger child is working on this project, you will need to supervise him or her during the parts that involve hot glue and scissors. You can also substitute a different type of glue in this fun Christmas project if you want to avoid hot glue altogether.
How to Turn a Pine Cone Into a Cute Reindeer
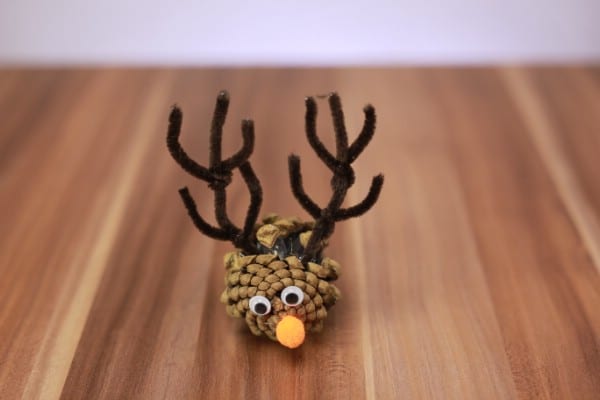
Looking for easy pine cone crafts for the holidays? In today’s exclusive new video, I teach you how you can take an ordinary pine cone which fell off a tree and turn it into an adorable little reindeer with pipe cleaner antlers. This project is great fun for kids and grownups.
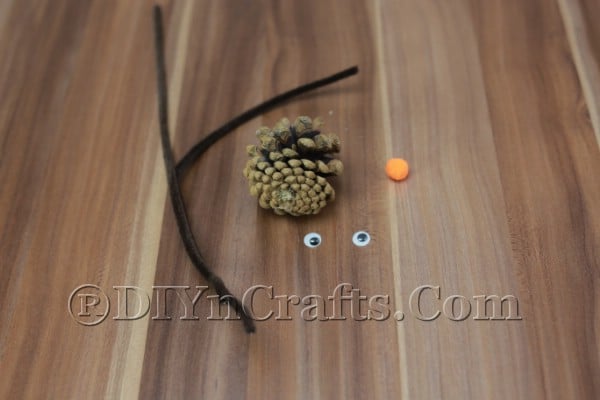
Materials
- Pine cone
- Brown pipe cleaners
- Googly eyes
- Pom pom
Tools
- Hot glue and glue gun
- Scissors
Instructions
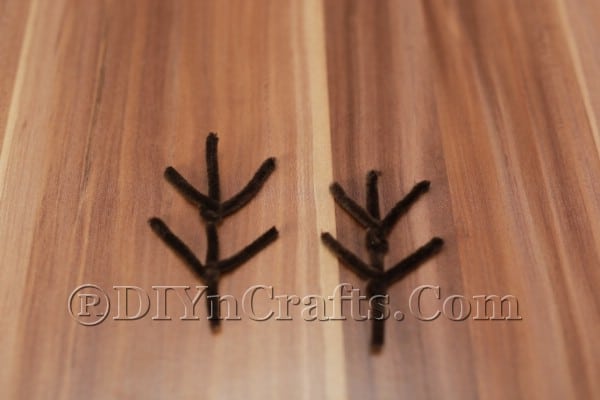
 First, you'll need to cut a brown pipe cleaner into three pieces. Each section should be roughly the same length as the others.
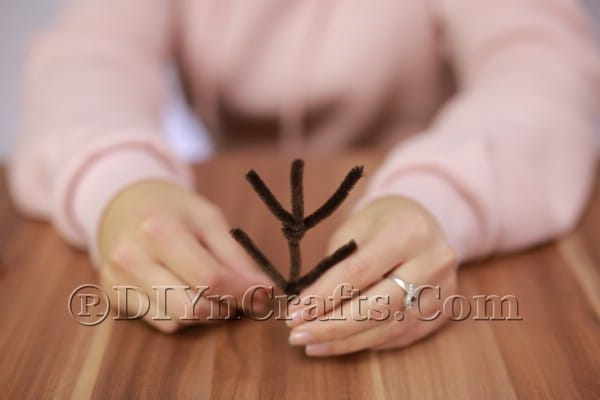
- Take two of the pipe cleaners and wrap them around the third one. They should each be separated by a small distance, separating the main pipe cleaner into sections which are roughly thirds. Branch them out to either side. This will be one of the reindeer’s antlers. It is easier to show this step in the video that it is to describe it using words. So make sure that you watch it if you can. Your finished result should look like the image below.
- Repeat steps 1 and 2 with another pipe cleaner to produce a second antler. It should be the same size as the first.
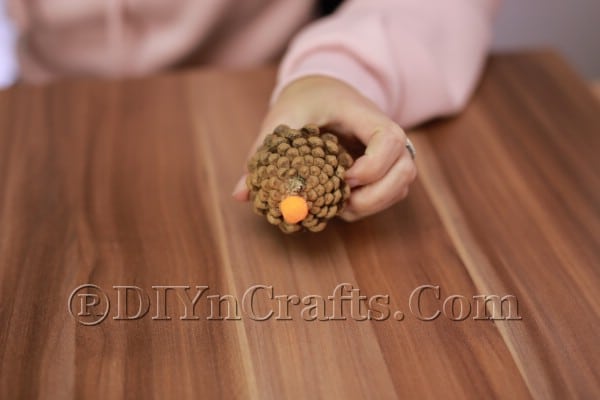
- Now, it is time to grab your pinecone. Any size or shape of pinecone is perfectly acceptable. But try to figure out which pinecone you plan to use before you make the antlers so that you can size them appropriately. Hot glue the pom pom onto the bottom of the pinecone. Do not put it right in the center. Put it about halfway between the center and the edge. You can choose any color you want. I went with orange. This will be the reindeer’s nose.
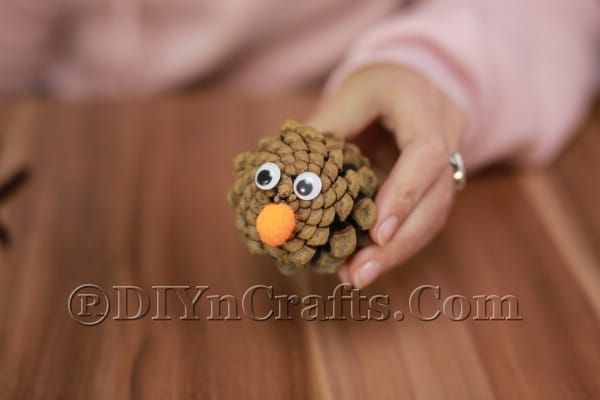
- Hot glue the googly eyes in place. Now the reindeer has a face.
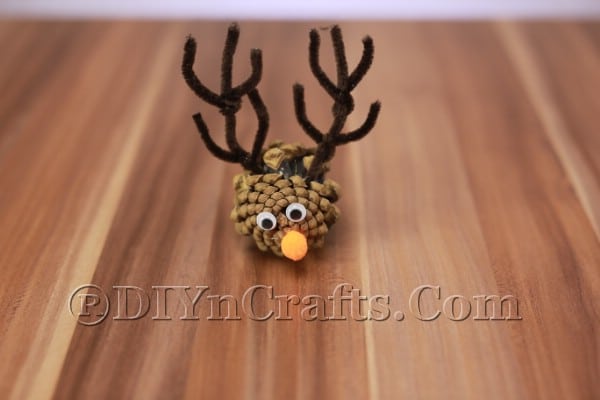
- Next, hot glue the antlers in place.
- Finally, you can arrange the antlers as needed to achieve the effect that you desire. Antlers have some curve to them; they do not just stick out straight. So take some time to try and make them look more organic. At that point, you have finished making your Christmas reindeer out of a pinecone and pipe cleaners.
 First, you'll need to cut a brown pipe cleaner into three pieces. Each section should be roughly the same length as the others.
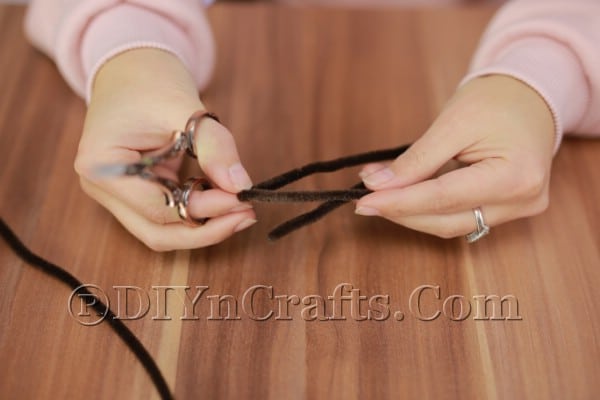

Notes
Try experimenting with different sizes and shapes of pinecones, and consider making some variations with the antlers as well. That way, each of the reindeers that you make will look individual and unique.
Recommended Products
As an Amazon Associate and member of other affiliate programs, I earn from qualifying purchases.


These Cute Little Pine Cone Reindeers Make Great Gifts
It only takes a few minutes to make one of these adorable DIY reindeer decorations. That means that if you have a whole pile of pine cones (as I did), you can turn out a whole bunch of these in no time at all.
This means that they make excellent, inexpensive handcrafted gifts for your family and friends. They are particularly great for children to make into presents for their loved ones.
One thing to note about these and other easy pine cone crafts is that you need to be careful when you store them away at the end of the holiday season. Pine cones are very brittle, and the older they get, the more easily they tend to fall apart. So, make sure that you pack them in plenty of bubble wrap or Styrofoam to protect them. Thankfully, if the antlers get bent, it is very easy to bend them back into shape when you unpack them.
I hope that you enjoy making these cute holiday crafts as much as my son and I did, and that they bring you and your loved ones lots of Christmas cheer!


Carolyn Spoto
Learn more about making the crafts shown on website.