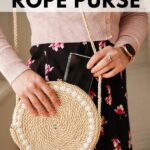

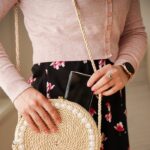


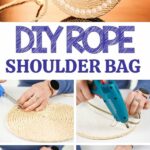
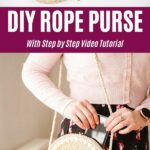

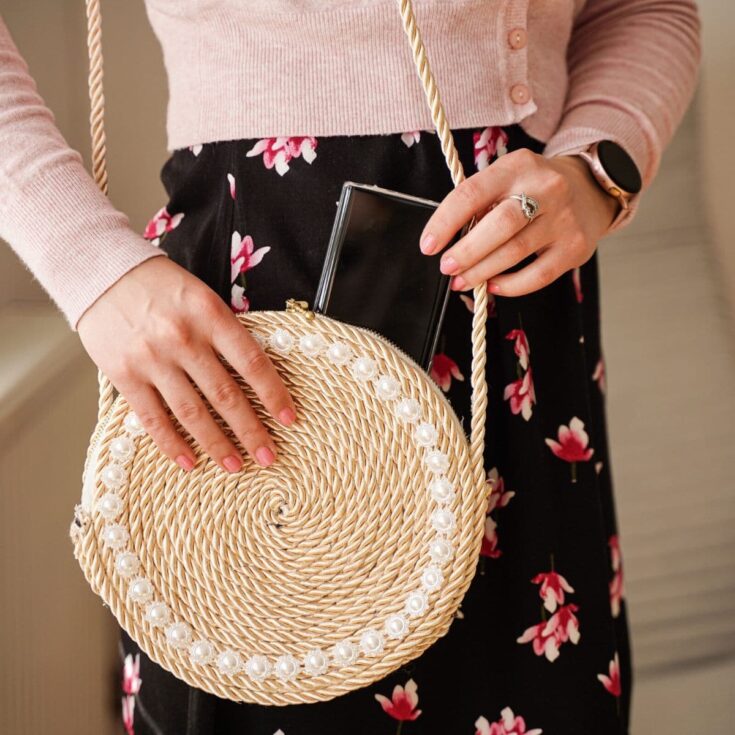
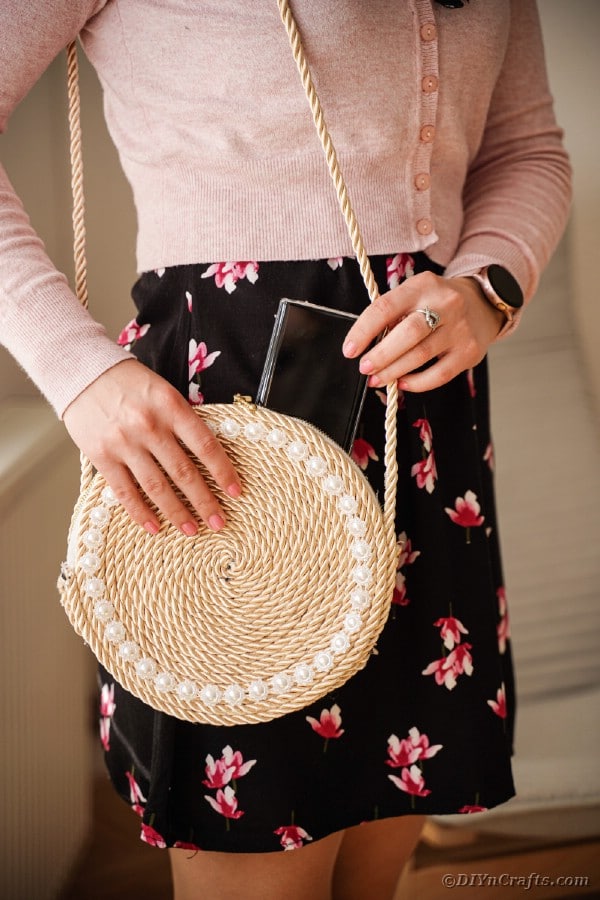
This fun little homemade rope purse is the perfect statement piece for any crafter to create. Beautiful, and stylish, this purse offers style and function in one little package. You will be surprised by how easy this purse is to make, but also how beautiful it turns out when complete. Add your own preferred beads or ribbon to create a unique look, and make this purse your own.

Jump to:
Homemade Rope Purse
When it comes to style, how something looks matters. What matters even more is being able to express your own style. Everyone wants a special piece that shouts who they are for everyone to see.
That is exactly what this rope purse does. It is simple to make, unique since it is handmade, and ultimately, it's the perfect way to express yourself.
Create the purse with a rope you like, colored or left neutral. Add small decorations like small fabric flowers or beads. Suddenly, you have a great addition to your wardrobe that offers both style and function.
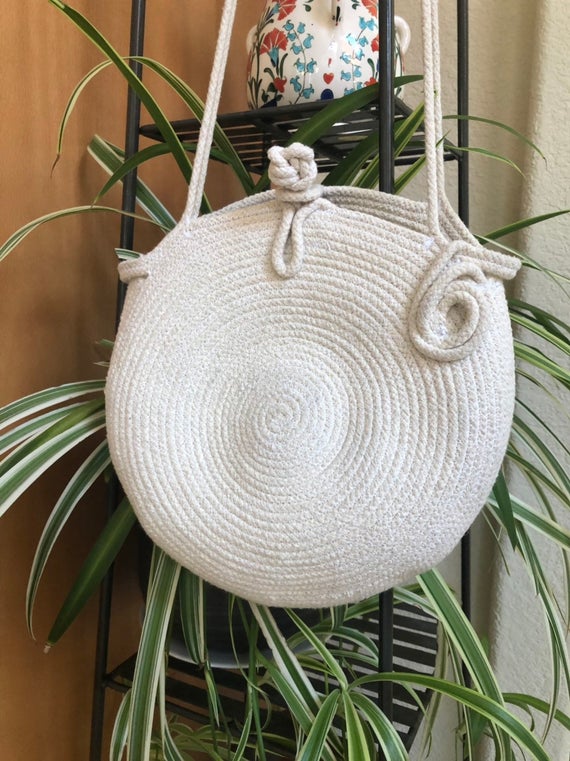
Make it small, medium, or large, or even make multiple purses. Turn this project into a fun way to add matching bags to your summer wardrobe!

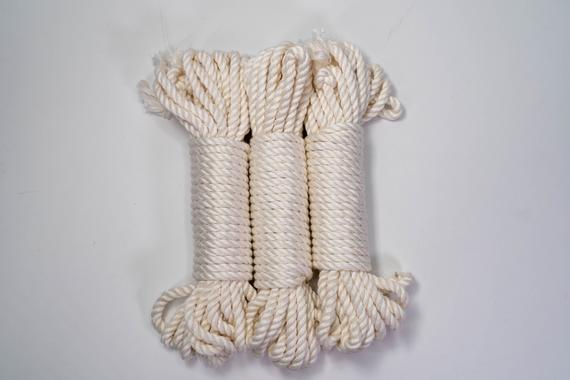
What Rope Should I Use?
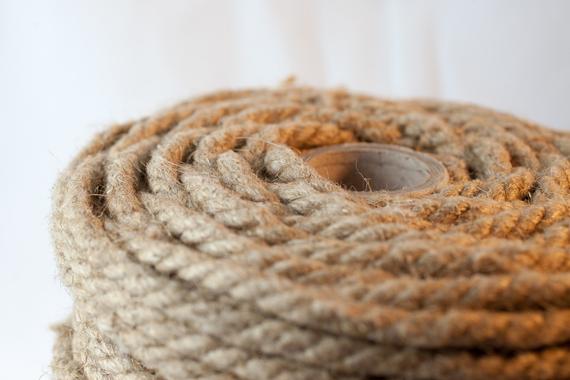
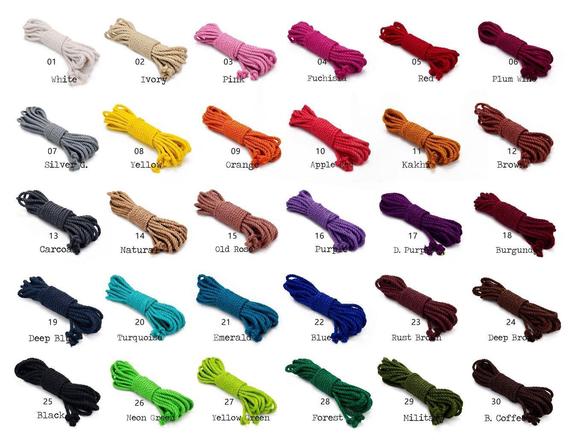
When making a purse you want to use on a regular basis, you want to make sure you use a sturdy rope that won't fray easily. You can make this with really any rope you want, but I recommend one that is a bit thicker for a sturdier feel to the purse.
Each type of rope out there would create a slightly different look to the purse. Just make sure you use what is going to adhere to the glue well so it doesn't fall apart when you are out and about.
Hemp rope is nice for a natural look, but a more common vinyl rope will be a bit easier to clean. For something light and pretty, you could create your own rope using ribbons or fabric strips.
That would, of course, add time to your project, but it could still be a fun way to make a totally unique to your purse.

Do I Have to Add a Zipper?
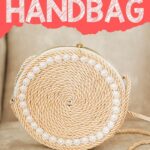
You don't have to use a zipper for this purse if you prefer a different latch option. I like the idea of leaving the area open and simply gluing on a ribbon and button hook as a closure. You might also like the option of adding a row of buttons or pearl beads along one edge and adding more rope or lace to hook around them. For inspiration, look at the other styles of purses available for purchase. You may find inspiration there.
Some ideas I like are using velcro on the inside, adding a leather flap that goes over the top and latches on the outside, or even adding snaps inside to a fabric interior. If you want something as simple as possible, you can also use a piece of rope and have it overlap the top and circle the purse. While these other ways will work, the most secure way to close the rope purse is to add a zipper.

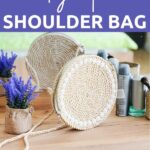
What Can I Use for the Strap?
I used another length of rope and simply glued it in place. For a sturdier option that can hold more weight, you may want to glue the rope or even a strip of fabric or leather through the rope purse sides as you are gluing them in place.
In craft stores and fabric stores, you may find ready-made purse straps. They can be made in different styles, thicknesses, weaves, braids, or lengths. Small straps can be used for handbag style only. Longer straps are great for a crossbody bag or a shoulder bag. Choose what will suit your needs, and common uses the best.
You can make your own strap using braided fabric, lengths of leather, ribbons braided together, or even a thicker rope length. Have fun and make this another way to decorate or make your purse unique to your own style.

How Much Can This Purse Hold?
This purse isn't designed or meant to hold a lot of items or to be a daily use purse that carries all of those random things moms often have in their bags. Instead, this is a great bag for going out on date night or a quick errand. It will hold your phone, a small wallet, and your keys. Perhaps add a compact or lip gloss. I would suggest that you not add more than a few items to the purse. Only 1-2 pounds is probably the maximum recommended for this style of bag.

Supplies Needed
- Rope
- Zipper
- Beaded ribbon
- Bag stabilizer
- Purse strap
- Scissors
- Hot glue gun
- Hot glue sticks or hot glue rope

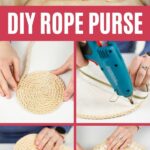
How to Make a Rope Purse
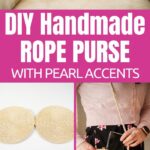
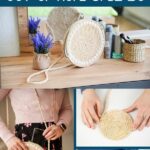
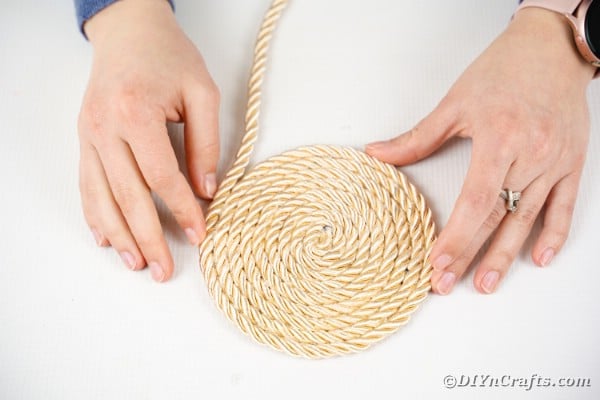
Add a drop of hot glue to the end of the rope, and begin rolling the rope onto itself.

Continue adding glue along the outside of the rope and curling it around itself into a circle.

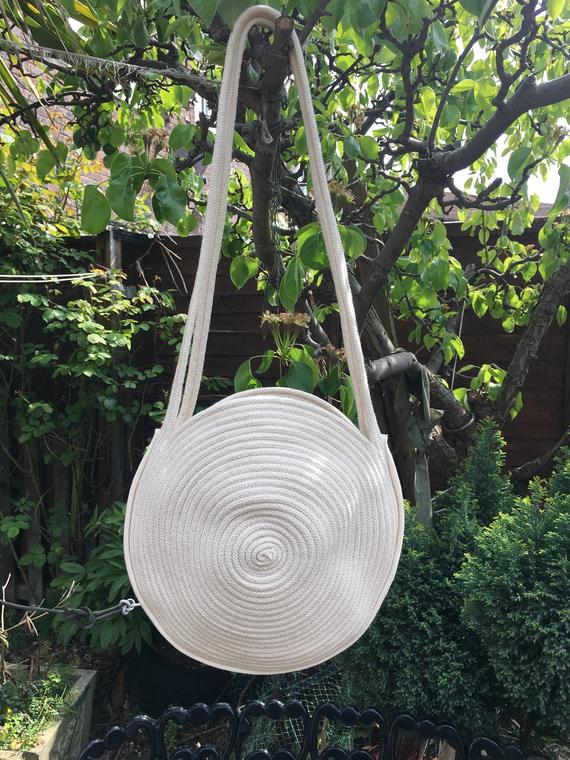
Follow this same process until you are happy with the size of the circle of rope. I made mine about 10" wide.

Clip the end of the rope and glue it to the edge.

Repeat this process again so that you have two equal rope circles to go on the outside of your purse.

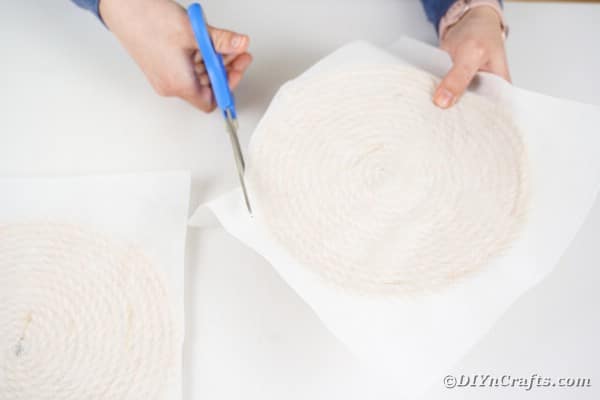
Add hot glue all over one side of each circle, then press the stabilizing cloth onto the circles and press down to seal all over the rope circle.
Trim the excess stabilizer off the edges so you have a lined circle on one side and a rope on the other.

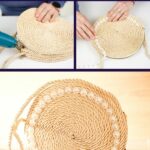
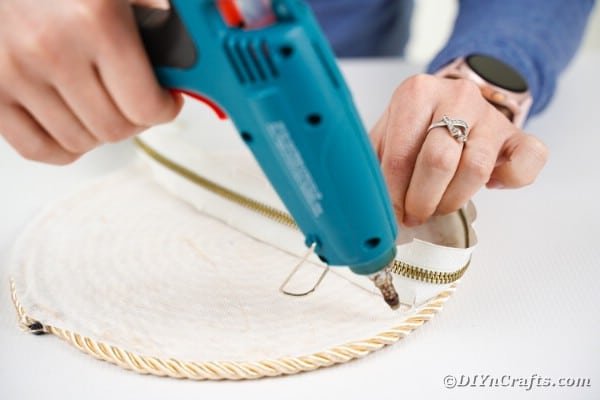
Cut slits onto the zipper every inch on both sides so it will fold and stay in place easily once glued without bunching.

Glue one side of the zipper onto one of the rope circles.

Take the rope and glue short lengths on the empty space where there is no zipper. Glue this until the same height as the zipper is wide.


Cut a length of rope the length you want your shoulder strap. Make sure you hang it over your shoulder to measure how it will fall on your hip or side, and add 2-3 inches on either end of the rope.
Glue the rope or strap to the sides of the purse and let the glue seal before using. For added stabilization, add a patch of leather over the end of the rope and stitch it in place.
Next, add a length of glue all along the top edge of the rope and place the second rope circle on top, sealing it to the bottom.

Add additional glue all along the zipper edge and connect so that it is sealed.
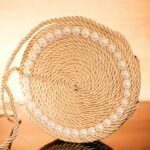
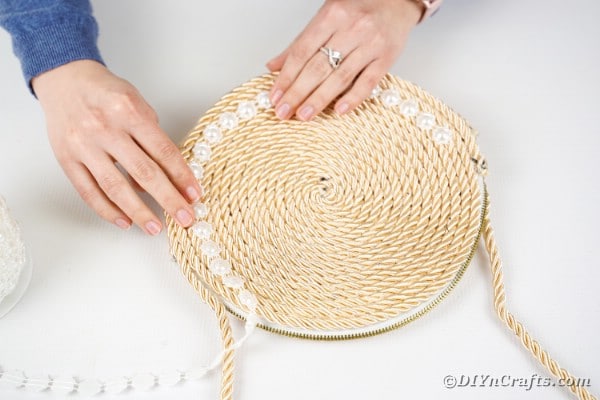
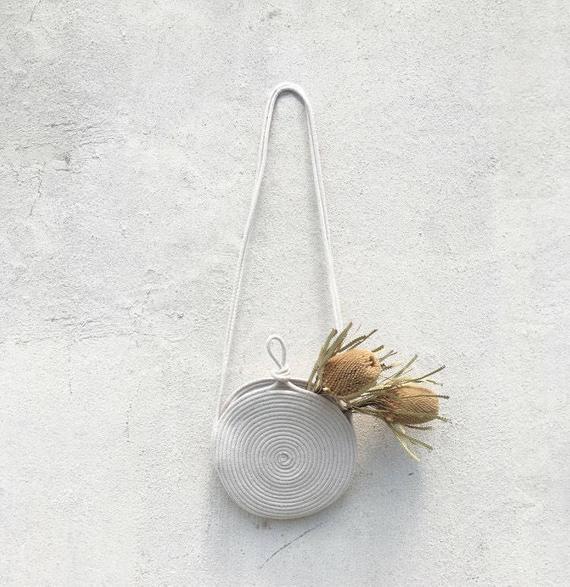
Add beaded ribbon or beads along the outside edge of one side of the purse.

Now you can use your purse!

More Ways to Create Using Rope
If you have rope leftover from this project, you may want to make other fun things. I love this simple rustic rope coaster tutorial. Another great option is to make a rope covered bottle vase to add to a side table as decor! You can even make rope baskets for extra storage around your home. Of course, this list wouldn't be complete without mentioning the rope covered tire ottoman, crochet rope baskets, or this great list of rope projects that will update your home!
Crafting Tip
I found that Dollar Tree carries a type of nautical rope that is ideal for a sturdier purse. It is thicker and braided tighter so it works excellently for a project like this. You can also find a great variety of embellishments like pearl beads or even beaded ribbons to glue onto the exterior of the purse for a little extra design.
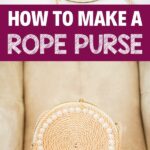
Rope Purse Tutorial
Follow this step by step tutorial for making a beautiful and rustic rope purse. This simple handmade shoulder bag is a great accessory for date night!
Materials
- Rope
- Zipper
- Beaded ribbon
- Bag stabilizer
- Purse Strap
Instructions
- Add glue to the end of your rope and begin rolling the rop onto itself forming a circle;
- Continue adding glue along the outside of the rope and curl it around itself until it forms a circle;

- Cut the end of the rope and secure to the side with hot glue;
- Repeat this process a second time making 2 10" circles;
- Add hot glue all over one side of each circle then press the bag stabilizer onto the circle and smooth;
- Trim the edges of the stabilizer off so it covers only the circle;
- Cut notches along both sides of the zipper about every 1";
- Glue the zipper onto one of the circles;
- Glue short lengths of rope along any open purse where the zipper isn't glued, stack these lengths of rope until they are the same height as the width of the zipper;
- Attach the second circle using hot glue and securing it to both the other rope and zipper;
- Measure a length of rope for your strap and glue to both sides of the purse;
- Glue beaded ribbon around the outside edge of the purse;
- Now you can wear your purse!

Notes
Use any color rope you prefer to make this purse more your style.
Recommended Products
As an Amazon Associate and member of other affiliate programs, I earn from qualifying purchases.
Finished Project Tutorial


Leave a Reply