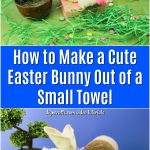
DIY & Crafts

Save money and have fun doing things yourself

  • Home
    • Furniture Makeovers
  • Repurpose
  • Crafts
    • Kids
    • Paper
    • Winter
  • Holidays
    • Valentine’s Day
    • Easter
    • Halloween
    • Christmas
  • Fashion
    • Sewing
    • Beauty
    • Hairstyles
  • Gifts
    • Baby Shower
    • Father’s Day
    • Mother’s Day
  • Homemade
  • Home
    • Lifehacks
    • Decorating
    • Organization
    • Parenting
    • Gardening
    • Health
  • Food
    • Recipes
  • Knitting & Crocheting

Home » Holidays » Easter » How to Make a Cute Easter Bunny Out of a Small Towel

How to Make a Cute Easter Bunny Out of a Small Towel

February 19, 2019 By Vanessa Beaty Leave a Comment

If you enjoy craft projects which involve transforming ordinary household items in extraordinary ways, this DIY Easter craft will be a blast. Following the steps in my video tutorial, you’re going to turn a dish cloth into a cute Easter bunny!

How to Make a Cute Easter Bunny Out of a Small Towel
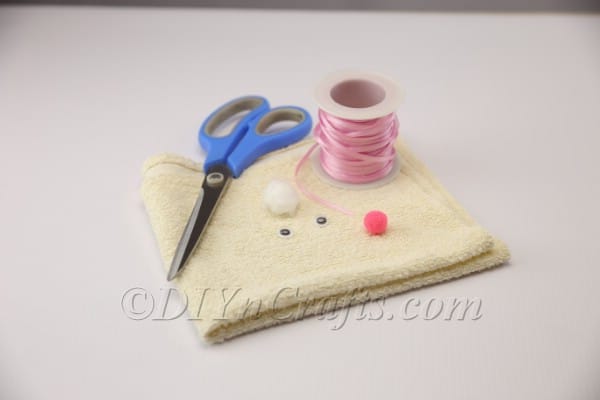
For this project, you are going to need a few simple supplies, including googly eyes, a ribbon, a pom pom, a rubber band, a cotton ball, a small towel, a pair of scissors and hot glue and a glue gun.

It doesn’t really matter what type of towel you use for this project, but something like a dish cloth which you use to dry your dishes after supper would work perfectly.

Likewise, it doesn’t matter what color the dish towel is, but I would recommend either going with neutral white, any regular bunny color (i.e. brown or black), or a color which is “Eastery,” i.e. light pink or yellow or another pastel hue.

A pattern on the towel is all right, but try not to pick anything which will be too distracting.

Along with the materials and tools lists below, you can view written steps to go with the video. Let’s begin!

Step by Step Tutorial with Detailed Instructions:


Yield: 1

How to Make a Cute Easter Bunny Out of a Small Towel

How to Make a Cute Easter Bunny Out of a Small Towel

Love crafts where you can repurpose everyday household items in unexpected and creative ways? In this video tutorial, you’ll find out how you can turn an ordinary dish towel into a cute Easter bunny. Watch the video and create your own!

Prep Time 2 minutes
Active Time 5 minutes
Total Time 7 minutes
Difficulty Easy

Materials

  • Dish towel or other small towel
  • Googly eyes
  • Ribbon
  • Pom pom (this will need to be small enough to be the bunny’s nose, so plan accordingly)
  • Cotton ball
  • Rubber band

Tools

  • Hot glue and glue gun
  • Scissors

Instructions

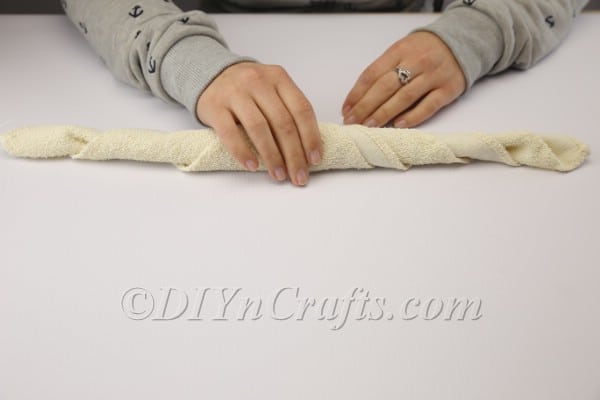
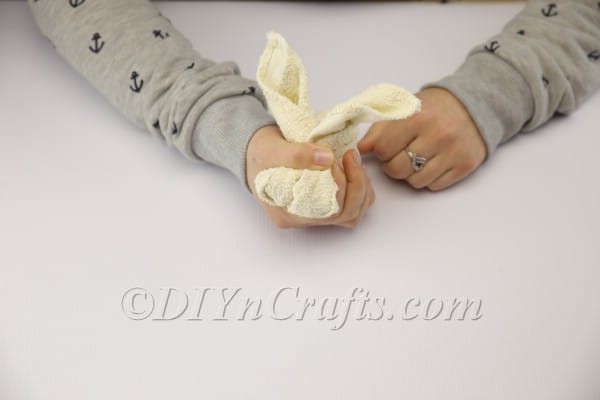
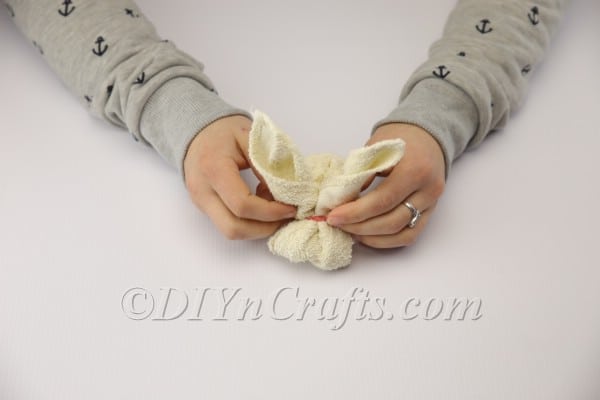
  1. To get started on this DIY Easter bunny project, take your dish cloth and lay it out flat in front of you. Then fold it in half along the diagonal line from corner to corner so that it forms a triangle shape.
  2. Starting at the folded edge, begin rolling the triangle up. Keep going until it is completely rolled.
  3. Fold this rolled-up shape in half from end to end.
  4. The next step is the hardest one to describe in words, but it is not difficult to carry out.
  5. With the rolled-up shape folded in half as described above, take one hand and pinch it together in the middle. Holding that hand in place, pull the two free ends upwards with your other hand. These will be the bunny’s ears.
  6. Now, pull those slightly backwards over the rolled-up section underneath. That section underneath is going to be the bunny’s body. The little bit which is now protruding in front of the ears will be the bunny’s head.
  7. Using a rubber band, section off the head from the rest. The rubber band should be looped just in front of the bunny’s ears.
  8. If you need to, rearrange the ears, pulling gently up on them to make sure they are sitting as you want them to. You can also check the head and body over to make sure you are happy with them.
  9. Obviously, a rubber band does not give the bunny a very “finished” look, and it is not all that appealing aesthetically. For this reason, you are going to hide it. The way that you can do this is simply to wrap a ribbon around and around the rubber band as many times as necessary in order to conceal it from view. Then, tie it off with a nice little bow.
  10. Now, you simply need to add the bunny's features. Glue the googly eyes to the face along with the small pom pom which will be the nose. In the back, attach the cotton ball to serve as a tail.
  11. Now your cute bunny made out of a dish towel is complete! Try making some friends for him to play with, and maybe use different colors of dish cloths and ribbons to vary them up a bit and give them each an individual character.

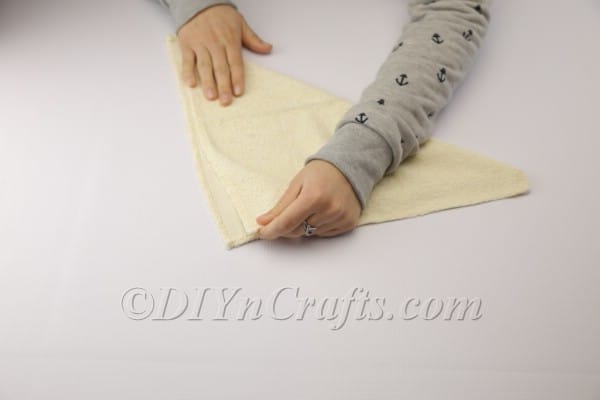
Recommended Products

As an Amazon Associate and member of other affiliate programs, I earn from qualifying purchases.

  • Bunny Letter Set
    Bunny Letter Set
  • Curious Little Bunny Pots
    Curious Little Bunny Pots
  • ITH Bedtime Bunny Easter Plushie
    ITH Bedtime Bunny Easter Plushie
  • Easter Bunny that Lights Up
    Easter Bunny that Lights Up
  • Bunny Ear Clips
    Bunny Ear Clips
  • Bunny Mason Jars
    Bunny Mason Jars
© Vanessa Beaty
Project Type: Upcycling / Category: Easter
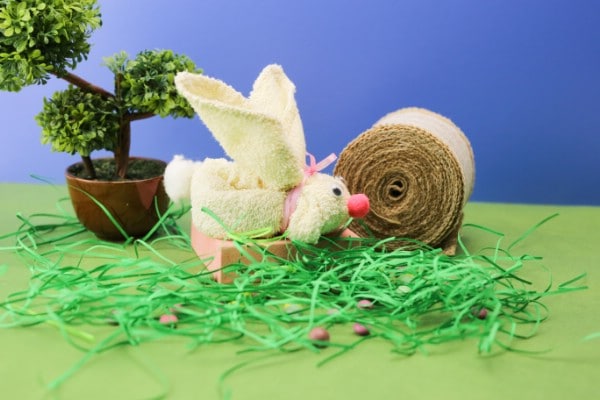
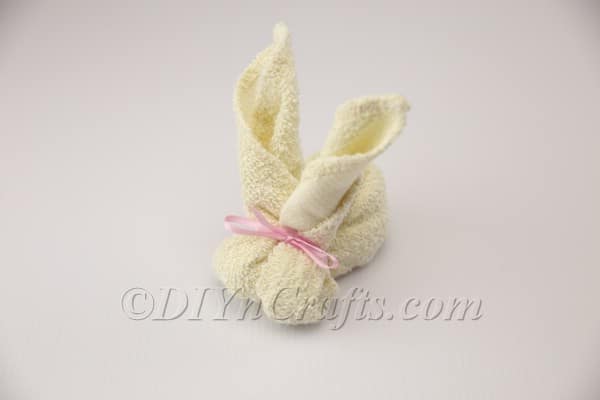
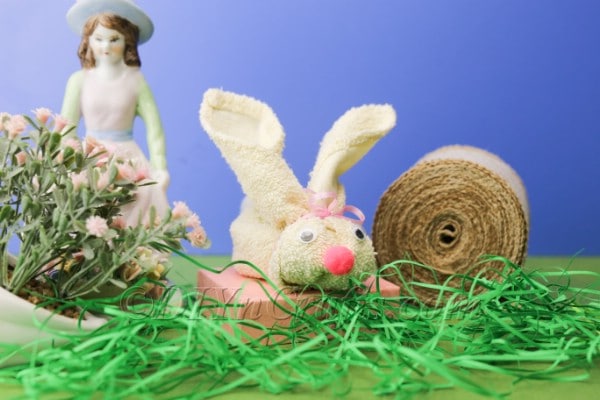
Your Cute Dish Towel Easter Bunny is Ready to Frolic

As you can see, this Easter bunny is positively adorable, and it was so easy to make! Consider setting your bunny in an Easter display like the one I put together for the images I shared with you of the finished project above. A cute bunny like this also can make a nice gift.

Easter Projects

How to Make a Cute Easter Bunny Candy Bottle {Video Tutorial}

How to Make a Cute Easter Bunny Candy Bottle {Video Tutorial}

100 Easy and Delicious Easter Treats and Desserts

100 Easy and Delicious Easter Treats and Desserts

36 Cute and Creative Homemade Easter Basket Ideas

36 Cute and Creative Homemade Easter Basket Ideas

25 Creative DIY Outdoor Easter Decorations That Fill Your Yard With Joy

25 Creative DIY Outdoor Easter Decorations That Fill Your Yard With Joy

105 DIY Easter Decorations You Can Make Yourself

105 DIY Easter Decorations You Can Make Yourself

58 Fun and Creative Easter Crafts for Kids and Toddlers

58 Fun and Creative Easter Crafts for Kids and Toddlers


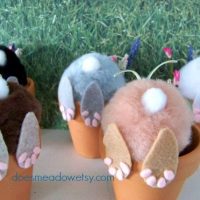
If you enjoyed this easy and cheap Easter project, you should also have a lot of fun making a fluffy Easter bunny using DIY pom poms. Still looking for more Easter crafts to make?

We have many more tutorials on our site with fast and easy steps and basic materials. We will be adding even more in the future. So check in with us regularly, and enjoy our craft tutorials for Easter and all the holidays throughout the year!

141shares

Subscribe to Blog via Email

Enter your email address to subscribe to this blog and receive notifications of new posts by email.

Join 10,185 other subscribers

Leave a Reply Cancel reply

Your email address will not be published.

This site uses Akismet to reduce spam. Learn how your comment data is processed.

Search

Subscribe to Blog via Email

Recent Projects

20 Tried and True Tips for Urban Gardening Success

18 Vegetables Plants Best For Starting as Indoor Seedlings

50 Drought-Tolerant Plants You’ll Hardly Ever Have to Water

Farmhouse Style Chipped Finish Side Table Restoration Tutorial

Pages

  • About Us
  • Be Featured
  • Contact Us
  • Email and Push Notification Subscriber Settings.
  • Privacy Policy
DIYnCrafts.com is a participant in the Amazon Services LLC Associates Program, an affiliate advertising program designed to provide a means for sites to earn advertising fees by advertising and linking to amazon.com, amazon.co.uk, amazon.ca and amazon.com.au.

Copyright © 2021 DIY and Craft Projects and Collections

141shares