Been looking for easy holiday crafting projects which you can do in a matter of minutes? Then you are definitely in the right place.
I’ve been uploading a ton of winter craft tutorial videos over the past couple of weeks, and I still have on the way.

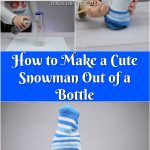
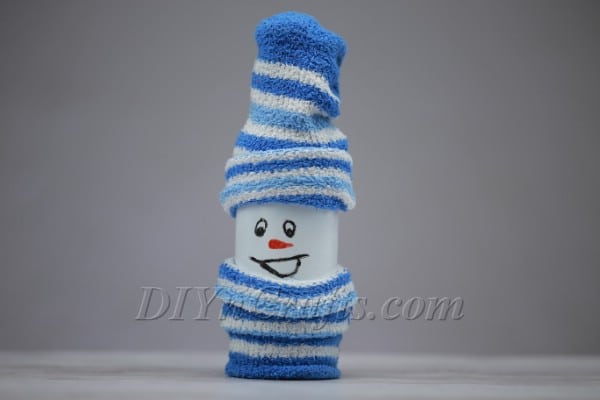
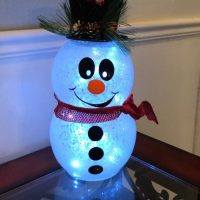
In today’s video, I am going to be showing you how you can transform an ordinary bottle into an adorable DIY snowman decoration for the holidays!
This project is super easy, and there are no scissors required, so it is a great one for all ages.
Even younger children can enjoy this project. So get out your crafting supplies and get ready for some creative fun!
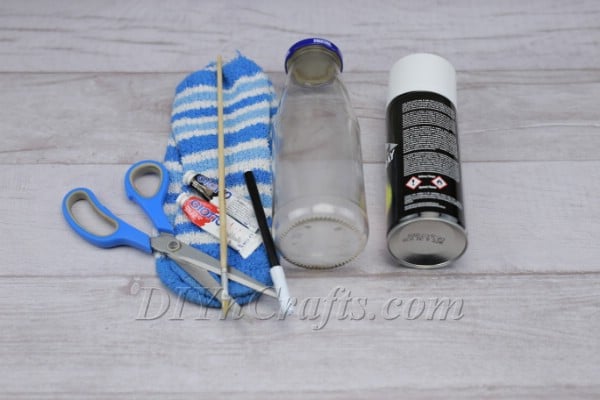
As you will see when you check out the materials list for this project below, you only need a few supplies to create your very own snowman.
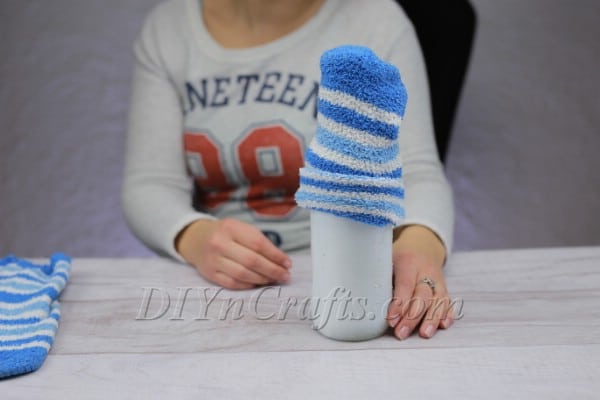
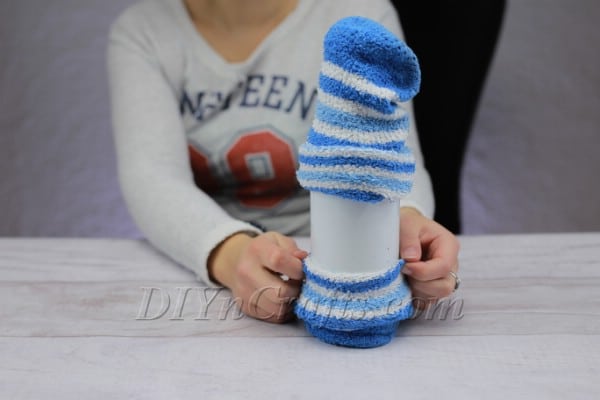
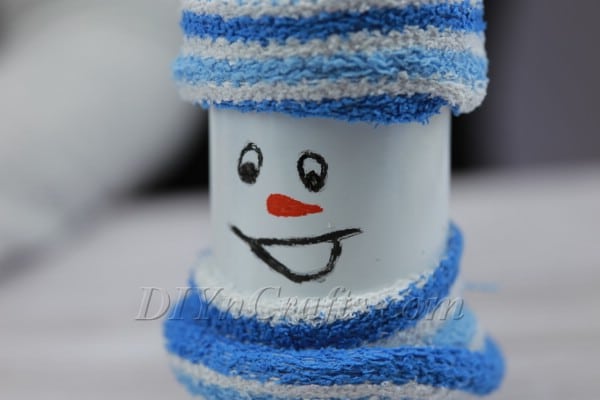
You are going to need a bottle to work with. It can be glass or plastic and any size or shape you want for the most part—though you do need to be able to fit socks around the top and the bottom. I do recommend that you go with glass if you can.
That way, your finished DIY Christmas decoration will be more durable.
Aside from that, you are going to need a pair of holiday socks. Do they need to match? I think that provides for a more unified effect, but no—not really.
In fact, this would be a great way to take mismatched holiday socks with missing pairs and put them to good use.
Actually, technically they do not need to be holiday-themed or winter-themed at all. Even just ordinary socks will suffice, but try and pick some which are colorful.
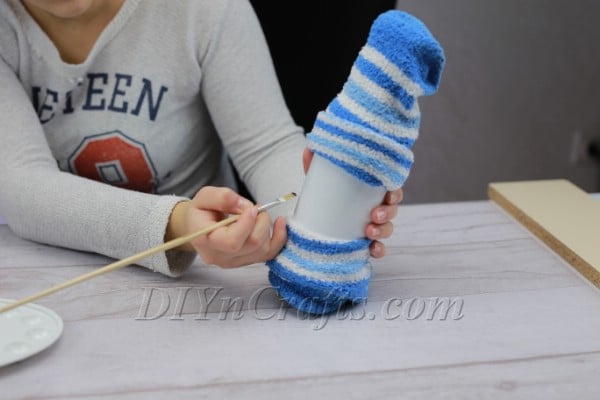
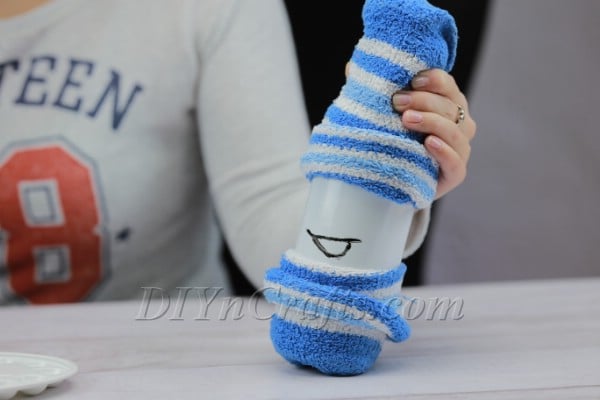
As for the paint colors you’ll need, at a minimum, you are going to need white spray paint, black paint, and red or orange paint. The red or orange paint is for the snowman’s carrot nose.
If you happen to have red and yellow but not orange, you can mix them to create orange. Otherwise, red works okay as a substitute.
Let’s go ahead and commence with our crafting. Watch the video tutorial and read through the written instructions below to make your handcrafted snowman.
Celebrate the winter holidays by getting out your crafting supplies! In my latest video, I teach you how you can take an ordinary bottle and transform it into a cute snowman decoration. This DIY project is fast, easy and fun, and it is perfect for creative souls of any age. After I finished this project, I was super happy with the result! But I think I might add a step next time if I have some glitter on hand and some adhesive spray. Covering the bottle in glitter after spray-painting it white would give it a snowy sparkle which would further enhance the finished effect. Just an idea to consider! As an Amazon Associate and member of other affiliate programs, I earn from qualifying purchases.How to Make a Cute Snowman Out of a Bottle
Materials
Tools
Instructions
 To get started, you are going to need to spray paint your bottle white. Cover the entire bottle evenly and then wait for it to dry. You do not need to worry about getting the cap or the bottom covered.
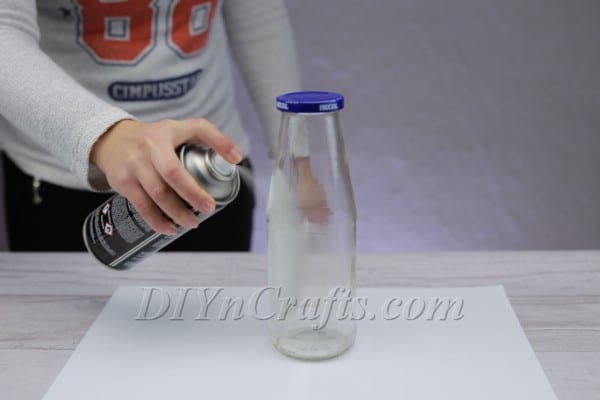

Notes
Recommended Products
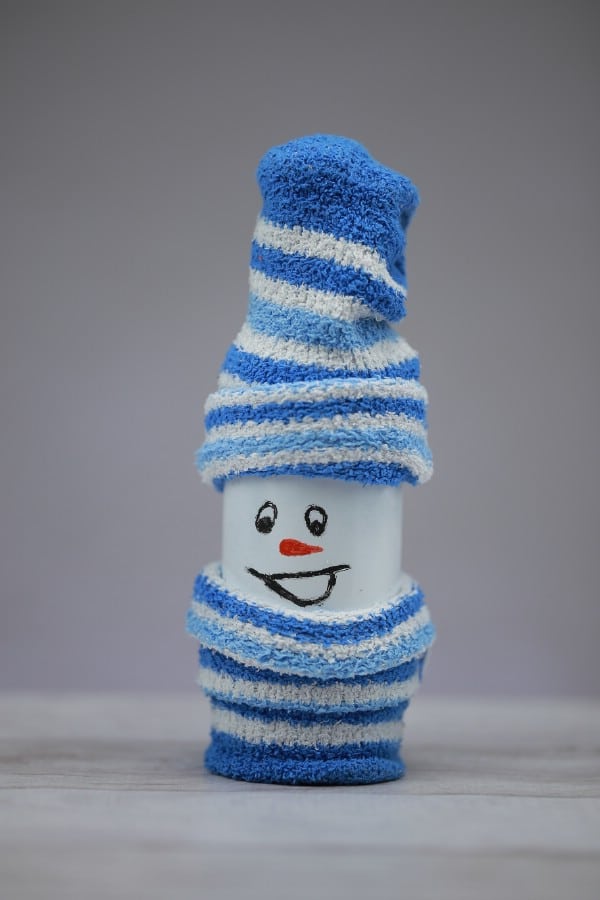
Let Your DIY Bottle Snowman Spread Holiday Cheer!
You have now successfully made a cute snowman using nothing more than an ordinary bottle and an old pair of socks and a bit of paint!
It really is incredible what you can create when you put your mind to it and learn to think about the most commonplace of objects in different ways.
Once you have created your snowman, you can display him anywhere and he will make for a lovely rustic Christmas decoration.
Try making him some snowman companions out of different sizes and shapes of bottles with a variety of socks.
This can help you to put together a colorful and festive feature to celebrate the season.
After the holidays are over, store your bottle snowmen carefully with extra packing materials so that they do not break in storage.
What is great is that the very socks that you use to create them can help to protect them.
Once you complete this easy holiday crafting project, be sure to take a look at some of the other videos I have been sharing. Hours of crafting fun await you!


siti hajar
I love its