3 DIY Paper Flowers To Beautify Any Decorating Project
Modified: by Vanessa Beaty · This post may contain affiliate links · 1 Comment
If you are someone who enjoys doing a lot of crafts, then you must know a few ways to make flowers, right? I’ve done quite a few craft projects lately and one thing that seems to always be included is a flower of some sort.
So, I thought that it might be a good idea to share with you all some great DIY flowers. These tutorials will walk you through how to make three different types of flowers from ordinary craft supplies.
You can use these DIY craft flowers for any number of projects, from turning them into wreathsto adding some style and beauty to your other craft projects.
DIY flowers make great gift toppers, too, and if you are planning a wedding soon, there are some great ideas for using these flowers for wedding decorations.
What You Need To Make DIY Craft Flowers
What you need to make these flowers will depend on which of them you plan to make. You can use tissue paper, craft foam, or satin ribbon to make a flower, and all of them are beautiful when you get them finished.
Video tutorial:
How To Make Tissue Paper Flowers
These tissue paper flowers are absolutely gorgeous, and you can use them in so many ways. Create a bouquet or make a wreath from these to hang on your front porch this summer!
Yield: 1 Flower
Prep Time: 5 Minutes
Active Time: 10 Minutes
Total Time: 15 Minutes
Difficulty: Easy
Materials:
Tissue Paper – In any color you want or a variety of colors
Scissors
Hot Glue Gun
Floral Wire
Faux Branches
Instructions:
1. Start by taking a sheet of tissue paper and cutting it in half. You want two equal triangles from each sheet of paper.
2. Cut a piece of your floral wire. You want this to be twice as long as the longer side of your tissue paper triangle.
3. Glue the wire onto the longer side of the tissue paper triangle.
4. Now, glue the other triangle over the first one, keeping the wire between them and ensuring that they overlap just a touch.
5. Cut your triangles into the shape of a leaf.
6. Shape the leaf just a bit by pinching the wire together in places – do this however you want to get the look that you desire.
7. You will need to repeat this process until you have six leaves – it takes six leaves to make one flower.
8. Attach your leaves together by folding your wires together.
9. Place a faux branch in the center of your flower and finish it off with some ribbon to cover your wires.
10. You’re all done! Do this as many times as you need to get an entire bouquet of tissue paper flowers. Each one should look a little something like this:
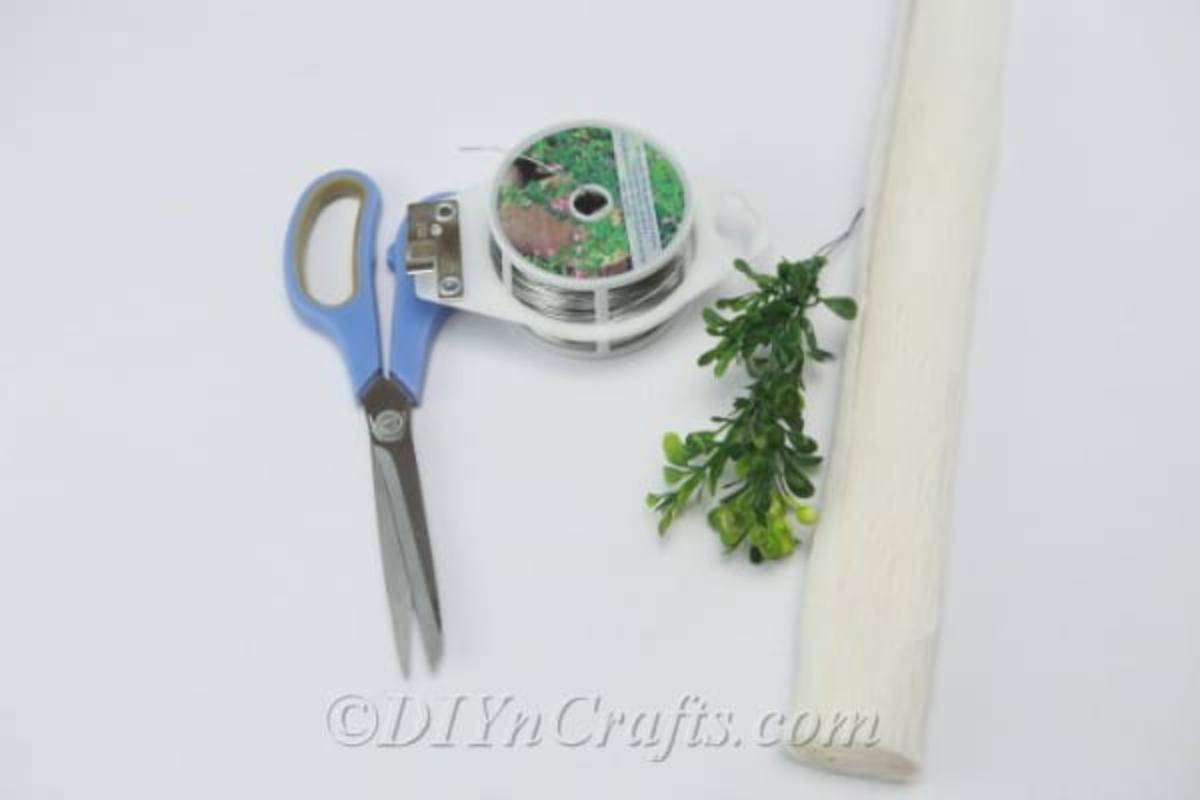
How To Make Satin Tulips
These satin tulips are really simple to make and they are gorgeous if you just want something to create a small bouquet to decorate a table. You could do some of these in different colors and make a gorgeous wreath for your front door this summer.
Yield: 1 Flower
Prep Time: 5 Minutes
Active Time: 10 Minutes
Total Time: 15 Minutes
Difficulty: Easy
Materials:
Satin Material Cut Into Squares
Wooden Dowel Rod
Green Fabric Or Ribbon
Rubber Band
Hot Glue Gun
Instructions:
1. Before you begin, make sure that you have your satin material cut into a square. For this single tulip, I used a square of about four inches by four inches. You can do a larger one if you want your flower to be fuller.
2. You begin by folding your material into a triangle shape.
3. Place the wooden dowel rod in the center of your satin triangle.
4. Overlap or wrap the sides of your material until you get a tulip shape.
5. Use the rubber band to secure the ends of your flower onto the dowel rod.
6. Now, you can use green material or satin ribbon to cover the dowel rod and make it look like a stem.
7. You just wrap the material or ribbon around the dowel rod and glue it down as you go along.
8. Repeat this procedure until you have as many satin tulips as you want.
9. Your finished tulip should look like this:
How To Make A Craft Foam Flower
Craft foam sheets come in handy for so many fun projects. This one in particular is truly simple and you can do so many things with colorful foam flowers!
Yield: 1 Flower
Prep Time: 5 Minutes
Active Time: 10 Minutes
Total Time: 15 Minutes
Difficulty: Easy
Materials:
Craft Foam
Hot Glue Gun
Scissors
Pencil
Instructions:
1. Start by choosing the color of your foam flower. I chose a deep pink but you can find craft foam in so many colors.
2. Using a plate or large bowl, draw a circle with your pencil onto the craft foam. The size of your flower will depend on how big you make your circle.
3. Now, you’re going to begin drawing a wavy line all around the circle and continuing in an inward direction until you reach the very center. You don’t have to be an artist for this part, just do the best that you can.
4. Cut the line that you drew, beginning with the outside edge and working your way inside. Be careful that you don’t cut it in half. You want this long piece when you are finished.
5. Now, you need to wrap the strip that you have, beginning with the outside edge and working your way inside. Basically, you are rolling it up to form a flower.
6. You can use hot glue as you go to keep your flower in place and be sure to add a drop or two in the center when you have the flower formed to hold it in place.
7. Your finished foam flower should look sort of like this one:
What Other DIY Flowers Can You Make?
I know that I have shown you some amazing DIY flowers that you can use to add beauty to your other craft projects. Remember these fabric flowers?
There is also a wonderful tutorial for making this DIY paper flower ball and a beautiful flower headband that you can make in just a few minutes.
When you post these great tutorials on flower making, is it possible to link to Pinterest? I would love to keep these gorgeous flowers. to make once I get the supplies. I appreciate your time. Merrill from the Beaded Flamingo Shop.


Merrill
When you post these great tutorials on flower making, is it possible to link to Pinterest? I would love to keep these gorgeous flowers. to make once I get the supplies. I appreciate your time. Merrill from the Beaded Flamingo Shop.