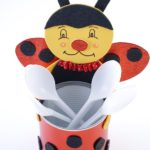


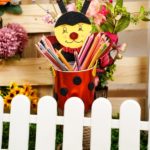

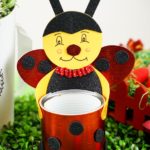

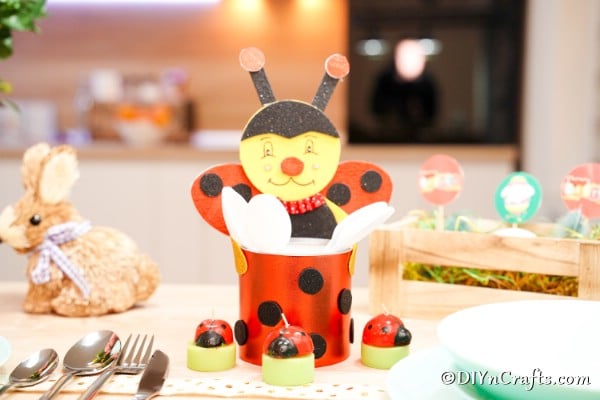
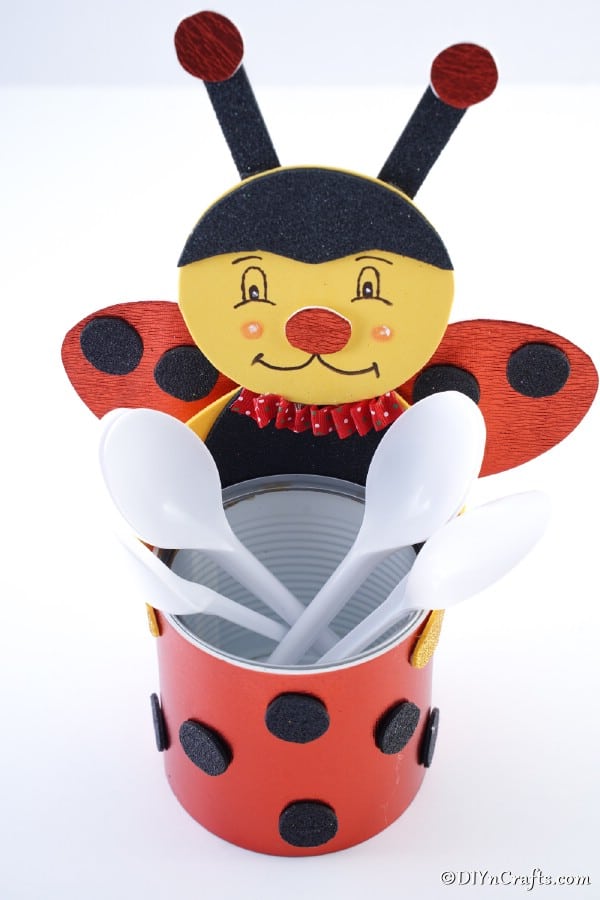
If you love finding ways to repurpose tin cans, this is the cutest craft you will find. This adorable ladybug organizer is super cute and makes an adorable decoration. Kids will love making these ladybugs for around the house and you will love that it is something you can repurpose or even give as a gift. Ideal for the ladybug fan and a great useful craft idea, this is one to add to your project lists now.

Jump to:
Repurposed Tin Can Ladybug Organizer
I love making recycled crafts, and I love ladybugs. So, why not combine the two? Tin cans are one of my favorite items to upcycle or repurpose. I am already using them on a regular basis, so I'm not out of money for supplies. Plus, they are really durable, so using them to organize items, etc., is perfect for them. This idea was a great way to create a little pencil can for my desk, but you could use it for a number of things around your home.

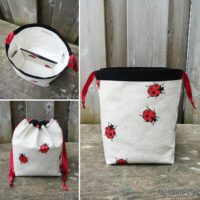
You may also like this cute upcycled flower pot ladybug. It's super cute to add to your garden! Another fun option for an organizer is this upcycled cardboard box organizer. You could even add some ladybug stickers to stick with the theme.
Can I Use Construction Paper Instead of Foam Paper?
If you do not have foam paper on hand, you can also use construction paper. The construction paper will be less durable and will not last as long as the crafting foam, but it is something that most people have on hand.
You could also use cardstock or even some felt on things like the spots on the can. While other papers will work, this craft is best made with thicker foam paper with a sticky backing to hold it secure.

Add some of these hand painted ladybug stones and a few of these golf balls made into ladybugs to your garden as another fun decoration. Ladybugs fit into any garden design!
What Can I Store in this Organizer?
This organizer is great for storing all your odds and ends. It works great on a desk to store pencils and pens, and it is tall enough to store scissors. You can store small craft supplies in it as well. If you have a Cricut machine, this is ideal for storing your weeding tools, spatulas, and other utensils that help when creating projects. I also love it for holding all of my crochet hooks in an easy to see location.
If you are using this cute ladybug tin can in the kitchen, you can definitely use it for storing things like utensils, spoons, napkins, or other items that are used regularly. As you can see in the picture below, it's perfect for adding plastic utensils to your table for any gathering with friends and family.
It can even be can also be used as a flowerpot. The ladybug's face will peek out behind the flowers or plant! The possibilities are endless!

Have kids who want to craft, too? Check out this fun way to turn plastic spoons into ladybugs! So adorable!
Supplies Needed
- Tin can
- Red foam paper (I used a shiny option)
- Black foam paper
- Yellow foam paper
- White paint pen
- Satin ribbon
- Black marker
- Scissors
- Craft glue

How to Make an Upcycled Tin Can Ladybug Organizer
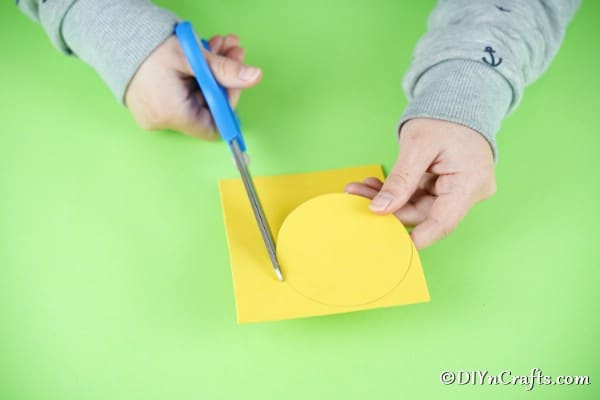
To begin, you will use the tin can and trace a circle onto the yellow paper.

Cut out the circle and set aside.

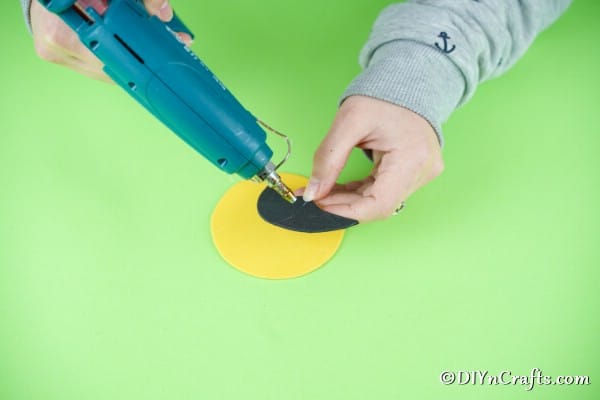
Now, you will use the can to create a half circle on the black paper.

Cut out the half circle, and then cut a scallop/wave along the flat side.

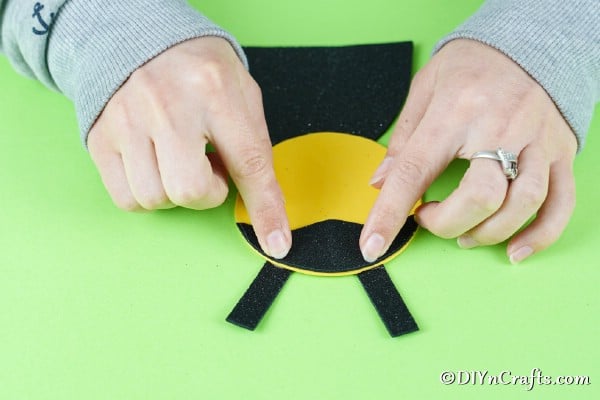
Now, you will glue this black piece onto the top of the yellow, creating the top of the ladybug's head.

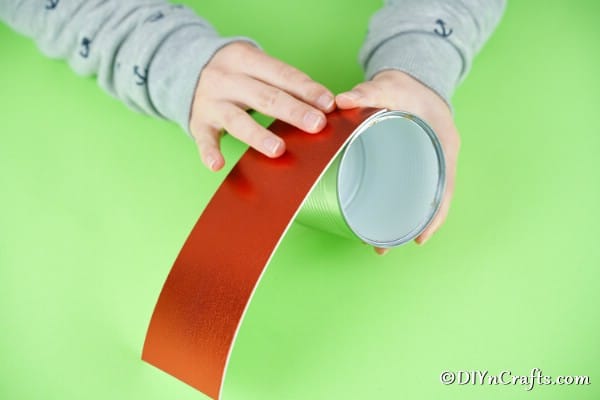
Next, you will measure and cut the red foam paper to attach to your tin can.

Glue this piece in place, wrapping it all the way around the tin can.

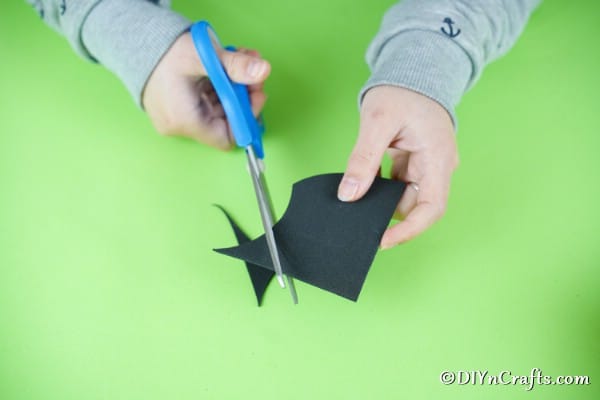
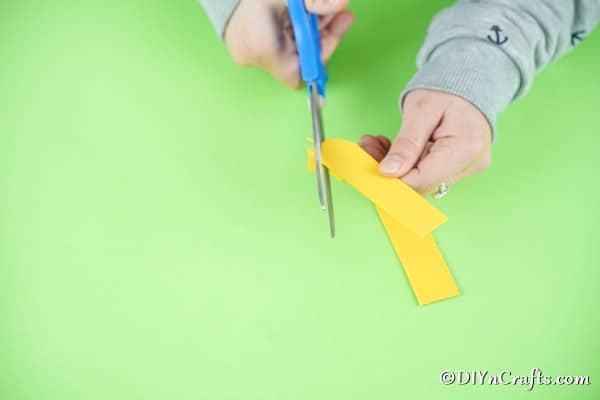
Now you will go back to the black paper and cut out 2 long straight pieces to be used as an antenna and then a body shape that is like half an upside down circle.

Glue the yellow head on the top of the body, and add the antenna on the top of the yellow head, gluing them to the back.

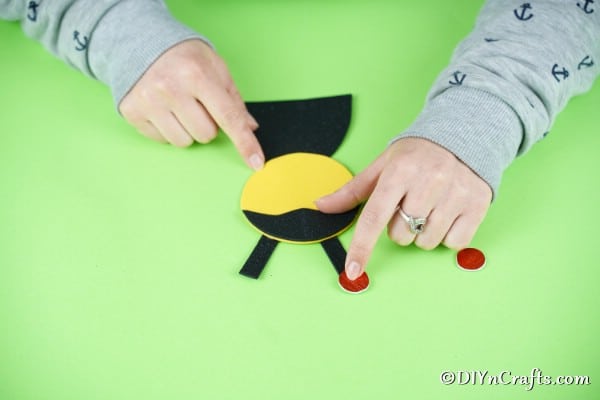
Now, trace and cut out three small red circles out of the red paper. Add one on each of the antenna, and set the third aside.

Take your ribbon, and start attaching it at the "neck." I glued one end in place, then bunched it up, gluing as I moved along so that it looked like a fluffy ribbon.

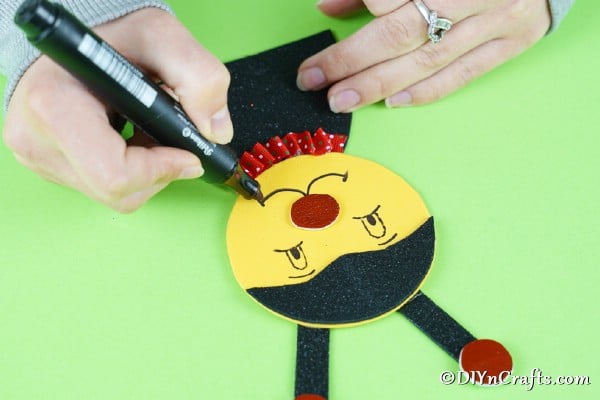
Next, you will add the third red circle to the center of the face and add eyes and a mouth using a black marker.

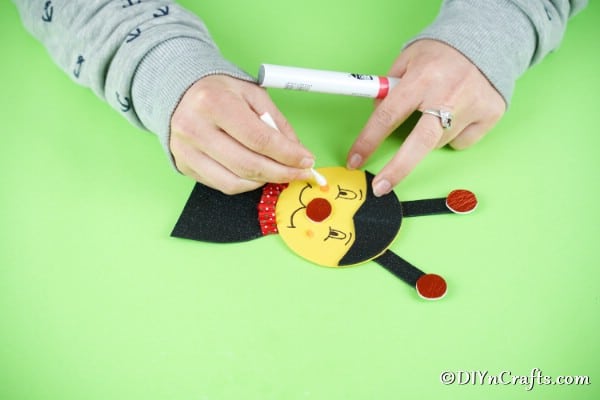
Use accent colors of white or pink paint pen to create "cheeks."

Now, you will cut out 2 arms from your yellow paper. A long shape similar to a cucumber or zucchini works well for these.

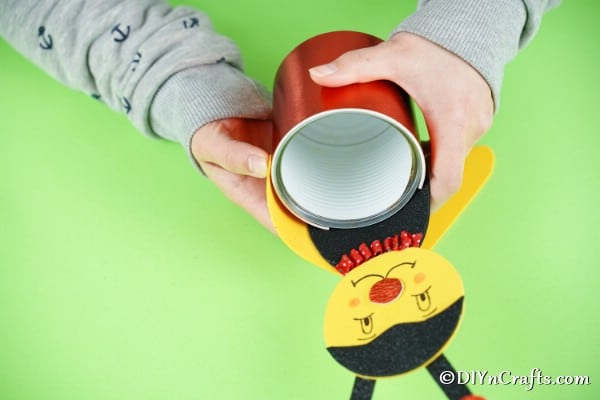
Glue the body of the ladybug to the open top of the can you covered with red paper earlier.

Now, attach the arms to the back of the ladybug's body, and then attach the "hand" or pointed end of each arm to the side of the can as shown.

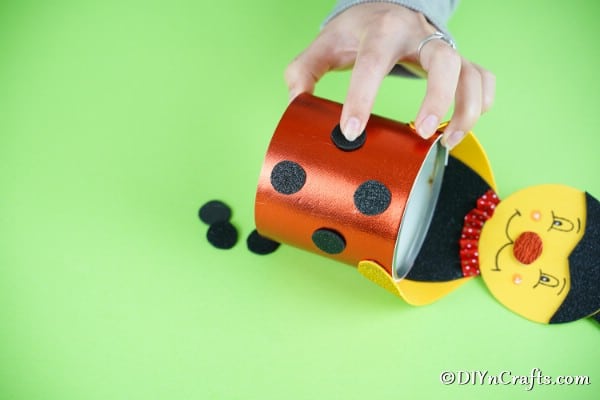
Next, you will cut out several small black circles to add dots to your ladybug. Start by gluing them around the outside of the red tin can.

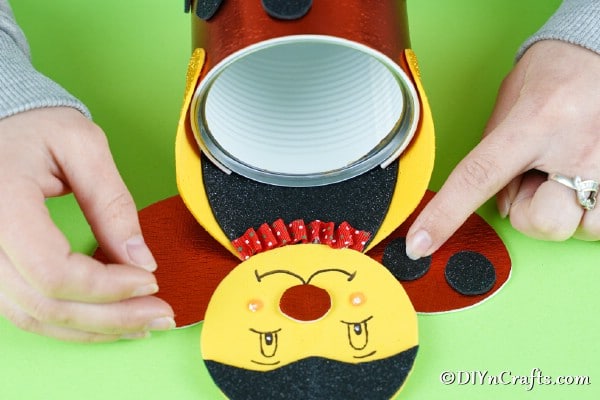
Now, you will cut out two rounded "wings" from the red paper to attach to the back of the ladybug so they come out from the back and up to about halfway up the face.

Add these wings to the back of the body as suggested and attach a few of the black circles.

Now, you can fill your ladybug with pencils, pens, or whatever item you want to store!

Youtube Video Tutorial:
Crafter's Tips
Having trouble measuring around a round can? Use a piece of ribbon and wrap around then mark. Then you can lay it next to a ruler to find the exact measuerments. Another easy option is to use a sewing tape measure that is fabric and wraps easily.
Another reminder is that if you don't have tin cans laying around, you can always bulk crafting tin cans on Etsy!
Creative Repurposed Tin Can Ladybug Organizer
Turn an old tin can into this adorable repurposed tin can ladybug organizer! A perfect little upcycle craft for helping keep you organized!
Materials
Tools
Instructions
- Trace a circle onto the yellow paper and cut it out then set aside;
- Next, cut a half circle out of the black paper, and trim the flat adge into a wave/scallop to be the "head/hair" on the ladybug then glue in place on the yellow circle;
- Measure and cut red foam paper to fit around the tin can, and glue in place;
- Now, you will cut out 2 long straight strips of black paper, and one larger half circle out of the black paper;
- Now you will glue the head onto the large black half circle with the black "hair" on the top of the yellow circle, and then attach the long strips on the back of the head as antenna;
- Next, trace and cut out 2 small circles from the red paper then use 2 of those circles on the end of the antenna;
- Take your ribbon, and glue to the neck space between the yellow and black, ruffling it and attaching as you move along so that it looks more like a ruffle at the neck;

- Now add the 3rd red circle to the center of the head, and draw a smile below it and eyes above it;
- Add accents to the cheeks with a pink or white marker;
- Cut out 2 long yellow pieces shaped like a cucumber or zucchini to become the arms;
- Glue your ladybug body to the top of the tin can; and then attach the arms, one on each side so that they are glued to the back of the ladybug and the sides of the tin can;
- Now, cut out several small black circles to then glue around the tin can to be the ladybug dots;
- Now cut out wing shapes on the red paper and attach to the back of the ladybug body, then add a few of the black dots;
- Your ladybug organizer is ready to use!
Notes
You can create this same craft with any size tin can. Just adjust the size of the cuts!
Recommended Products
As an Amazon Associate and member of other affiliate programs, I earn from qualifying purchases.


Pamela Broyhill
I really love the tutorials on making various craft projects, but if you don't have the supplies on hand, it's going to cost you A LOT to buy them. Love the ideas, but too expensive for me.