String art is one of my favorite pastimes. It's so simple, and this Valentine's Day heart string art decoration is a great addition to your decor. All you need is a piece of wood, a few small nails, a hammer, and, of course, the string. This is a perfect choice for adding to your mantle during the Valentine's Day season, but it is also great to give as a gift.

Jump to:
Valentine's Day Heart String Art Decoration
Valentine's Day is one day I love decorating my house to celebrate. There are so many great ways to show love to those around you, and a day dedicated to it is, of course, my favorite! Adding red, pink, white, and silver throughout my decor always makes me happy. I'm known to mix a bit of glitter and even purple into Valentine's Day decorations.

This string art idea is not only fast and easy to make but truly adorable. A few supplies are all you need, and this is one of those decorations that's also super versatile. I love seeing it on a mantle, but it's great for hanging on the wall. It could even be used lying flat on a table as a centerpiece!

This looks amazing next to this simple paper heart garland. Another great choice is this wall art heart out of pistachios. So many fun ways to add hearts to your decor!
Do I Have to Use a Wooden Background?
No, a wooden background isn't necessary. I've seen string art added to canvases, plastic boards, cardboard, corkboard, and even simply on a piece of fabric pulled over a frame. The way to make this work is to have an option for looping the string around. That doesn't require wood but does require some kind of pin, tack, nail, or screw to loop around.

Use this as a centerpiece on your table using these Valentine's Day meals for two! A fun and easy desserts are these Valentine's Oreo cream cheese cookies or this recipe for strawberry cookies. Both are so easy and yummy!
Do I Have to Use Nails?
No. If you are worried about banging a thumb with a hammer, or just don't have one on hand, you can use things like push pins, thumbtacks, brads, or anything that can be stuck into your board and has enough space to allow looping around. I've even seen really elaborate pieces made by sewing buttons onto a piece of cloth to create the pattern and winding string around the buttons. Use your imagination to make this your own.

Hang this on your door when completed right next to this simple no-sew fabric Valentine's Day wreath.
How to Make String Art Templates
One thing you need for this project is a simple template to add your nails around to give the opening that looks like a heart after the string is in place. You don't need anything special to do this. In fact, all I typically do is cut the shape out of a piece of basic copy paper and tack add it to the area I want my string to be wound around.

If you prefer, you can grab stencils, cookie cutters, bowls, or other larger-shaped items and place them in the center of the board to add nails around to create your desired shape.
This heart string art project is great next to my simple Love lights project on the mantle!
Supplies Needed
- Wooden cutting board or board
- String or embroidery floss
- Paper template
- Nails
- Hammer

How to Make Heart String Art Decoration
To begin, you will create your template. I simply drew a heart on a piece of paper and cut it out.

Place the heart template on the center of your wooden board.

Begin hammering nails around the outside of the template about ¼" apart.

Once you have surrounded the heart template, you will then create a ring of nails around the outer rim of the circle board.

Now, you will begin weaving the string over the nails. Choose a nail on the outer rim, and tie the end of your string in place. Now, you will loop that string around the nail above it and then pull back down to the one next to it. Next, you will loop it around that nail and proceed to follow the same process until this pattern has been done around the entire board.

Continue wrapping the yarn around the board 4-5 times following the same pattern until each nail has around 5 loops of thread. You can alternate the loops so you are skipping to the next one each round so it covers the board completely.

When you are satisfied with how the string art heart looks, clip the end and tie it in place.

When the heart wall decor has been completed, you can display it as desired on a wall, shelf, or as a centerpiece.

Printable Step-by-Step Photo Tutorial:
Adorable Valentine's Day Heart String Art Decoration
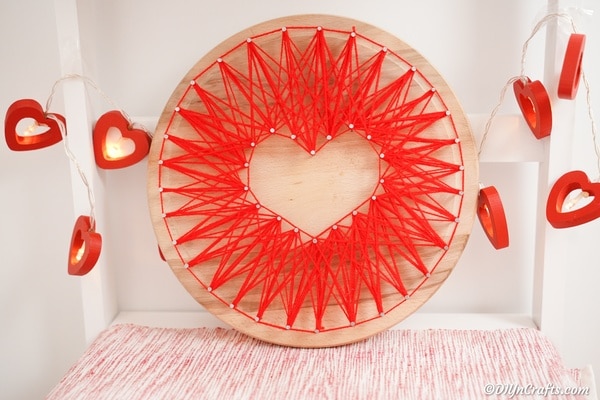
This Heart String Art decoration is a great addition to your Valentine's Day decorations this year! All you need is a bit of string, some nails, and wood!
Materials
- Wood board
- Red string
- Nails
Tools
- Hammer
- Scissors
Instructions
- Begin by cutting a heart out of the white paper;

- Now, place this heart on the center of the wooden board and begin hammering nails around it to create a heart shape;
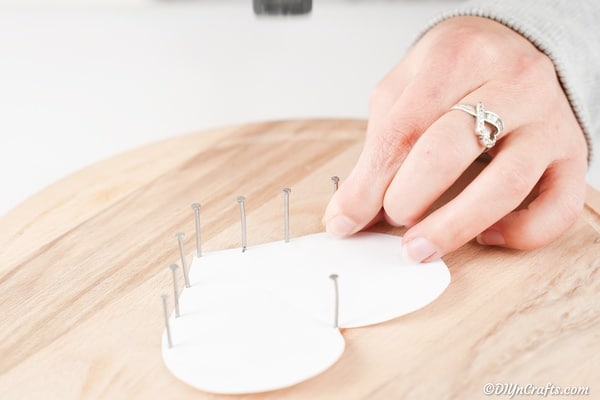
- Once you have created the heart shape, you can remove the template paper, and then start adding nails around the outer rim of the board;
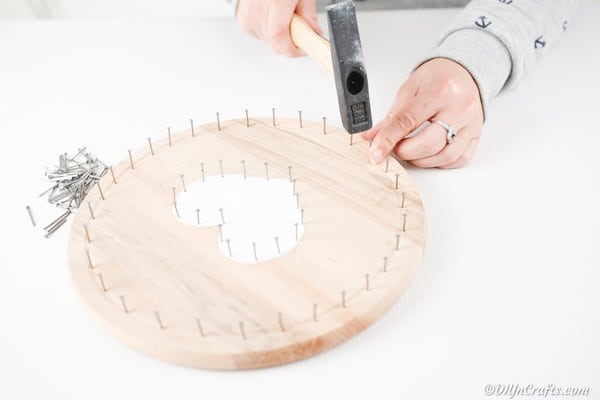
- Continue adding nails until there is a line around the outer rim;
- Next, you will take your string and tie the end to one of the outer rim nails and then begin wrapping it around the nails by moving up to the nail above, and then back down;
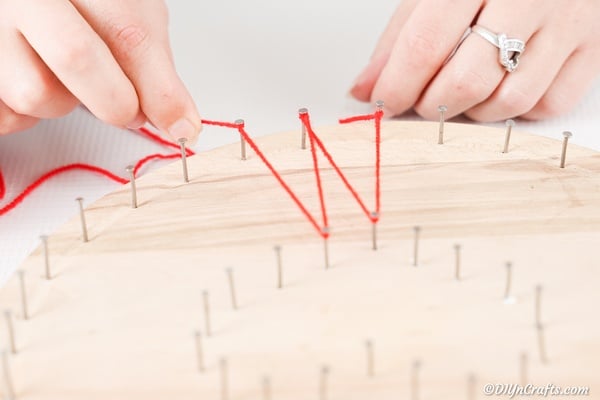
- Follow this process around the board 4-5 times;
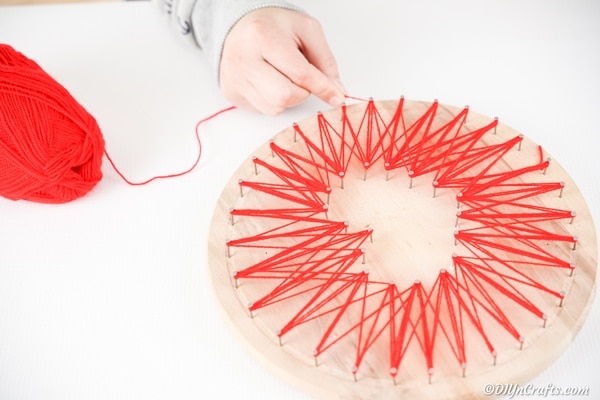
- You will weave back and forth so that the entire area is covered;
- Once you are done adding this string, you will tie the end to a nail and clip short;
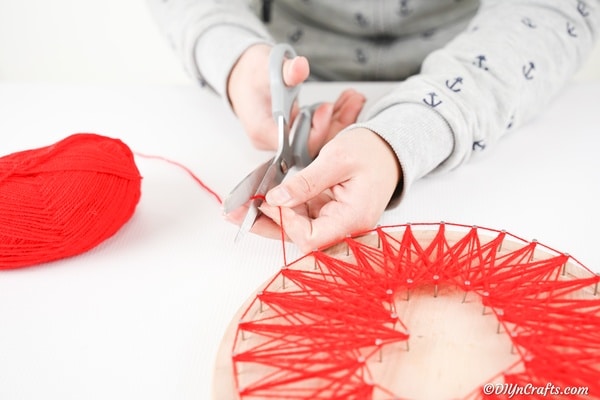
- Display as desired on a wall or as a centerpiece.
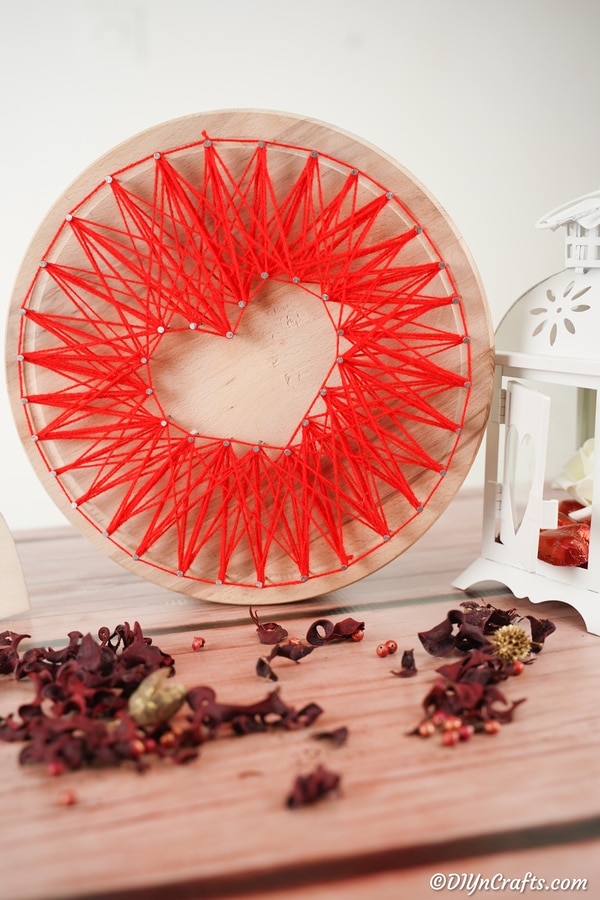
Notes
You can use this same process with any shape you desire to create fun string art decorations for every holiday.





Steph
Adorable! I love string art too. <3
a
That's really lovely.
Dianne Ricci
I am intersted in doing any craft, I like to make things as presants to people. Plz send me any type of craft Ideas i could try, Im interested in all different types. Thanku.