• Skip to primary navigation
  • Skip to main content
  • Skip to primary sidebar
DIY & Crafts
  • Home
  • Repurpose
  • Crafts
    • Cricut
    • Kids
    • Paper
    • Winter
  • Holidays
    • Valentine's Day
    • Easter
    • Halloween
    • Christmas
  • Fashion
    • Sewing
    • Beauty
    • Hairstyles
  • Gifts
    • Baby Shower
    • Father's Day
    • Mother's Day
  • Homemade
  • Home
    • Furniture Makeovers
    • Lifehacks
    • Decorating
    • Organization
    • Parenting
    • Gardening
    • Health
  • Food
    • Recipes
  • Knitting & Crocheting
menu icon
go to homepage
  • Decor
  • Repurpose
  • Paper
  • Crafts
  • Kids
  • Cricut
  • Fall
  • Fashion
  • Father's Day
  • Baby Shower
  • Food
  • Beauty
  • Recipes
  • Furniture Makeovers
  • Gifts
  • Hairstyles
  • Health
  • Holidays
  • Christmas
  • Easter
  • Halloween
  • Home
  • Gardening
  • Parenting
  • Homemade
  • Kids Crafts
  • Knitting & Crocheting
  • Lifehacks
  • Mother's Day
  • Organization
  • Party
  • Sewing
  • Spring
  • Upcycling
  • Valentine's Day
  • Videos
  • Wedding
  • Winter
  • Woodworking
search icon
Homepage link
  • Decor
  • Repurpose
  • Paper
  • Crafts
  • Kids
  • Cricut
  • Fall
  • Fashion
  • Father's Day
  • Baby Shower
  • Food
  • Beauty
  • Recipes
  • Furniture Makeovers
  • Gifts
  • Hairstyles
  • Health
  • Holidays
  • Christmas
  • Easter
  • Halloween
  • Home
  • Gardening
  • Parenting
  • Homemade
  • Kids Crafts
  • Knitting & Crocheting
  • Lifehacks
  • Mother's Day
  • Organization
  • Party
  • Sewing
  • Spring
  • Upcycling
  • Valentine's Day
  • Videos
  • Wedding
  • Winter
  • Woodworking
×

Home » Crafts

Send Your Season’s Greetings In Style With These 5 DIY Christmas Cards

Modified: Oct 14, 2018 by Vanessa Beaty · This post may contain affiliate links · 1 Comment

Trying to put last minute gifts together? This year we are focusing on quick and easy holiday DIY projects which you can put together in no time. For example, I’ve shared 25 knitted Christmas gifts you can make quickly and easily.

I’ve also taught you how to make 5 DIY Christmas tree ornaments.

Send Your Season’s Greetings In Style With These 5 DIY Christmas CardsBut what about the cards that are going to go with those gifts? True, you could run to the store and purchase Christmas cards to send, but you know what?

Christmas cards from the store are ridiculously overpriced—and they aren’t very personal. So why not make Christmas cards for your family and friends this year on your own? In this 4 minute video, I show you how you can make 5 DIY Christmas cards for your loved ones.

Video tutorial:

Materials:

Colorful construction paper
Hot glue and glue gun
Twine
Bows
Small clothespins
Twig
Ribbon
Tree embellishment
Snowflake embellishments
Faux flat-back pearls

Steps:

Mittens Card

1. Start by folding your card into the shape you want.

Mittens Card - Send Your Season’s Greetings In Style With These 5 DIY Christmas Cards

2. Use some hot glue to attach a piece of twine across the top. Make sure that there is a slight curve in the twine, as if it is hanging from the top of the card.

Mittens Card - Send Your Season’s Greetings In Style With These 5 DIY Christmas Cards

Mittens Card - Send Your Season’s Greetings In Style With These 5 DIY Christmas Cards

3. Make some small “mittens” out of construction paper, and attach little bows to them.

Similar Project:  Charming DIY Clothespin Reindeer Ornaments (With Video)

Mittens Card - Send Your Season’s Greetings In Style With These 5 DIY Christmas Cards

4. Using small clothespins, attach them to the twine.

Mittens Card - Send Your Season’s Greetings In Style With These 5 DIY Christmas Cards

You now have a card with adorable hanging mittens. You could also cut out the construction paper in the shape of stockings. That would be very cute as well!
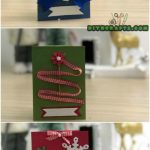
Mittens Card - Send Your Season’s Greetings In Style With These 5 DIY Christmas Cards

Tree Card #1

1. Begin by getting a piece of construction paper and folding it into the shape of a card.

Tree Card #1 - Send Your Season’s Greetings In Style With These 5 DIY Christmas Cards

2. For this card, I had a cool tree embellishment to attach to the card. Maybe you can find something similar at your local craft store. Use a hot glue gun and affix it to the card.

Tree Card #1 - Send Your Season’s Greetings In Style With These 5 DIY Christmas Cards

3. Attach a ribbon at the base of the tree.

Tree Card #1 - Send Your Season’s Greetings In Style With These 5 DIY Christmas Cards
4. Attach a small label to the bottom of the card below the tree, and you are all set.

Tree Card #1 - Send Your Season’s Greetings In Style With These 5 DIY Christmas Cards

Tree Card #1 - Send Your Season’s Greetings In Style With These 5 DIY Christmas Cards

Tree Card #2

1. Begin by folding a piece of construction paper into a card.

Tree Card #2 - Send Your Season’s Greetings In Style With These 5 DIY Christmas Cards

2. Next, get either a thin twig or a piece of twine and glue it vertically in the middle of the card. This will be the trunk of the tree.

Tree Card #2 - Send Your Season’s Greetings In Style With These 5 DIY Christmas Cards

Tree Card #2 - Send Your Season’s Greetings In Style With These 5 DIY Christmas Cards

3. Get a ribbon and glue one end to the top of the “tree trunk.”

Tree Card #2 - Send Your Season’s Greetings In Style With These 5 DIY Christmas Cards

4. Continue gluing the ribbon to the card in a zigzag fashion from the top down. This is the shape of the tree.

Tree Card #2 - Send Your Season’s Greetings In Style With These 5 DIY Christmas Cards

Tree Card #2 - Send Your Season’s Greetings In Style With These 5 DIY Christmas Cards
5. Attach a snowflake embellishment to the top of the tree as the “star” (if you have an actual star, that would of course work just as well or better).

Similar Project:  Festive 3D Christmas Tree Cards - Video

Tree Card #2 - Send Your Season’s Greetings In Style With These 5 DIY Christmas Cards

6. Adhere a label to the bottom of the card, and you are all done!

Tree Card #2 - Send Your Season’s Greetings In Style With These 5 DIY Christmas Cards

Snowflake Card

1. Fold a piece of construction paper into the shape of a Christmas card.

2. Attach a bow with a faux pearl to the top.

Snowflake Card - Send Your Season’s Greetings In Style With These 5 DIY Christmas Cards
3. Attach a snowflake embellishment to the card.

Snowflake Card - Send Your Season’s Greetings In Style With These 5 DIY Christmas Cards

Snowflake Card - Send Your Season’s Greetings In Style With These 5 DIY Christmas Cards

4. Attach another snowflake embellishment. There really are no rules on where you place stuff on this card. Just use an arrangement you think is aesthetically pleasing. I have a snowflake in the upper right and lower left to maintain a sense of balance.

Snowflake Card - Send Your Season’s Greetings In Style With These 5 DIY Christmas Cards

5. Attach a couple more snowflakes which are smaller in size. Mine are green, but it would look fine if yours were all the same color as well.

Snowflake Card - Send Your Season’s Greetings In Style With These 5 DIY Christmas Cards

Snowflake Card - Send Your Season’s Greetings In Style With These 5 DIY Christmas Cards
The finished card is delightful! This project is a fun one for young kids, because they do not need to be precise with where they place the snowflakes.

Snowflake Card - Send Your Season’s Greetings In Style With These 5 DIY Christmas Cards
Ornament Card

1. Start by folding a piece of construction paper into a card. Go with a darker red or green to create contrast with the flat-back faux pearls you will be using for this project.

2. Next, paste a thin strip of white paper down the center from the top. It should only be around an inch or a little longer.

Ornament Card - Send Your Season’s Greetings In Style With These 5 DIY Christmas Cards

3. At this point, you can very lightly trace the shape of a circle below the strip of paper—if you want. If you do not need the guidelines, skip them.

Similar Project:  Upcycled Ice Cream Pail Decorative Basket

Ornament Card - Send Your Season’s Greetings In Style With These 5 DIY Christmas Cards

4. Attach a bow at the bottom of the strip of paper and above where the pearls will go.

Ornament Card - Send Your Season’s Greetings In Style With These 5 DIY Christmas Cards

5. Now, get your flat-back pearls and use hot glue to attach them in the shape of a round ornament.

Ornament Card - Send Your Season’s Greetings In Style With These 5 DIY Christmas Cards

6. Adhere a label below the ornament, and your project is complete! This finished card makes an elegant holiday statement.

Ornament Card - Send Your Season’s Greetings In Style With These 5 DIY Christmas Cards
I hope you enjoy making all of these Christmas cards. Your loved ones will certainly enjoy receiving them!

More Crafts

  • love sign made of matches
    Framed Love Sign Made of Matches
  • purple and white heart shaped box on table by coffee mug
    DIY Heart-Shaped Gift Box from Upcycled Plastic Bottle
  • woman in pink holding red paper butterfly
    Simple DIY Paper Butterfly Kids Craft
  • gold jewelry stand on black table with jewelry on top of stand
    Upcycled Plate Earring and Jewelry Holder
377 shares

Subscribe to Blog via Email

Enter your email address to subscribe to this blog and receive notifications of new posts by email.

Join 12,170 other subscribers

Reader Interactions

Comments

    Leave a Reply Cancel reply

    Your email address will not be published. Required fields are marked *

  1. leslie

    March 16, 2018 at 1:04 pm

    I love them!!!

    Reply

Primary Sidebar

DIY n Crafts Avatar

Hi, I'm Leah! I started DIYnCrafts long ago to spread crafts and happiness. Currently, we have thousands of easy crafts and tutorials, making us the biggest crafty site on the internet.

More about the team → and me

Recent:

  • cutting board picture board with brown bow on top
    Upcycled Cutting Board Craft Picture Frame
  • unicorn basket on tree stump
    DIY Paper Unicorn Basket
  • Delicious Sock it to Me Cake Recipe
  • woman in black shirt with long braid
    Bohemian Stacked Braids Hairstyle

Pages:

  • About Us
  • Be Featured
  • Contact Us
  • Email and Push Notification Subscriber Settings.
  • Privacy Policy

Categories

Footer

↑ back to top

About

  • Privacy Policy
  • About Us

Contact

  • Contact

As an Amazon Associate, I earn from qualifying purchases.

Copyright © 2022 DIYnCrafts LLC.

377 shares
  • 271