DIY & Crafts

Save money and have fun doing things yourself

  • Home
  • Repurpose
  • Crafts
    • Kids
    • Paper
    • Winter
  • Holidays
    • Valentine’s Day
    • Easter
    • Halloween
    • Christmas
  • Fashion
    • Sewing
    • Beauty
    • Hairstyles
  • Gifts
    • Baby Shower
    • Father’s Day
    • Mother’s Day
  • Homemade
  • Home
    • Lifehacks
    • Decorating
    • Organization
    • Parenting
    • Gardening
    • Health
  • Food
    • Recipes
  • Knitting & Crocheting

Home » Crafts » How to Easily Create These Adorable Easter Bunny Napkin Place Settings

How to Easily Create These Adorable Easter Bunny Napkin Place Settings

March 17, 2017 By Vanessa Beaty Leave a Comment

Easter is such a wonderful holiday when it comes to crafting, because there are just so many different festive ideas out there. It’s a time for new beginnings, a time to celebrate the freshness of spring. And that also makes it a great time to explore some new crafts that maybe you haven’t tried before.

How to Easily Create These Adorable Easter Bunny Napkin Place Settings {Video}This year, most of my Easter crafts have fallen into two categories: mason jar crafts (like these) and origami crafts. In fact, just the other day I shared an exclusive video with you to make an adorable Easter napkin bunny bag place setting. And now I have another video with you to teach you how to make a different origami bunny napkin!

Video Instructions:

Photo Instructions:

Here are the steps!

1. Start out with a rectangle. Fold it in half so it becomes a square. Then unfold it. Fold it over itself the other way so that it forms a narrower rectangle.

Step 1:
Step 1:
2. Fold up both sides along the centerline and press down to flatten it.
Step 2:
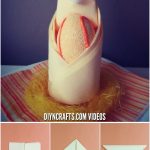
3. Now, fold the top corners down so that you have a diamond shape like this:
Step 3:
4. Fold the sides down so that you get a kite shape:
Step 4:
5. Turn it over, and you should see a shape a bit like this:
Step 5:
6. Fold it together down the middle loosely, and pull the “ears” out to either side a bit, opening them up a little so they look more like actual bunny ears. Put some tape on the other side to hold it all together.
7. Next, glue on the eyes and the nose.
Step 6:
8. Set the bunny aside, and grab a square napkin. Fold it in half diagonally so that you get a triangle.
Step 8:
9. Pull the corners in on either side and tape them together so that you get an object like this:
Step 9:
This is your basket.
10. Set the bunny inside the basket, and prop them up on top of a plate. You can now put treats inside for your guests.
Finished bunny bag!
This would be a wonderful craft to do with children as it is quite easy to make. Have fun, and Happy Easter!

75shares

Subscribe to Blog via Email

Enter your email address to subscribe to this blog and receive notifications of new posts by email.

Join 9,983 other subscribers

Leave a Reply Cancel reply

Your email address will not be published.

This site uses Akismet to reduce spam. Learn how your comment data is processed.

Search

Subscribe to Blog via Email

Recent Projects

Fishtail Ponytail Pigtails with Bow Accent {Hairstyle Tutorial}

Country Chic DIY Paper Heart Hanging Garland

Adorable Owl Diaper Cake Baby Shower Gift Idea

Adorable DIY Diaper Cake Train Baby Shower Gift

Pages

  • About Us
  • Be Featured
  • Contact Us
  • Email and Push Notification Subscriber Settings.
  • Privacy Policy
DIYnCrafts.com is a participant in the Amazon Services LLC Associates Program, an affiliate advertising program designed to provide a means for sites to earn advertising fees by advertising and linking to amazon.com, amazon.co.uk, amazon.ca and amazon.com.au.

Copyright © 2021 DIY and Craft Projects and Collections

75shares