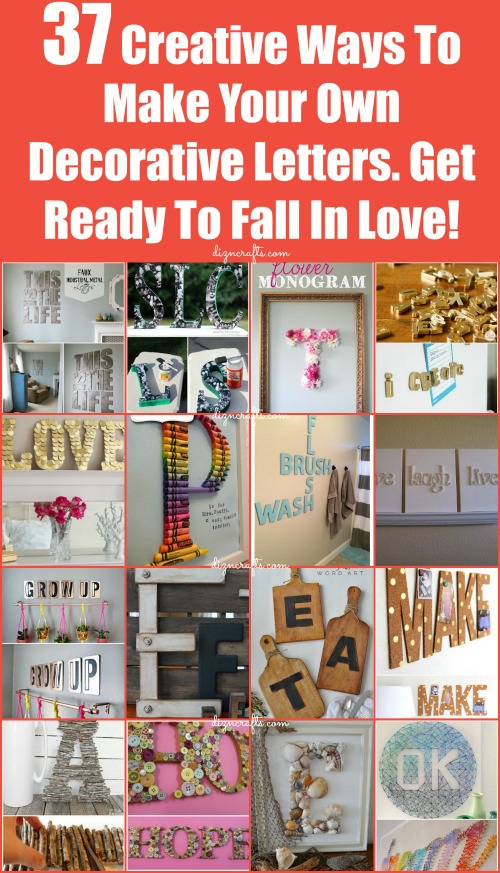
 When it comes to communication and expression, there is no doubt that words play the main role. Sure, body language and facial expressions aid in communication, and fashion, art and music is another way in which we express ourselves, but at the very core of it all is language… words. Words have the power to support, inspire, encourage, and, of course, cause harm. But I like to use them for good.
It makes a lot of sense to me, then, that people like to decorate their homes with words. Whether you just want a singular letter (monogram) for an initial, a weighty word, a meaningful quote, poem verse, song lyric or motto, there are some fantastically creative ways to make and display these for maximum impact.
Allow me…
Faux Floral
 The use of fake flowers can truly brighten up any room, and it’s the perfect decoration for spring or summer. This one is really easy to do since there’s no precision cutting or gluing needed, and the final product is so lightweight that you won’t have to drill any holes into the wall.
DIY Instructions and Project Credit – Decoist
Magnetic Fridge Letters
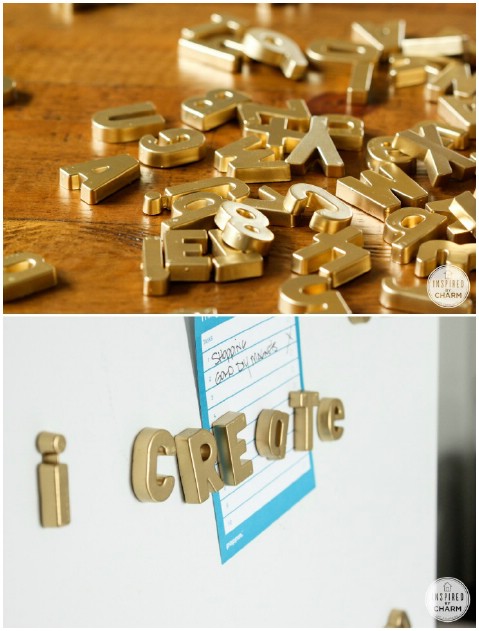 Remember these colorful magnetic letters from when you were a kid? I know my mom still has ours stashed in a box somewhere so it’s about time I go pick them up! I still love the idea of letters on the fridge so that you can leave a little note or something on there, but all the colors are just a little too childlike, so what do you do? Spray paint them, of course!
DIY Instructions and Project Credit – InspiredByCharm
Button Madness
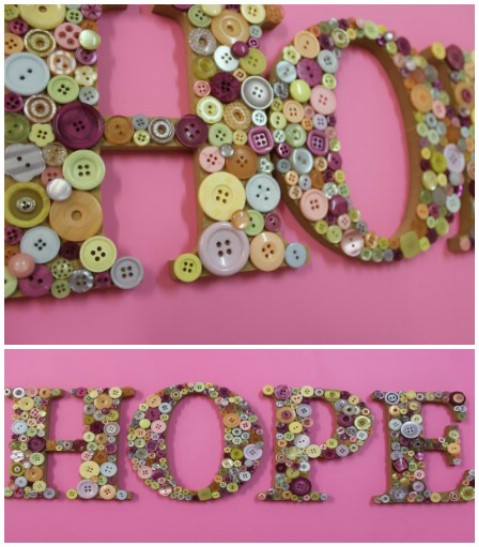 Gluing buttons onto wooden letters is just such a simple task for something so adorable! The colorful approach would look great in a child’s room, but if you want it for yourself, I’d suggest getting buttons in different shades of the same color and displaying it in your craft/sewing/DIYing room.
DIY Instructions and Project Credit – BrightStarKids
Photobomb
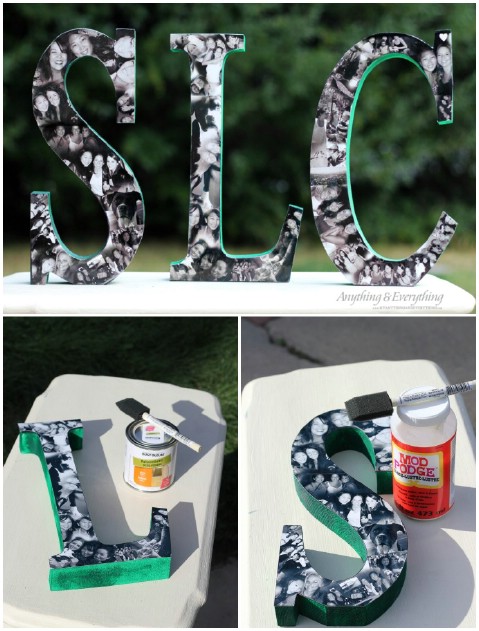 A great way to really personalize the letters or the words you’re spelling out is to turn each letter into a photo collage. Getting images onto the wooden letters is a cinch – you just need to print them out (on photo paper, not regular printer paper), glue them onto the wood with Mod Podge and then finish it off with some polyurethane.
DIY Instructions and Project Credit – Myanythingandeverything
Faux Industrial Metal
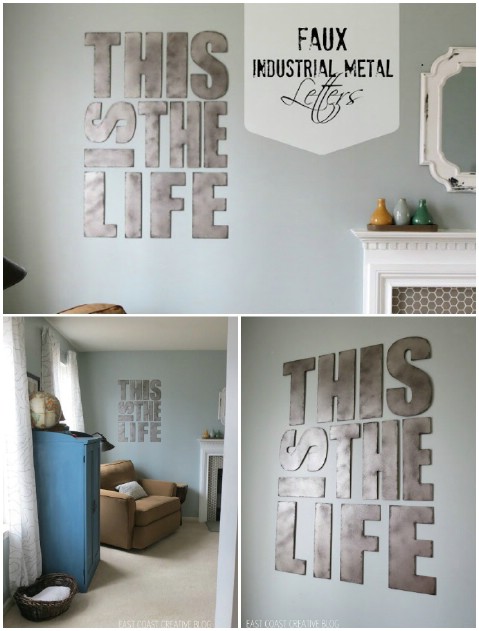 Here’s a fantastic little cheat that gives you a very realistic metal look at a fraction of what the real thing would’ve cost you. It’s actually a lot easier to pull off than you may think – you just need the right combination of sprays and a very clever finishing technique of black pint sponged around the edges. Brilliant!
DIY Instructions and Project Credit – InfarrantlyCreative
Yarn-Wrapped Letters
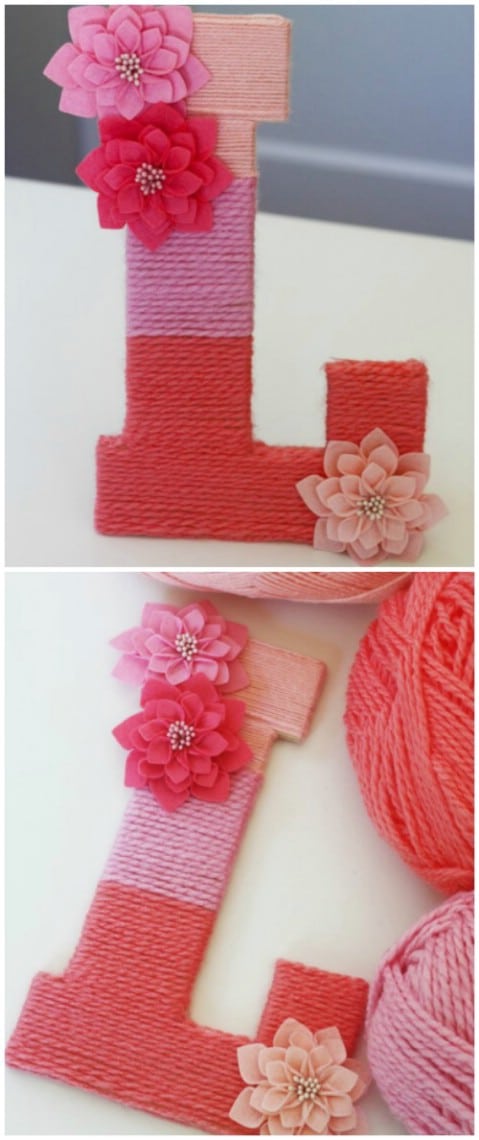 Wrapping yarn around wooden letters is honestly one of the easiest ways to decorate them. The ombre effect is also very simple to achieve since you just need a few shades of the same color and type of yarn. You can ombre a single letter like in the image, or if you’re spelling out a name or word, wrap each letter in one shade for a more drawn out ombre effect.
DIY Instructions and Project Credit – CatchMyParty
Creative Crayon
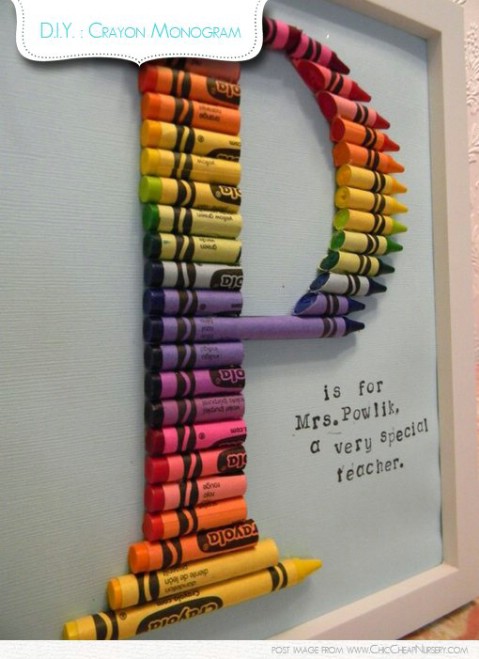 I’ve seen some pretty cool projects that involve melting crayons, but I never thought of cutting them up to create a letter or image. It’s cheerful, it’s colorful, and it’s the perfect addition to a nursery, playroom or classroom.
DIY Instructions and Project Credit – Chic&CheapNursery
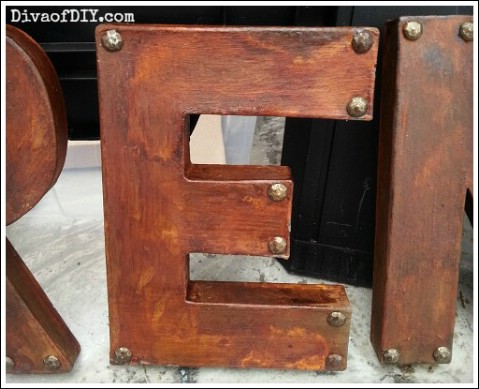
Copper Sheets
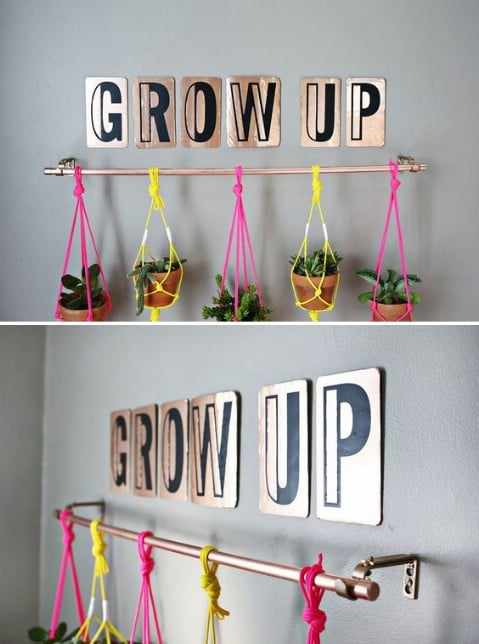 I feel as if copper is one of the more underrepresented of the metals, so here’s a fantastic way to incorporate it into your home. It’s got a bit of a retro feel which makes me love it even more, and it’s a very simple yet effective project.
DIY Instructions and Project Credit – ABeautifulMess
Cork Board Letters
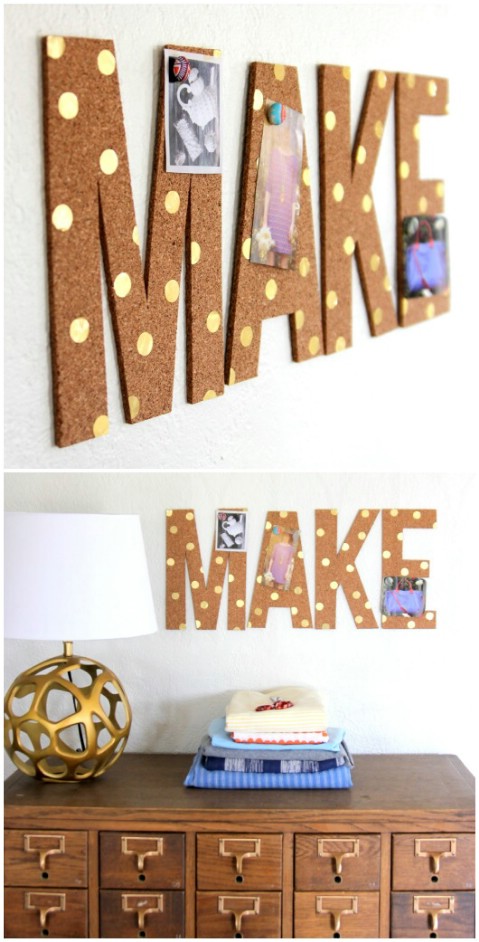 Your letters and words don’t have to be purely inspirational or decorative, they can be useful too; this cork board lettering is the perfect example. Not only does it look super cute, but it serves as a little corkboard on which you can pin notes, to-dos, ideas etc.
DIY Instructions and Project Credit – KojoDesigns
Thrifty Thumbtacks
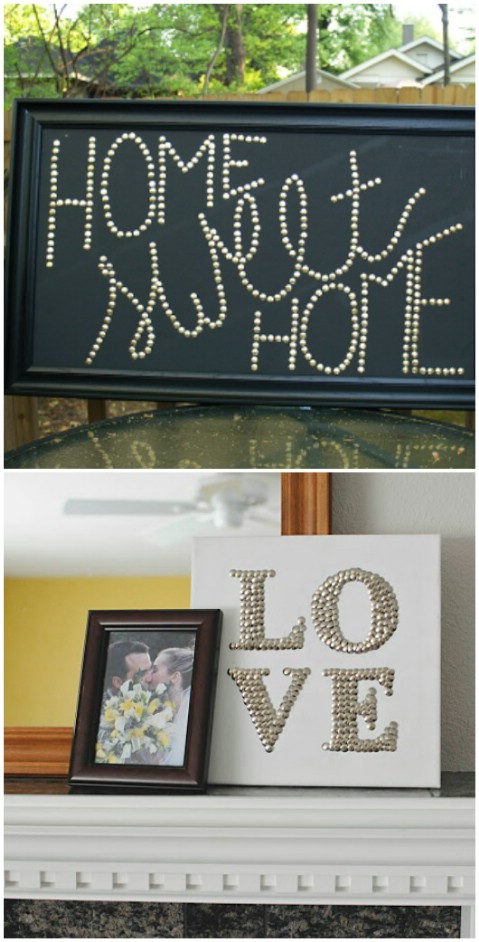 Thumbtacks? How clever is that? You can just push these babies through a canvas or a piece of foam board to create absolutely any word or phrase you want. It’s pretty cheap, super easy, and looks fabulous!
DIY Instructions and Project Credit – Metal&Mud and TheJonesWay
Lacey Doilies
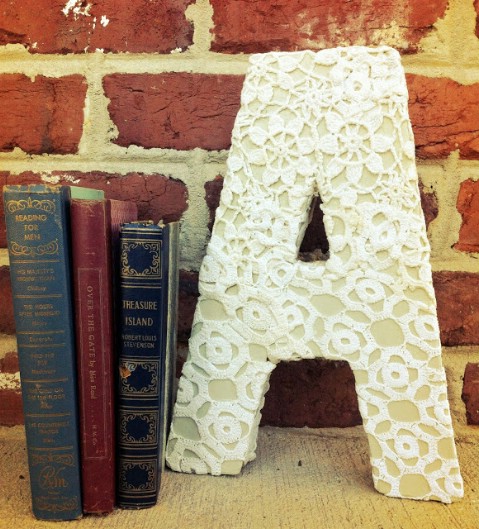 If you like a vintage look then you’ll certainly be a fan of this one: wrap your painted wooden letters in lace doilies! That’s pretty much all there is to it. You can keep the doilies and letters the same color like in this tutorial, or paint both in their own complementary colors.
DIY Instructions and Project Credit – AveryAndAnderson
Paint Sticks
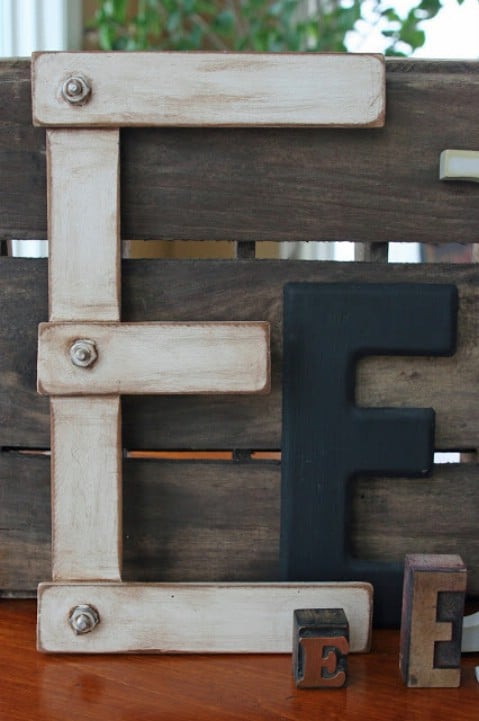 Who would’ve thought to use paint sticks as material for DIY lettering? It’s brilliantly creative and it’s a pretty painless process. I really love the exposed nuts and bolts since I’m a big fan of rustic design. Just make sure to plan carefully since your letters need to consist of straight lines with sticks.
DIY Instructions and Project Credit – MamieJane’s
Architectural 3D
 It’s actually very easy and affordable to make your very own 3D letters with chipboard, paper cups for strength (genius!) and some paper packing tape to cover it all up. From there it’s up to you to decorate your letters however you see fit.
DIY Instructions and Project Credit – DickBlick
Book Folding
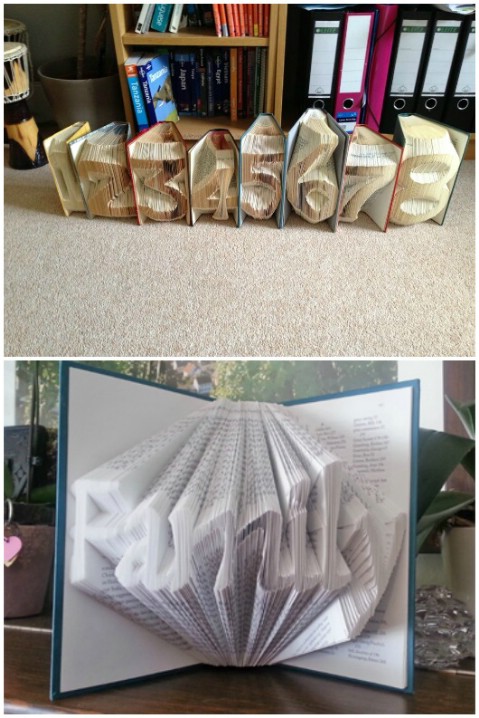 I’ve seen these before and, until today, have not been able to wrap my head around how this fantastic artwork is made. I’m not going to lie, it is rather finicky and very time-consuming, but honestly, just look at how it turns out! Just put on a good movie, pour some of your favorite wine, and get folding.
DIY Instructions and Project Credit – DIYPics and Instructables
Cutting Boards
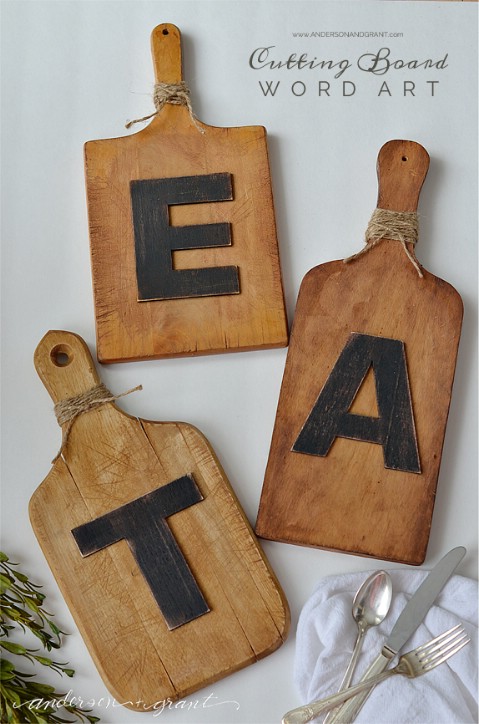 Here’s a brilliant idea for the kitchen: gluing wooden letters to old cutting boards. I like that each board is different and that you can see they’ve been used – perhaps you can ask friends if they have any oldies lying around that are just going to waste.
DIY Instructions and Project Credit – Anderson+Grant
Chalkboard Letters
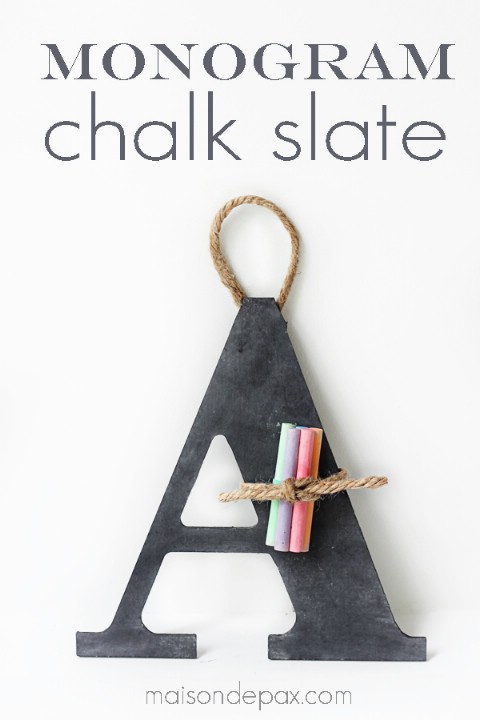 This is a nice quick and easy project that basically just involves spraying wooden letters with chalkboard spray paint. It really couldn’t get any easier! I love the idea of endless change since these can be decorated with chalk constantly.
DIY Instructions and Project Credit – MaisonDePax
Giant Scrabble
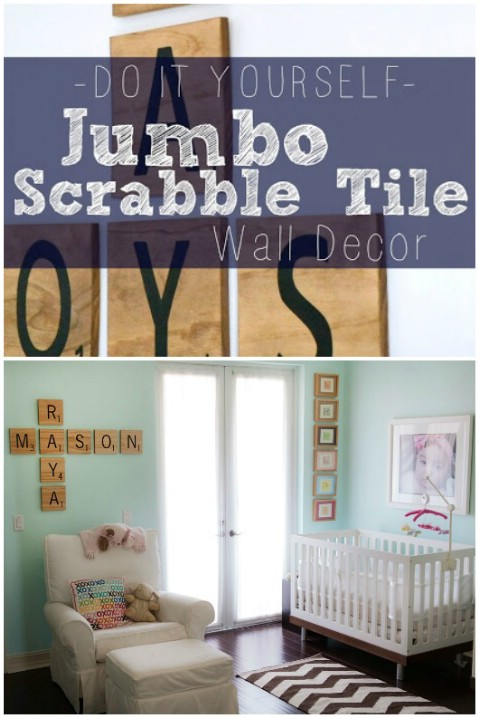 I love reading and writing, so it goes without saying that I love Scrabble. Which means that I’ll just have to make these for myself one day. It’s not a very difficult project, you just need steady hands for the painting. It really adds a whimsical and rustic charm to any room.
DIY Instructions and Project Credit – BourneSouthern and SomethingTurquoise
Plaster of Paris
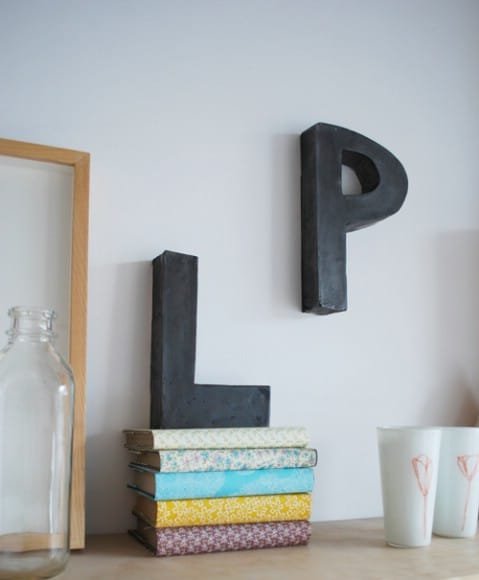 Instead of simply painting store-bought letters, why not start from scratch and make your very own letters from plaster of Paris? It gives you a lot more flexibility with regards to font, size and shape. I’m also a big fan of the graphite powder finish for that metallic look, but you can decorate your blank canvas just as you please!
DIY Instructions and Project Credit – Poppytalk
Colorful Cut-Outs
 This is a really novel idea that gives you some added texture and color from either the blank canvas underneath, or a pretty fabric that you like. I think this could also look great with a mirror instead of a canvas – the reflection cut-outs will add a whole new dimension.
DIY Instructions and Project Credit – BrassyApple and ABeautifulMess
Penny Pincher
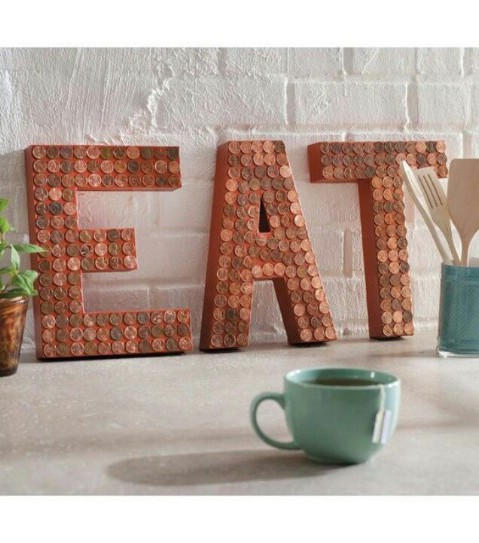 As one of the simplest of the lot, this is also one of my favorites. I absolutely love the look of the pennies on the letters, especially since they aren’t all shiny and new – it’s the variation that I’m after. I’d use this technique for a home office decoration since work = money!
DIY Instructions and Project Credit – Joann
Plank Sign
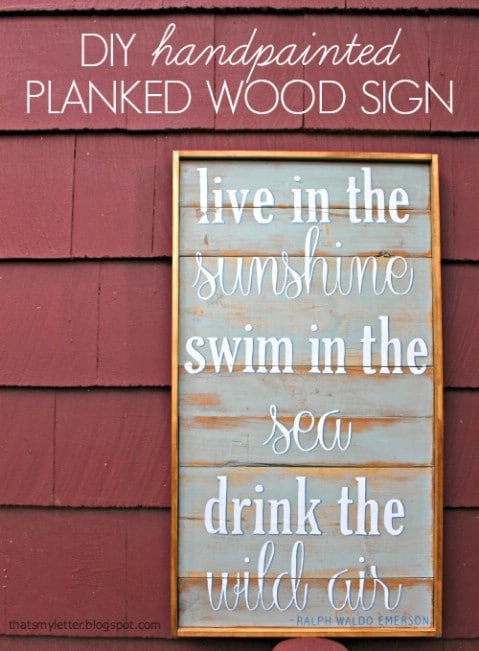 Here’s a great way to make something really beautiful out of scrap wooden planks – any imperfections will simply add more character to your piece. It’s a relatively simple project that lets you display your favorite quote or saying to keep you inspired every day.
DIY Instructions and Project Credit – That’sMyLetter
She Sells Seashells by the Sea Shore
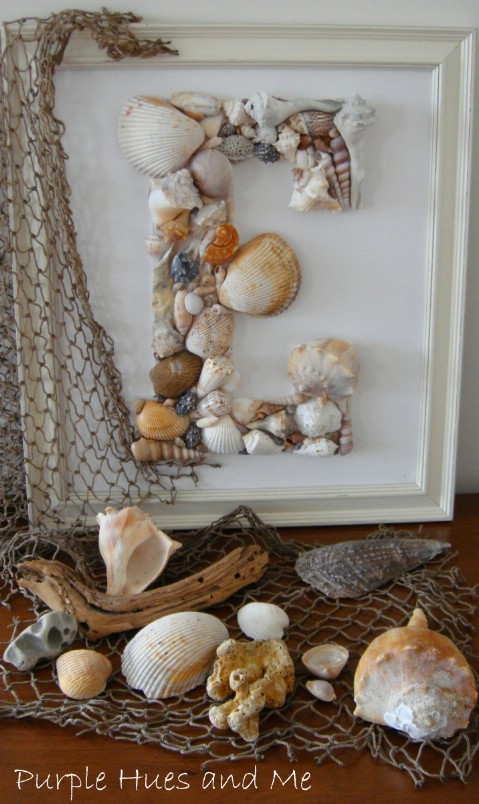 Regardless of whether you actually live by the sea or just like to be reminded of it when you aren’t close by, using seashells as decoration is an old tried and tested classic. I love the natural colors and different shades, but you can even spray paint them all one color (silver!) to put the emphasis on texture.
DIY Instructions and Project Credit – PurpleHuesAndMe
Wrapped Washi Tape
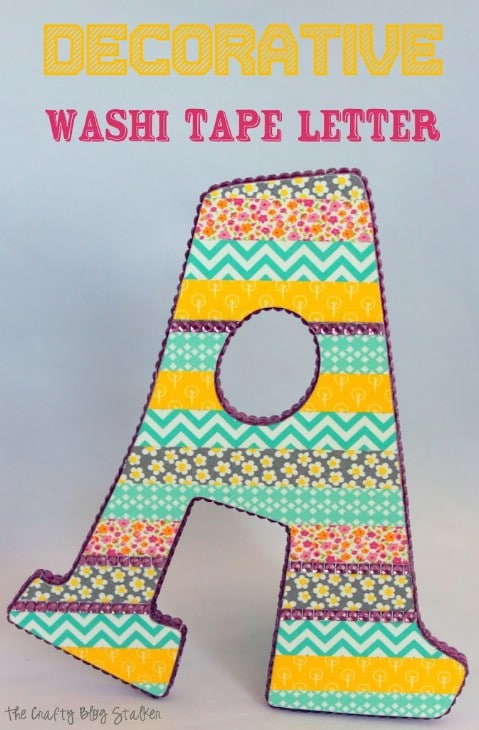 Washi tape is actually just a fun thing to work with, and when it comes to wrapping your wooden letters with different strips, it’s downright adorable. This is absolutely perfect for a kid’s room, and since it’s so simple today, spelling out an entire name won’t be much of a drag.
DIY Instructions and Project Credit – TheCraftyBlogStalker
Sassy Sequins
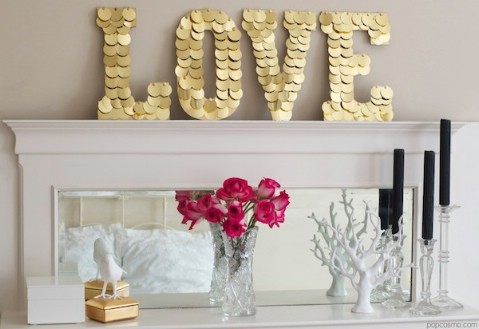 These oversized sequins give a real edgy and modern look and feel that simply can not be overlooked. This is a real statement piece! If the wooden letters are too hard for the thumbtacks to be pushed though, consider making cardboard letters or finding some that are made of polystyrene.
DIY Instructions and Project Credit – PopCosmo
Love Shelf
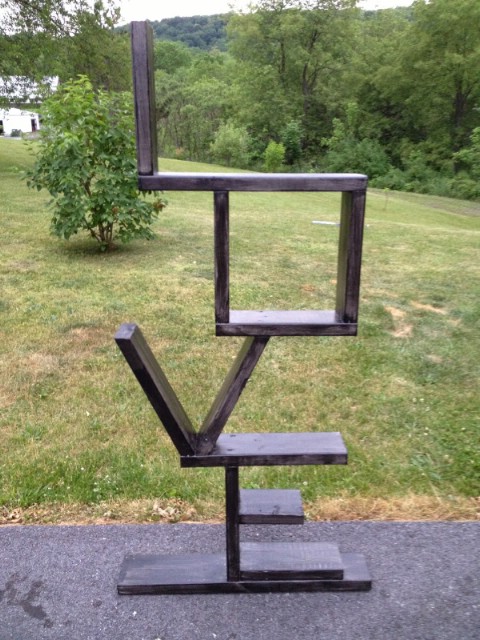 This is by far one of the most innovative projects of the lot since it isn’t just decorative, but it’s functional too. The blogger saw something similar on Pinterest and decided to make one herself, so luckily all the planning has already been done for you.
DIY Instructions and Project Credit – DIY:CraftingItMyself
String Art
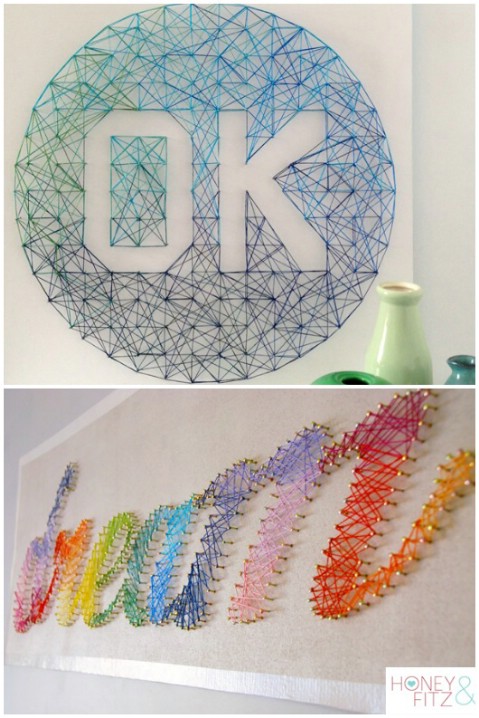 I’ve been obsessed for this string art technique for quite a while now but I’ve been procrastinating because I’m concerned that I don’t have the patience for it. But this really looks fantastic, so I think the time is now! It’s really fund and playful, and there is actually a lot of room for personal customization.
DIY Instructions and Project Credit – Honey&Fitz and Tuts+
Crosswording
 This tutorial isn’t so much about decorating the actual letters but more about the creative placement. I think this crossword effect is just so cute and clever; it really brightens up the bathroom wall in a fun way.
DIY Instructions and Project Credit – AquaLaneDesign
Faux Rust
 If you’re going for an industrial look you don’t have to actually go find—and pay a lot for—letters made of metal. It’s actually very easy to fake the rusty effect with paper mache letters, the right type of paint, rust activator and some cleverly-applied upholstery tacks for a realistic look.
DIY Instructions and Project Credit – JenniferDecorates
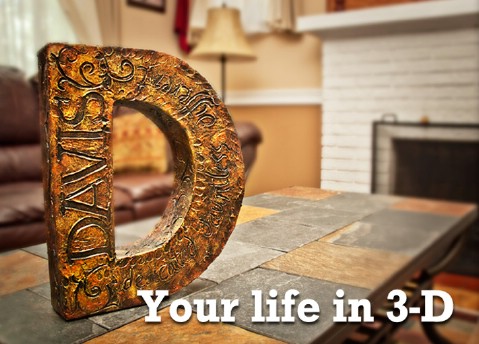
Antique Sign
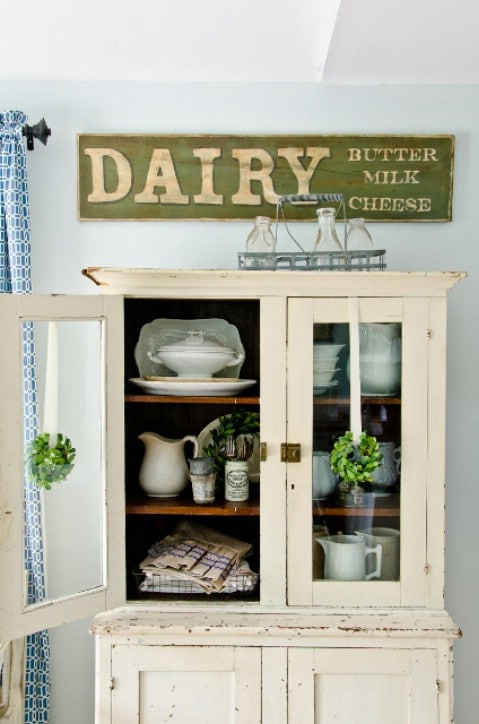 Scavenging for real antique signs can sometimes prove to be a fruitless ordeal, so why not make your own? That way you don’t have to just settle with what you can find, but it can look exactly how you want it to! This tutorial makes it really easy for you to get this done and dusted in one sitting.
DIY Instructions and Project Credit – MissMustardSeed
Canvas Minimalism
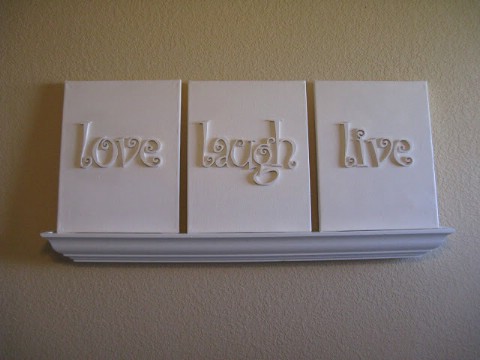 I really like this idea of white one white – you’re foregoing colors and putting the emphasis on texture instead. It’s a really quick and budget-friendly project, which just goes to show that you don’t have to dish out the dollars to beautify your home.
DIY Instructions and Project Credit – InspirationForMoms
Bookworm Letters
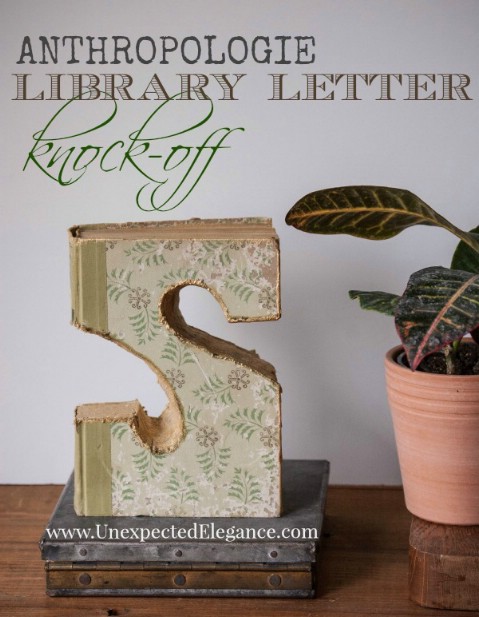 As a bibliophile, the thought of hacking up a beautiful old book does make me feel a little uneasy, but after seeing the finished product, I must say I really am impressed. You can easily find a cheap book at any secondhand bookstore, but be warned, this is a messy project!
DIY Instructions and Project Credit – UnexpectedElegance
Charming Cut-Outs
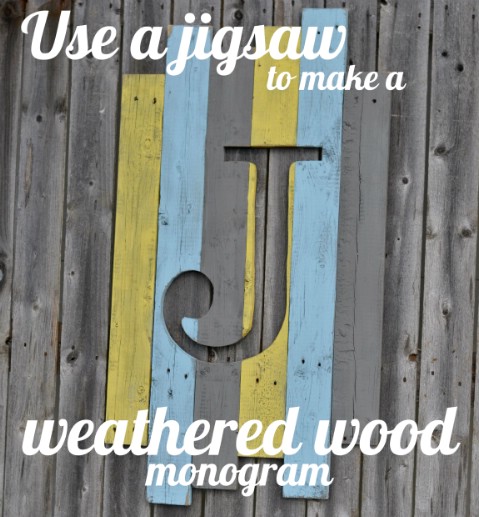 The pallet wood frenzy is still going strong, so of course I had to include this little project. Instead of building up your letters, though this one is about cutting them out, and I really love that change. Plan where you’ll be hanging this before you start painting the wood, since the color of the wall will be visible.
DIY Instructions and Project Credit – InfarrantlyCreative
Magnificent Maps
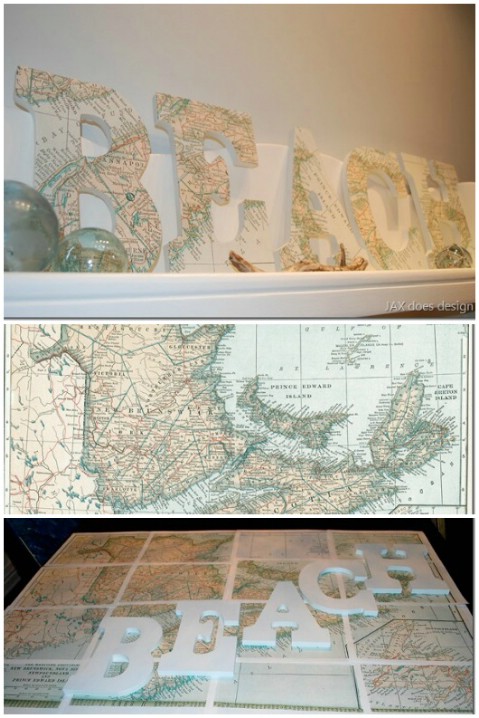 I absolutely adore maps and globes – my plan is to have my entire bedroom wall covered with a world map, so there is no way I’m skipping out on this one. This particular example uses maritime maps which is perfect for a beach theme; I also think a map of the London Underground look really cool.
DIY Instructions and Project Credit – JaxDoesDesign
Circus Marquee Letters
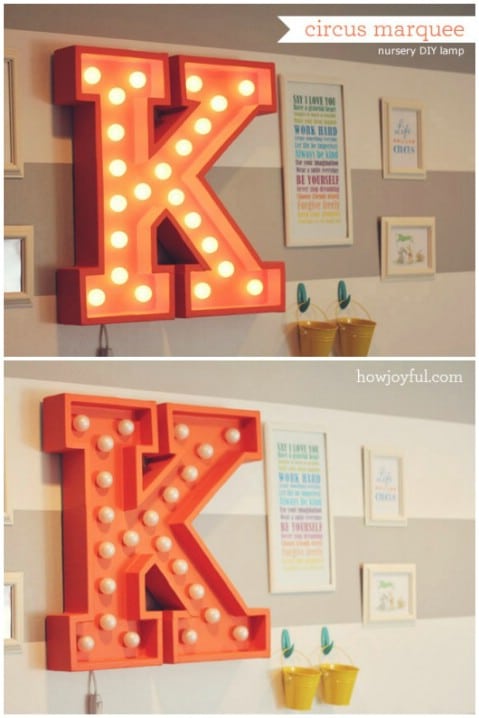 This is to die for! Not only does this marquee letter look brilliant, but it’s actually a very clever way to keep some light in your little one’s room if he or she isn’t totally comfortable in the dark yet. If I were ever to make myself something like this, though, it would definitely go in the kitchen!
DIY Instructions and Project Credit – HowJoyful
Terrific Twigs
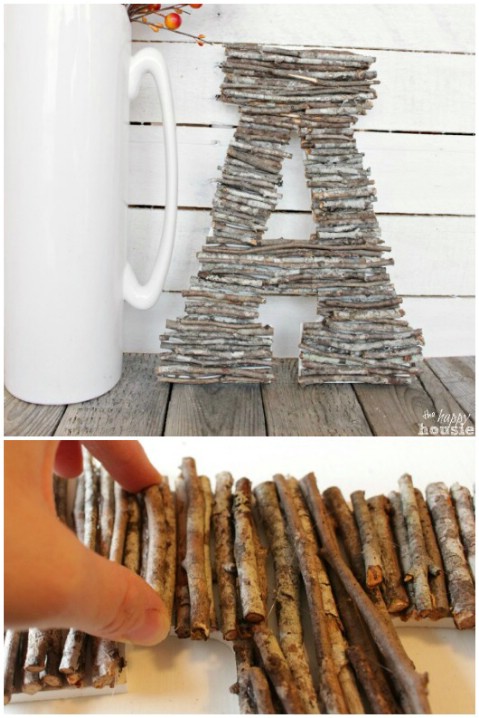 How much simpler can it get than gluing twigs to a wooden letter? I love projects like this that really require minimal effort but end up making a bold statement. The natural rustic look is so charming, and there’s no doubt that the best part of this project—apart from marveling at your creation once it’s done, of course—is enjoying a nice walk to collect the twigs.
DIY Instructions and Project Credit – TheHappyHousie
Concrete Letters
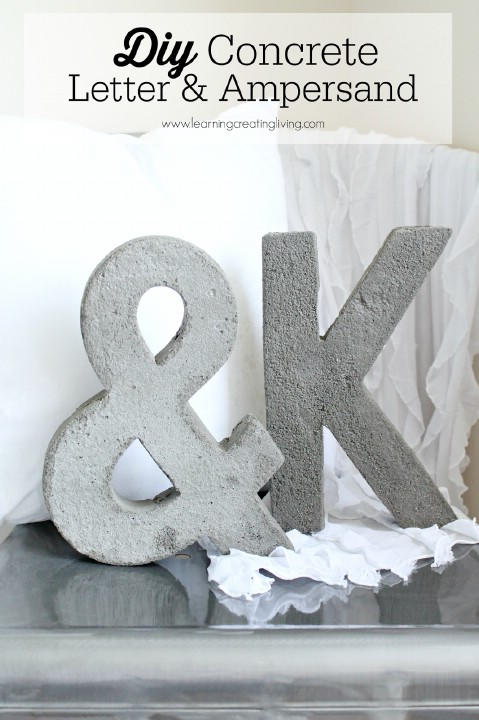 If you’re looking for something bold, sturdy and robust, making your own concrete letters is the perfect solution. You can get these done in no time! Of course you can paint your letters once you’re done, but I think leaving them raw and untouched is what makes them so appealing.
DIY Instructions and Project Credit – LearningCreatingLiving
Rope Word Art
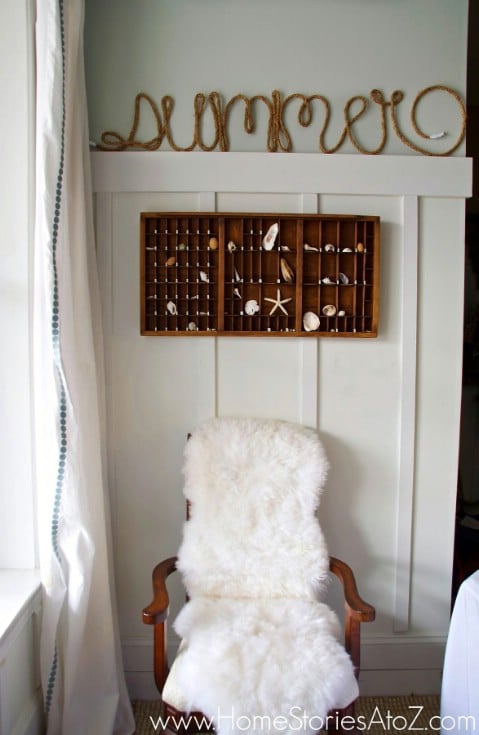 Did you know that a mixture of wood glue, corn starch and water can stiffen up rope? It’s the best way to create cursive, loopy words with rope without having to pin or stick everything in place. This brings in a wonderfully rustic and nautical element to your home without having to make any major overhauls.
DIY Instructions and Project Credit – HomeStoriesAToZ


Leave a Reply