

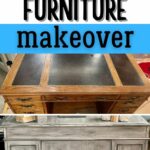

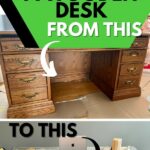
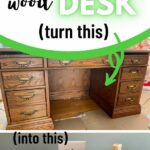
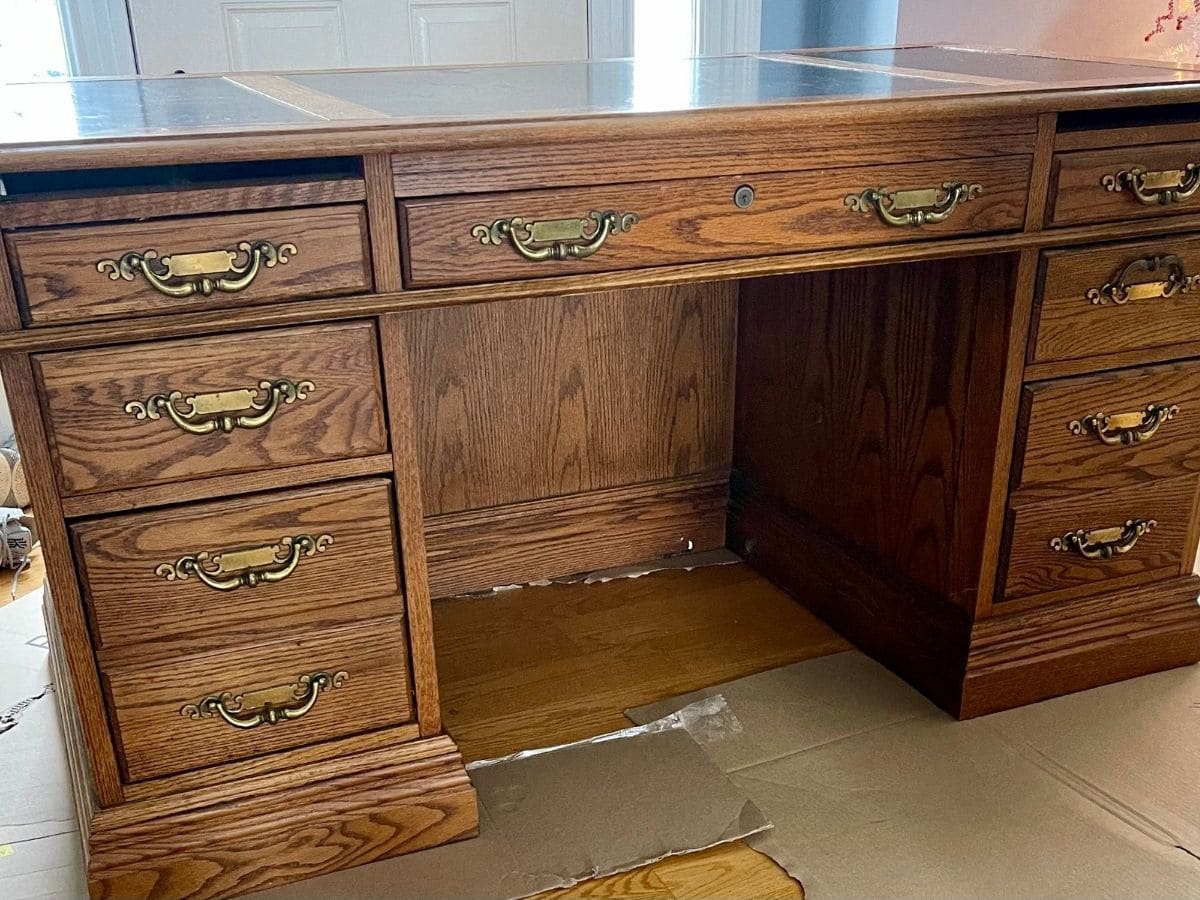
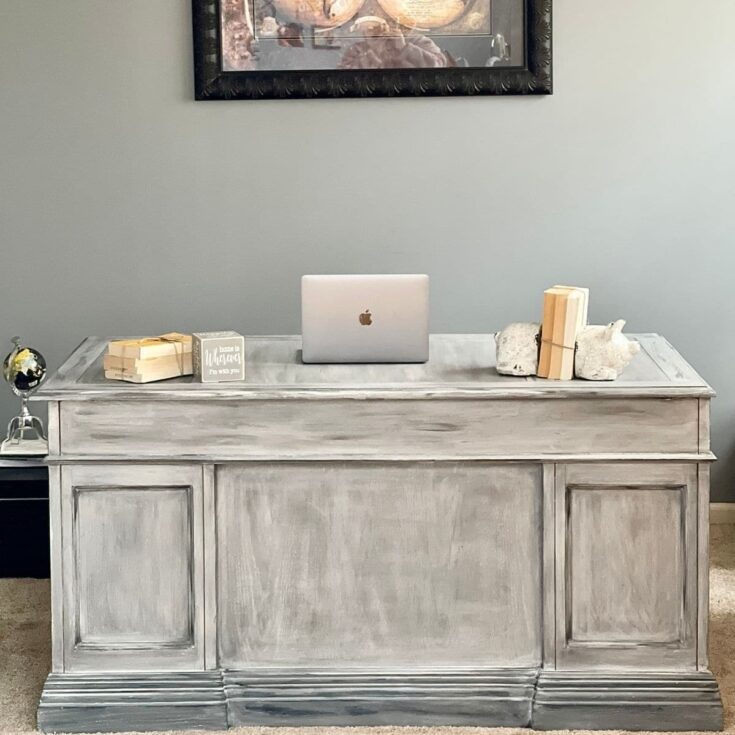
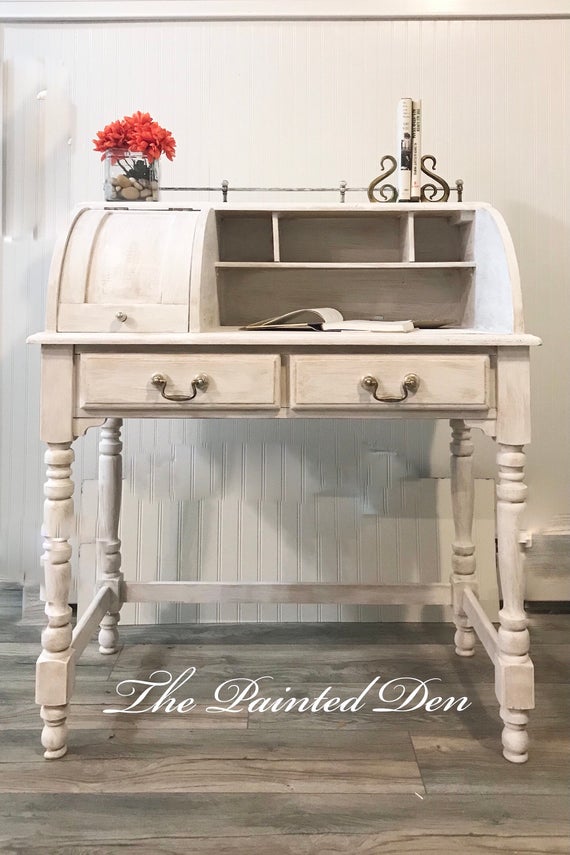
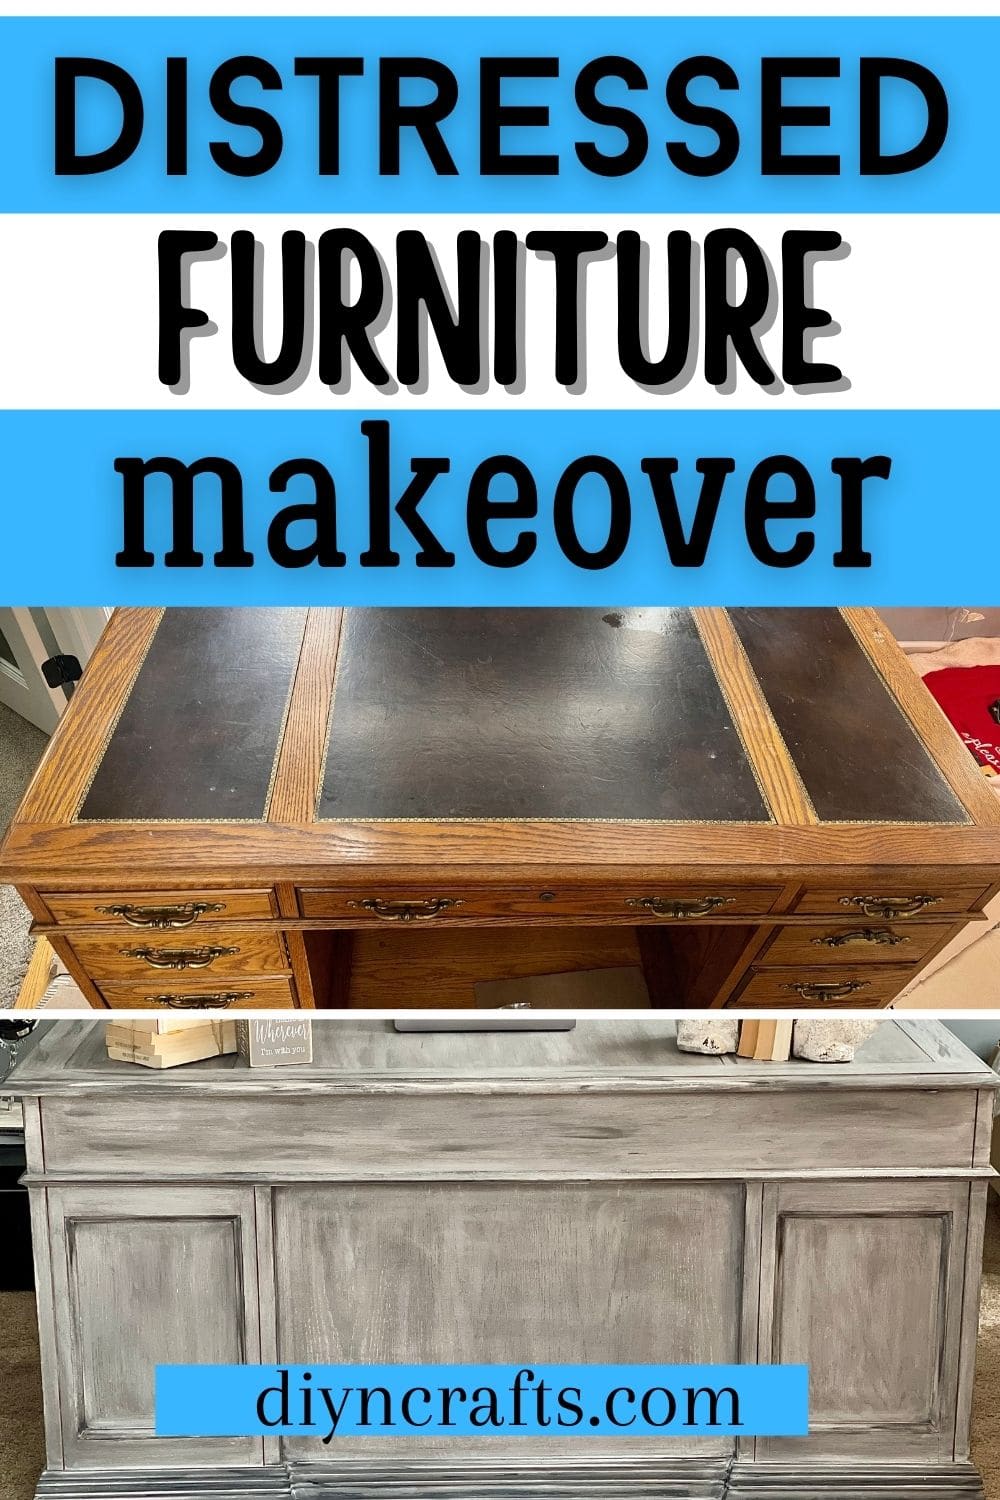
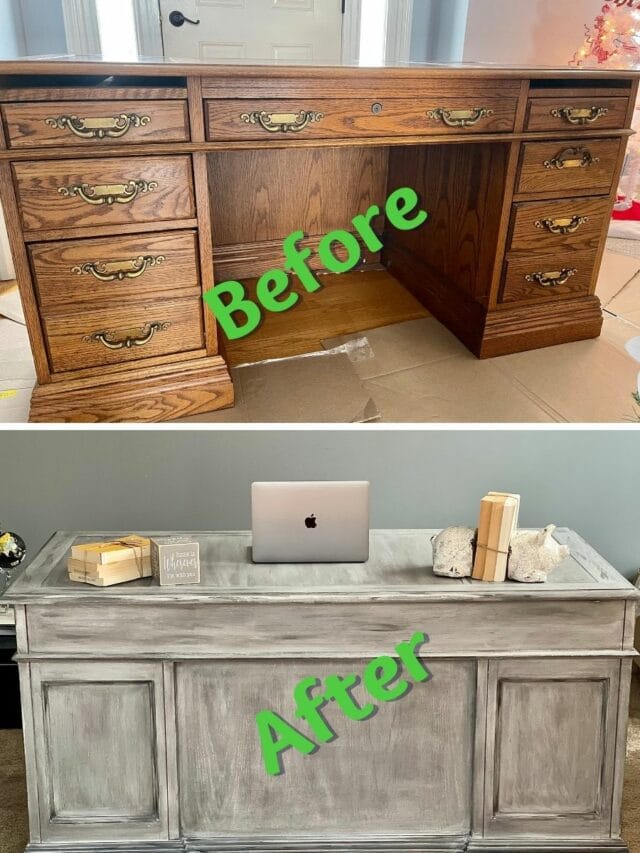
There is nothing I love more than taking something old and making it new again. This distressed wood desk is a great furniture makeover. You can follow an easy step by step process to make this desk look totally different. Following the popular modern farmhouse style, this desk is going to become not just a great part of your office, but a show piece in your home.
Distressed Wood Desk
Working from home means sitting at a desk for long hours some days. So, having a desk you really love is definitely important. Seeing this desk and turning it into a gorgeous new style to match the farmhouse decor style was a brilliant choice. This process has many steps and does take patience, but the end result is breathtaking. If you too like the distressed or weathered wood look of the modern farmhouse style, then this process is going to be one you'll want to duplicate on your own wood furniture items.
Tips for Finding Old Furniture to Makeover
When looking for something to restore or makeover, I tend to look at what I already have on hand first. If nothing fits my needs, then I look at local thrift shops, flea markets, garage sales, yard sales, and estate sales. When I still can't find something right, I will ask friends and family. Sometimes, I go online and look at local buy and sell groups or even places like eBay, Craigslist, and Facebook Marketplace.
More DIY Restoration Projects
If you want more great inspiration to makeover something unique for your home, you are in the right place. There are tons of great ideas to makeover or restore furniture pieces and random household items below. Pick the ones that fit your style and get busy creating!
- Step by Step Mid Century End Table Furniture Makeover
- 25 Beautiful Furniture Makeover Ideas Using Paint
- Metallic Finish Rustic Side Table Restoration Tutorial
- 25 Rustic Shiplap Decor and Furniture Ideas for a Farmhouse Look
- Distressed Curio Cabinet Re4storation with Farmhouse Style
- Modern Farmhouse Glass Top Wooden Tables Restoration
How Long Does It Take to Restore This Desk?
While the steps themselves may not take a long time to complete individually, there is a lot of waiting time with this project. Multiple times throughout the process you will need to let the desk or furniture cure to dry or set the process.
At a minimum, you will need at least 7 whole days, but it is best to also allow yourself a bit longer just in case anything needs more time. Humidity in the air can make drying times longer, and while the furniture may be ready at the end, you will want to let it cure for a month before really cleaning/using it extensively.
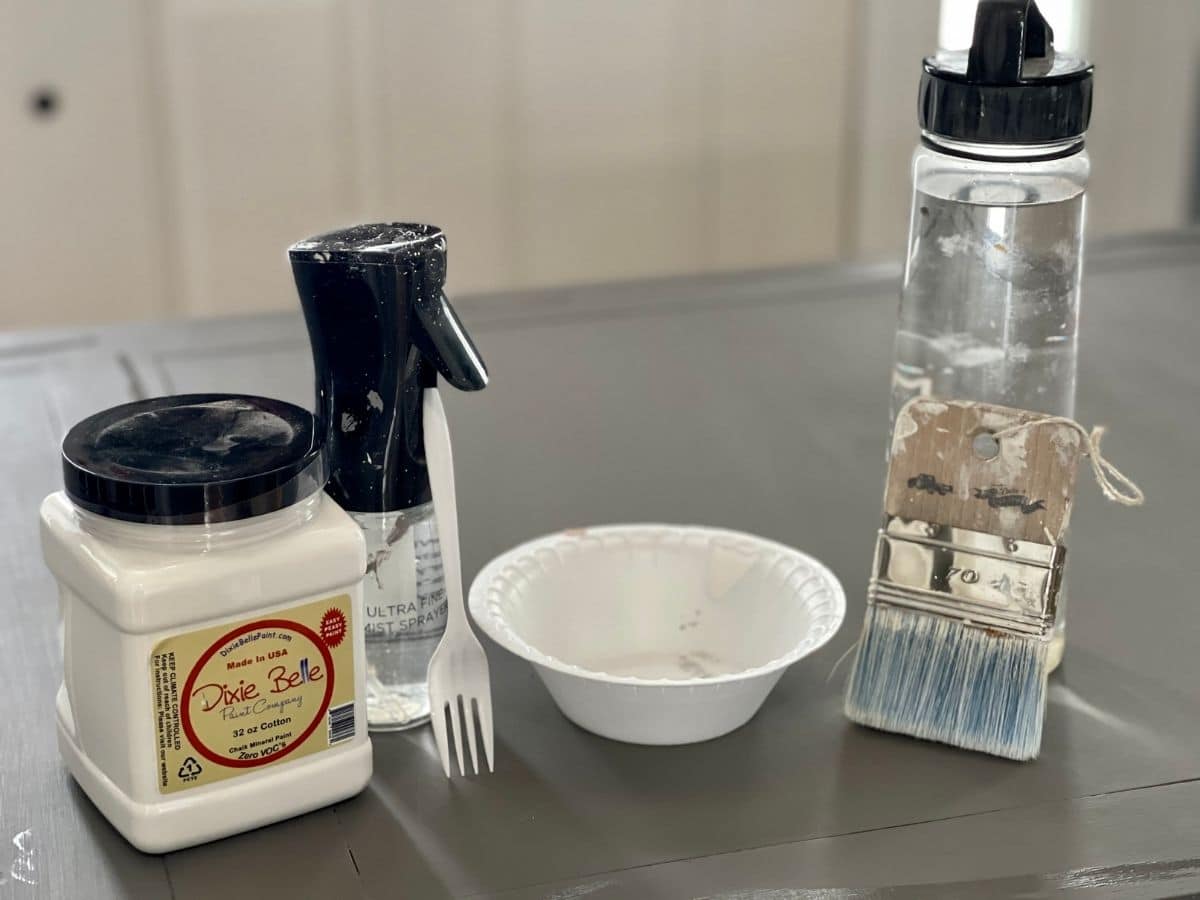
What Tools Do I Need?
- Sand paper or a sanding block
- Misting spray bottle
- Natural bristle chalkpaint brush and wax brush
- Foam paint brush
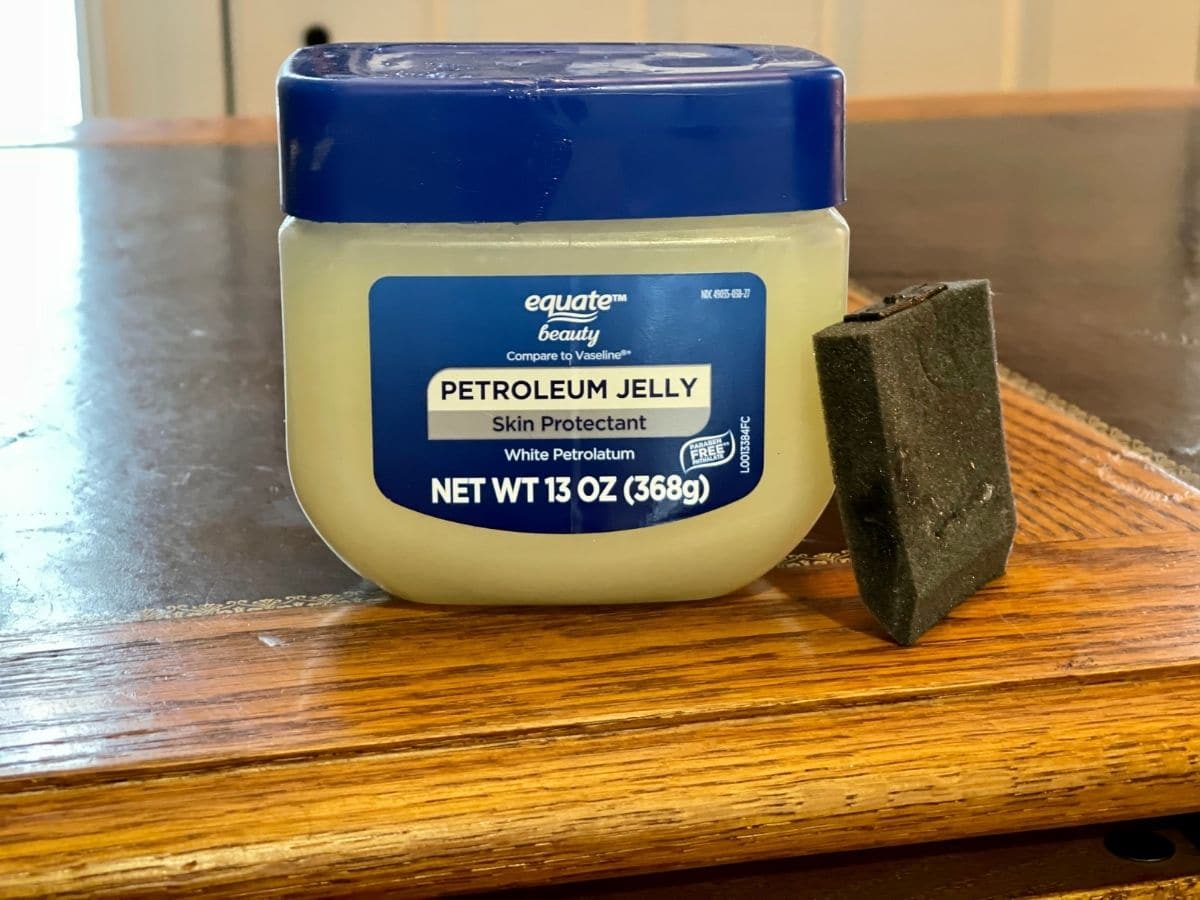
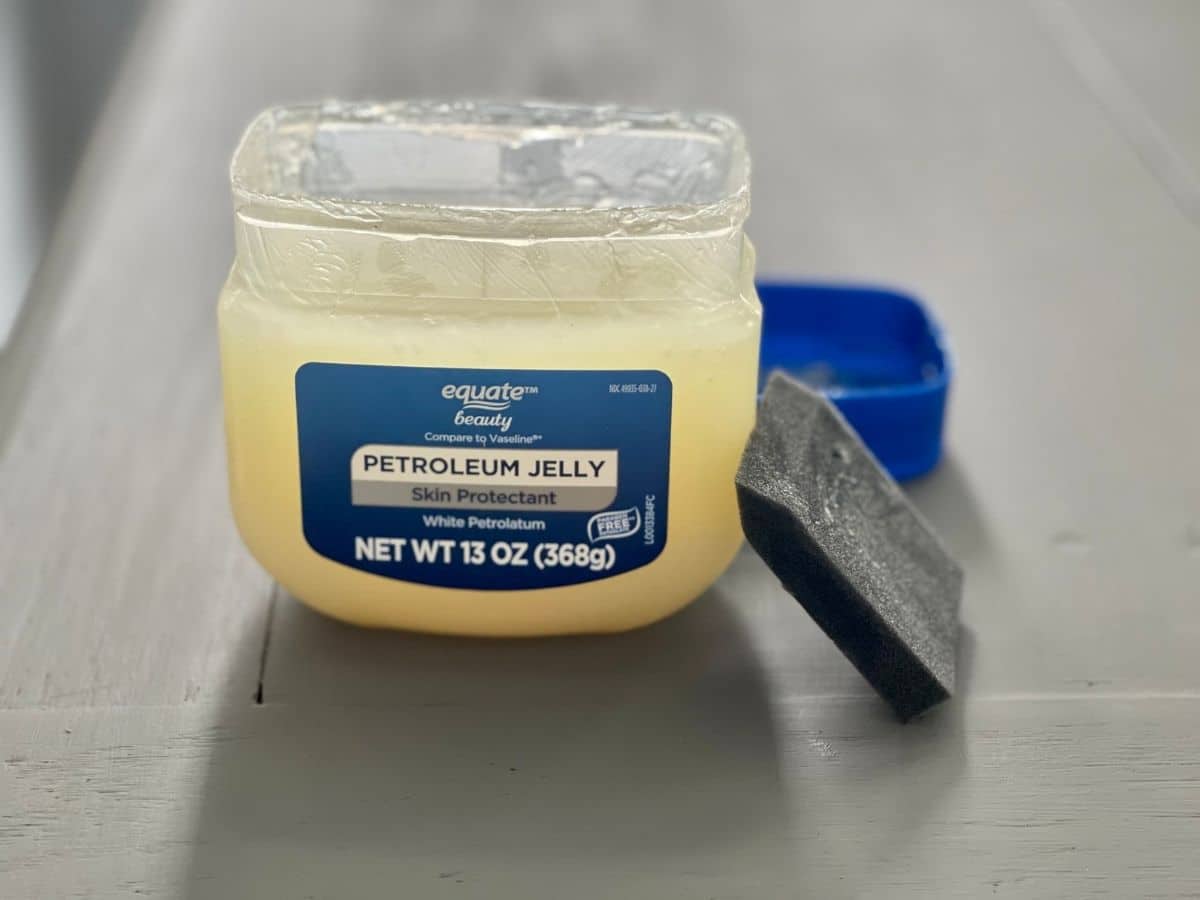
- Petroleum jelly
- Natural Bristle chip brush
- Lint free cloths
- Drop cloth
- Mineral spirits
- Dixie Belle paints
- Dixie Belle waxes
- Disposable plate, cup, and fork or traditional paint tray and mixing bowls
Prepare Your Workspace
Getting everything ready to make your furniture dreams come true is important. Before you begin doing anything, you'll need to prepare not just your furniture piece, but also the work space. Clean things out, lay out drop cloths, and stage supplies so everything is easy to find when needed.
- Place furniture in a clean work space. If working in a garage be sure to sweep or blow all dirt and debris out of the area you will be working in. Lay a drop cloth down to ensure paint does not drip and ruin your flooring.
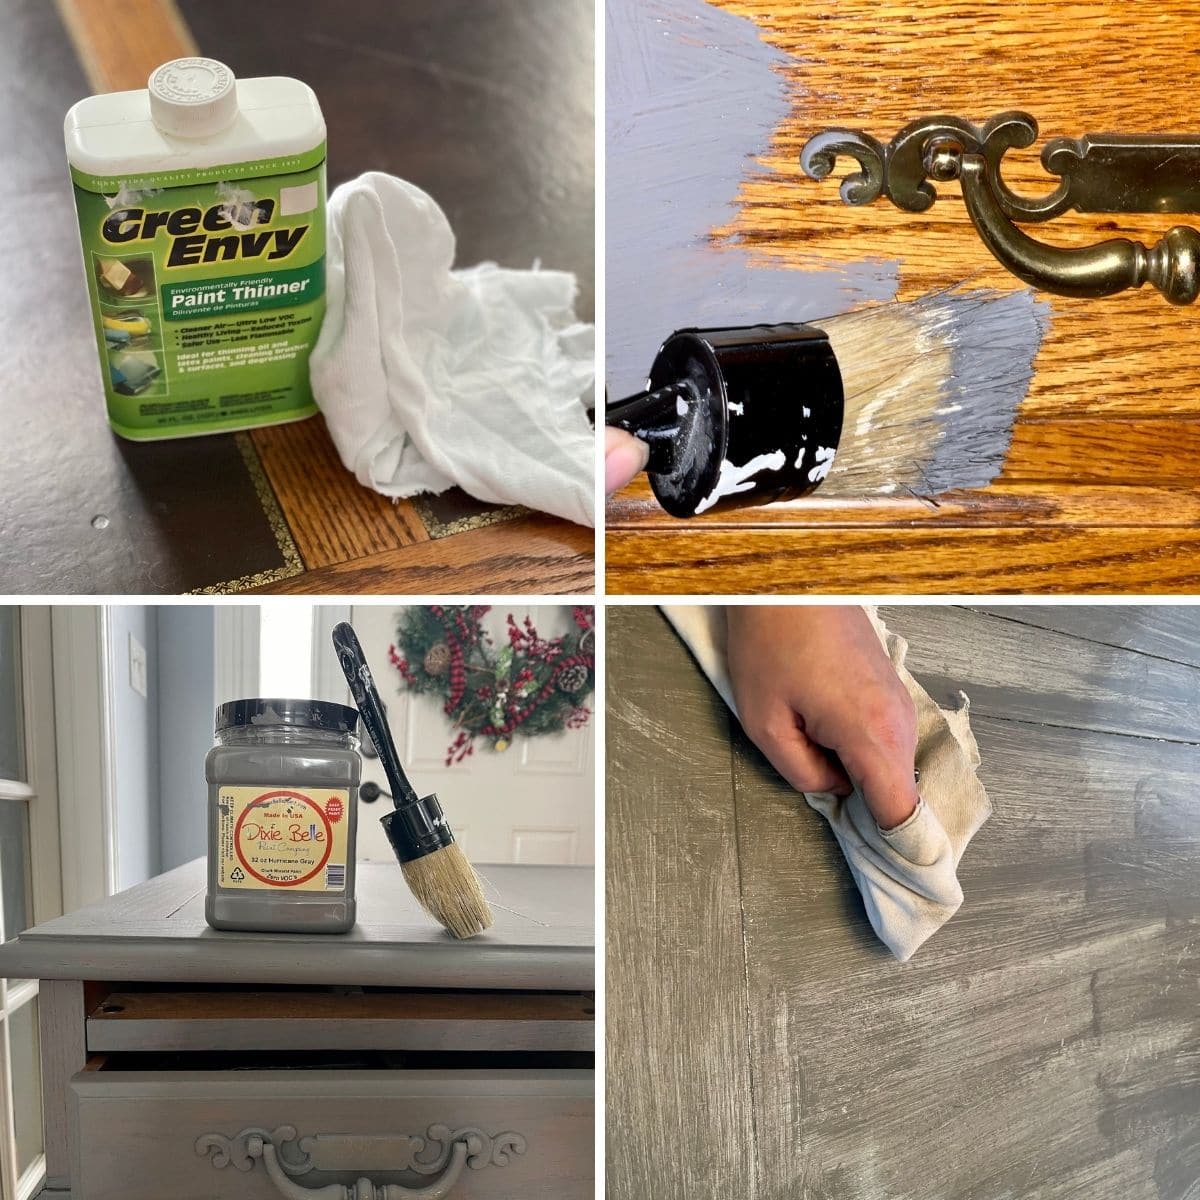
- Take one lint free cloth and dampen with mineral spirits. Clean the entire piece of furniture with the spirits to remove any and all debris or oils that may be on the surface. Be sure to wipe down anywhere you will be painting, including the inside of drawers and/or doors. It is advised to wear a mask or be sure you are in a well ventilated area.
Start the Painting Process
This portion of the process is probably the most time consuming and requires the most patience, but the end result is worth your time and effort.
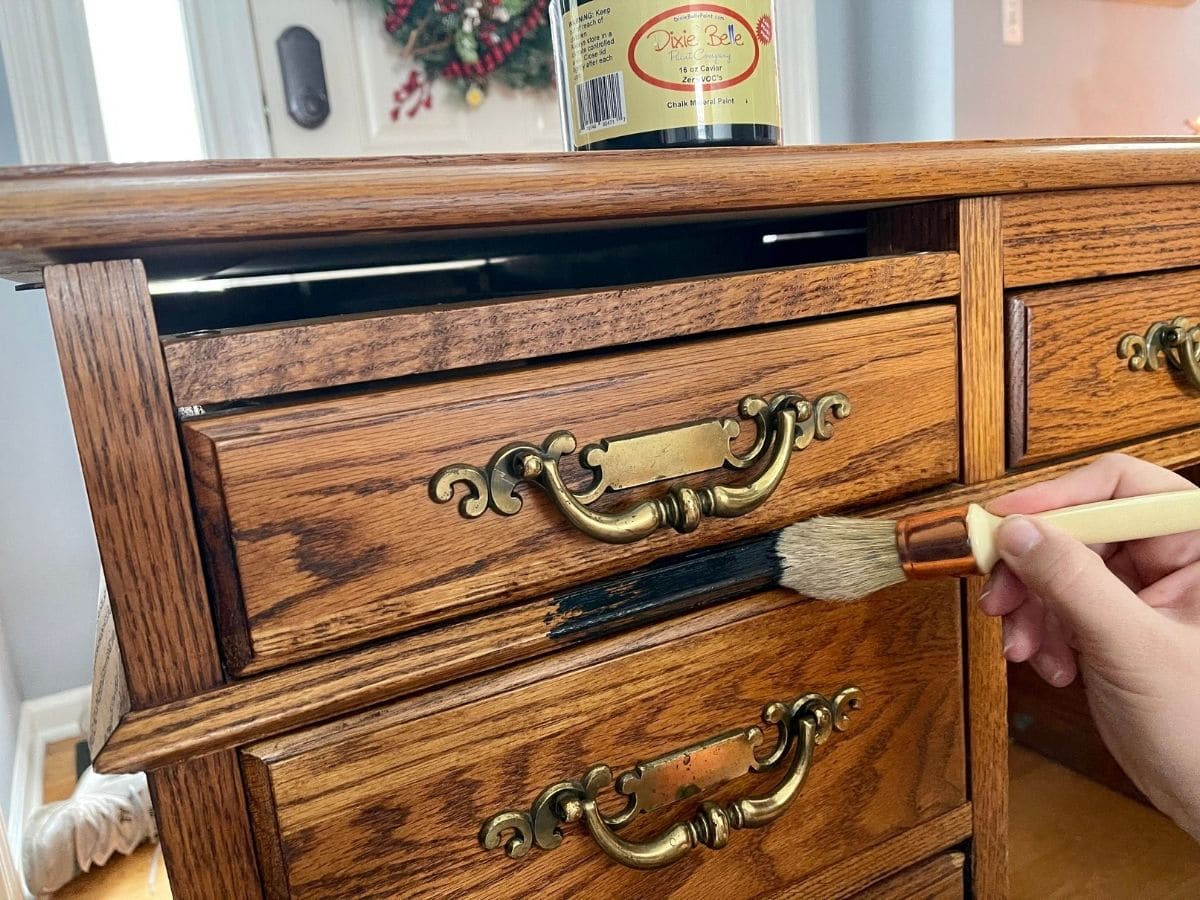
- Shake your Dixie Belle Caviar for 30 seconds.
- Pour Dixie Belle Caviar on to a paper plate. A little goes a long way. Best to add more to your plate as you go to ensure you do not waste.
- Using your Natural Bristle Chalk Paint Brush, coat the bottom of your brush and start painting the edges and bottom of your piece. Be sure to work the paint in the same direction of the wood grain. Working from top to bottom will help minimize drips. Coat any areas that you are going to want to stand out. We chose all the trim for this piece. Don’t worry if paint looks streaky it will all flatten out.
- Let cure for 24 hours (depending on weather and humidity)
- If necessary, using 220 grit sandpaper lightly sand any areas of paint drips or build up.
- Using your lint free dust cloth remove any debris.
- Using your foam Brush and Petroleum Jelly coat areas of the Dixie Belle Caviar Chalk Paint. This is going to allow the areas you apply a generous coat of jelly to chip through, exposing the Caviar in your end result. This is your chance to be creative!
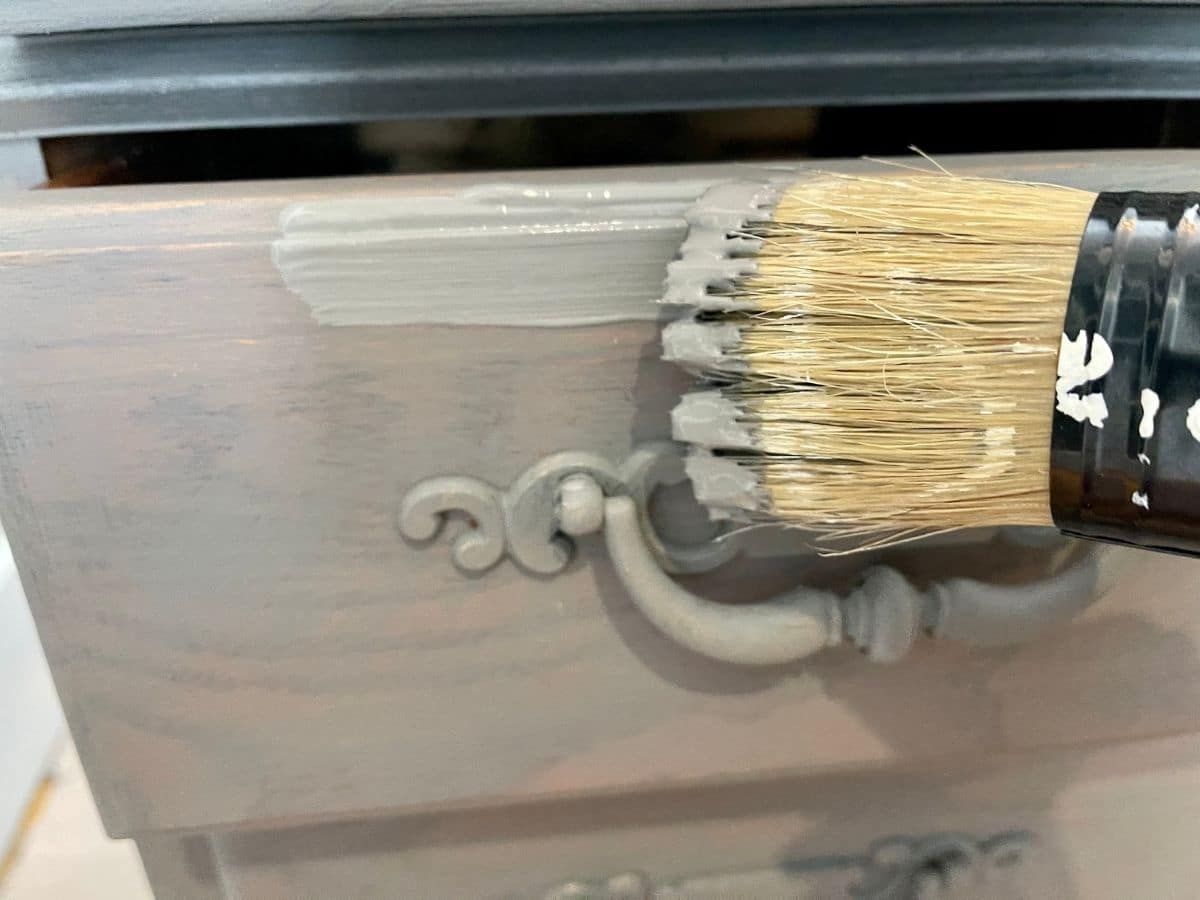
- Shake your Dixie Belle Hurricane Gray for 30 seconds.
- Pour your Dixie Belle Hurricane Gray onto a paper plate. A little goes a long way, add as you go to ensure you do not waste.
- Using your Clean Natural Bristle Chalk Paint brush coat the entire piece with Dixie Belle Hurricane Gray. Be sure to paint in the direction of the wood Grain. Cover all areas of the piece including painting over the petroleum jelly and the areas painted in Dixie Belle Caviar.
- Let Dry for 30 minutes.
- Using the same Natural Bristle Chalk Paint brush and Dixie Belle Hurricane Gray apply a second coat of paint to the entire piece, except your trim or anywhere you applied the Dixie Belle Caviar. This will ensure your piece has two coats of paint all over at this point.
- Let Dry for 24 hours.
- Using your foam Brush and Petroleum Jelly apply generous coats to the areas that you want the Dixie Belle Hurricane Gray to Chip through. For this piece we focused on applying the jelly to all the corners of the top, corners of the drawers, and areas on the front of the desk. This is your chance to be creative and to select the areas you will want to distress and have the Hurricane Gray chip through.
- Shake your Dixie Belle Cotton Chalkpaint for 30 seconds.
- Pour Dixie Belle Cotton and water using a 50/50 ratio into a solo cup or paper bowl. Mix thoroughly with a plastic fork.
- It’s time to begin your Whitewash. Using your natural bristle chip brush, coat the bottom of your brush and start painting the top of your piece. Paint in the same direction of the wood grain. Work from top to bottom. Do not paint the trim or any areas that you painted in the Caviar. This is going to give us dimension in the end.
- Be sure to use light strokes and long strokes. Mist your paint with your misting spay bottle to keep the paint moving over your piece as it starts to dry. Coat the entire piece except the areas painted in Dixie Belle Caviar.
- Let Cure for 24 hours.
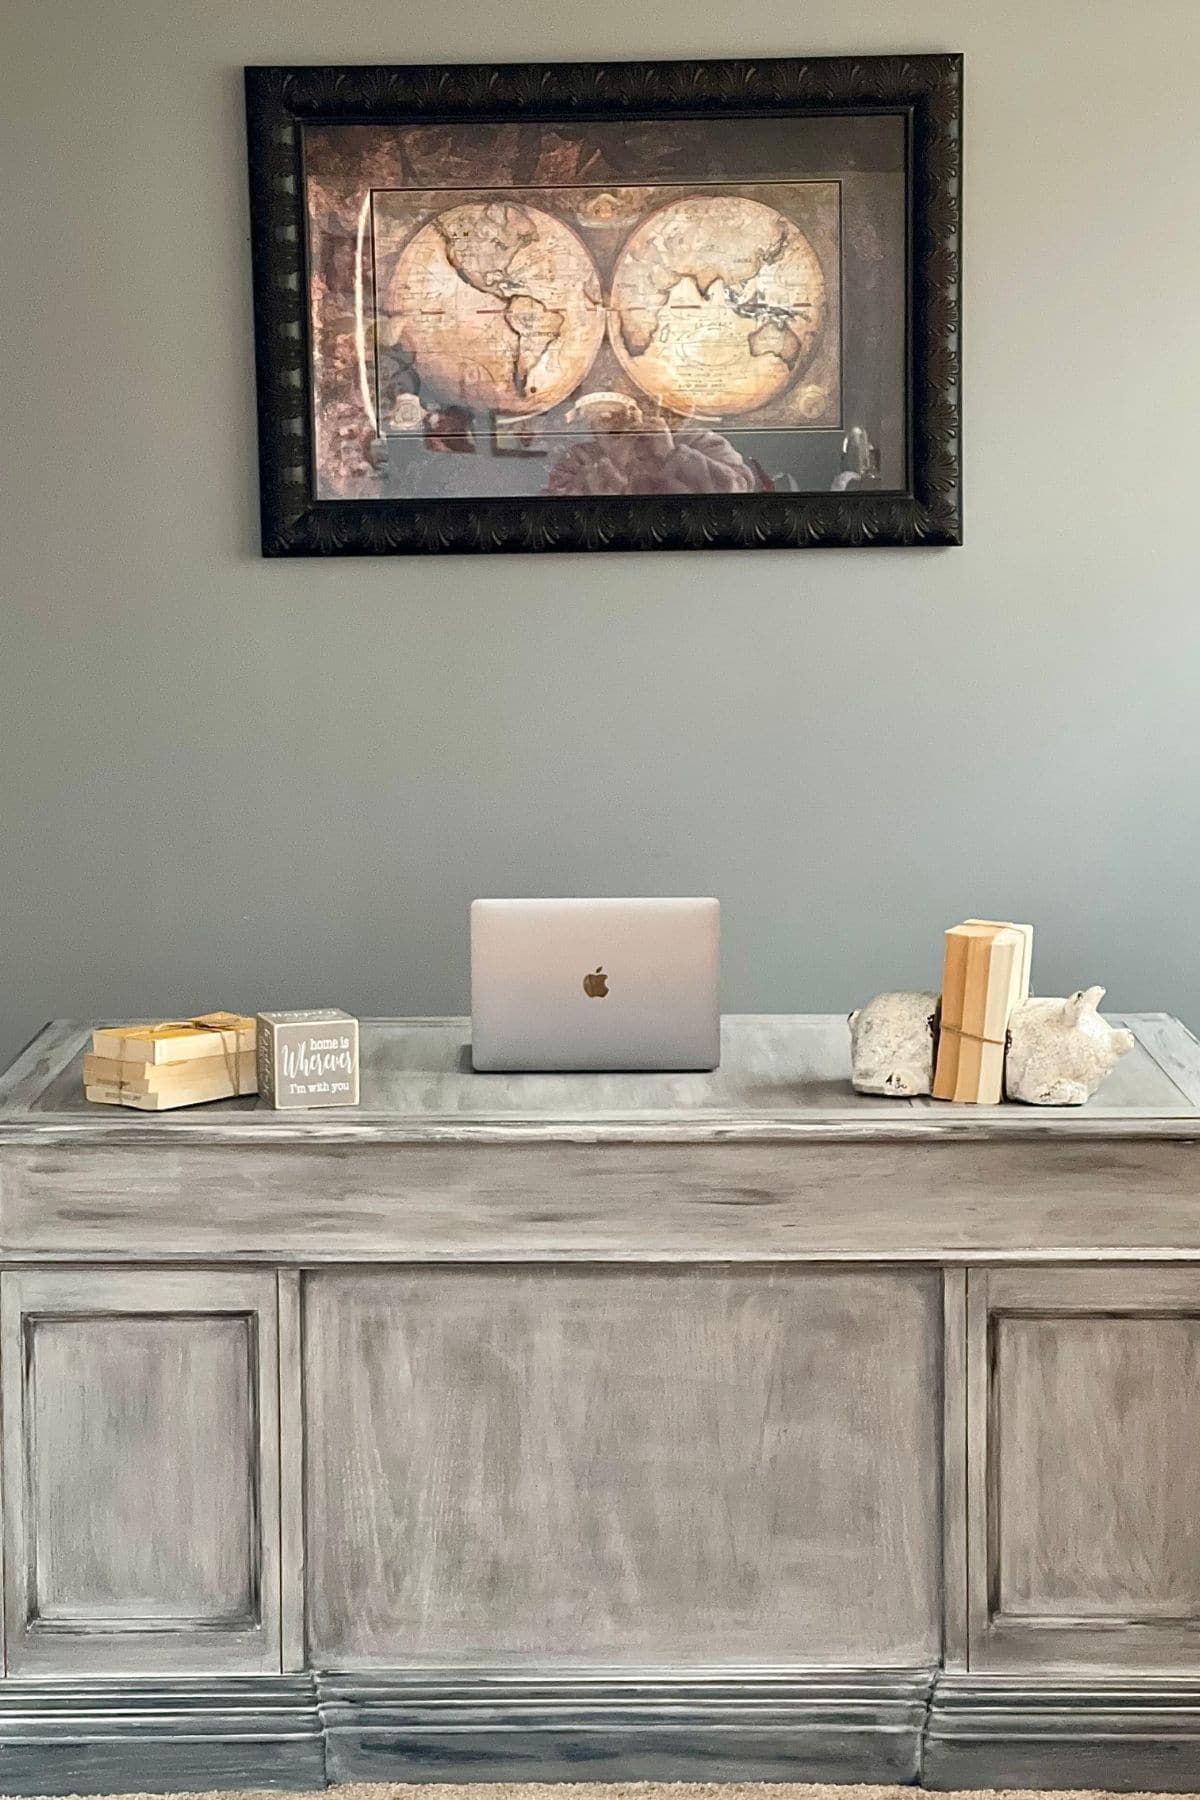
The Finishing Touches
The last few steps are the most important. This is where the details come into play. Adding personality, unique looks, and those little things that make this piece truly your own happen now.
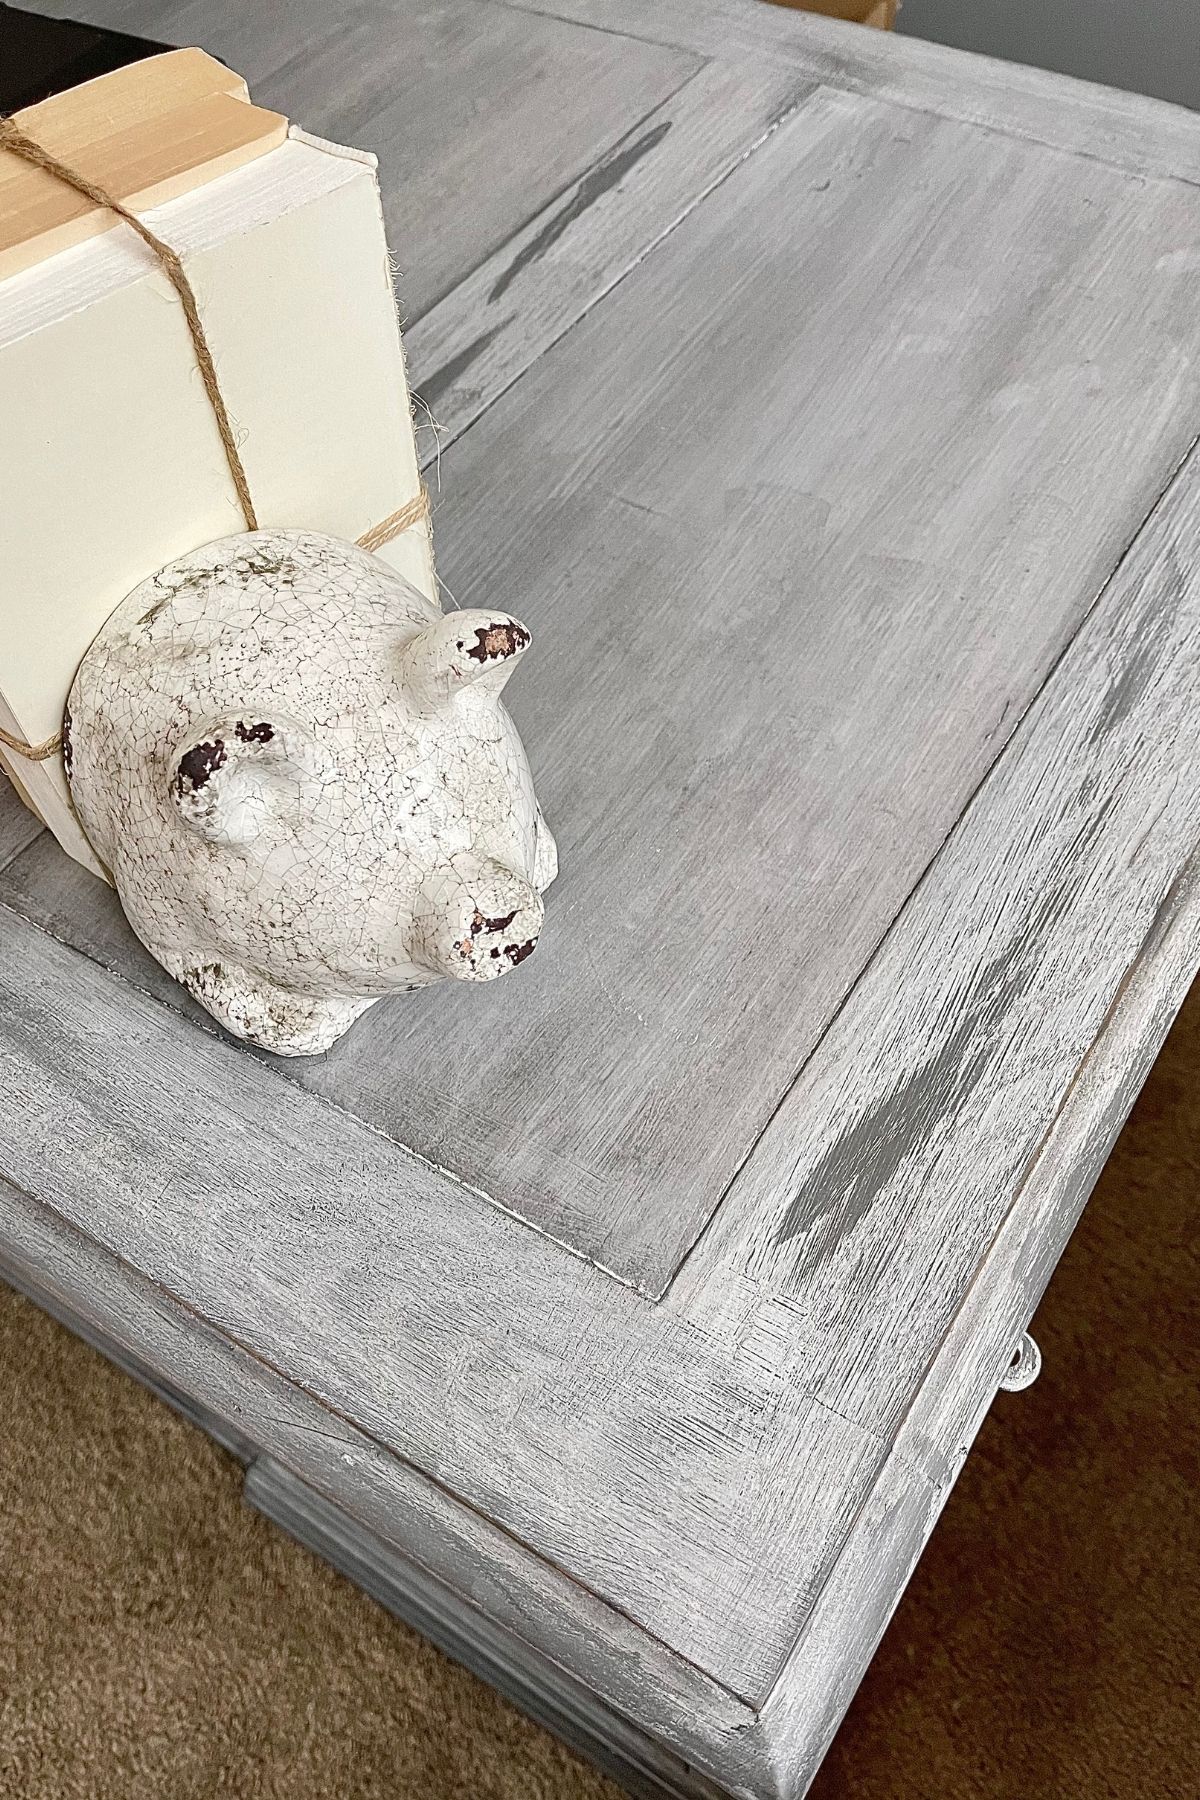
- Using 220 grit sandpaper lightly sand the entire piece. Corners, legs, and drawers are a great place to distress. Be sure to focus on areas you place the Petroleum Jelly. These areas should chip off with ease, exposing the color underneath creating dimension. If you have an orbital sander you can use this as well for this step.
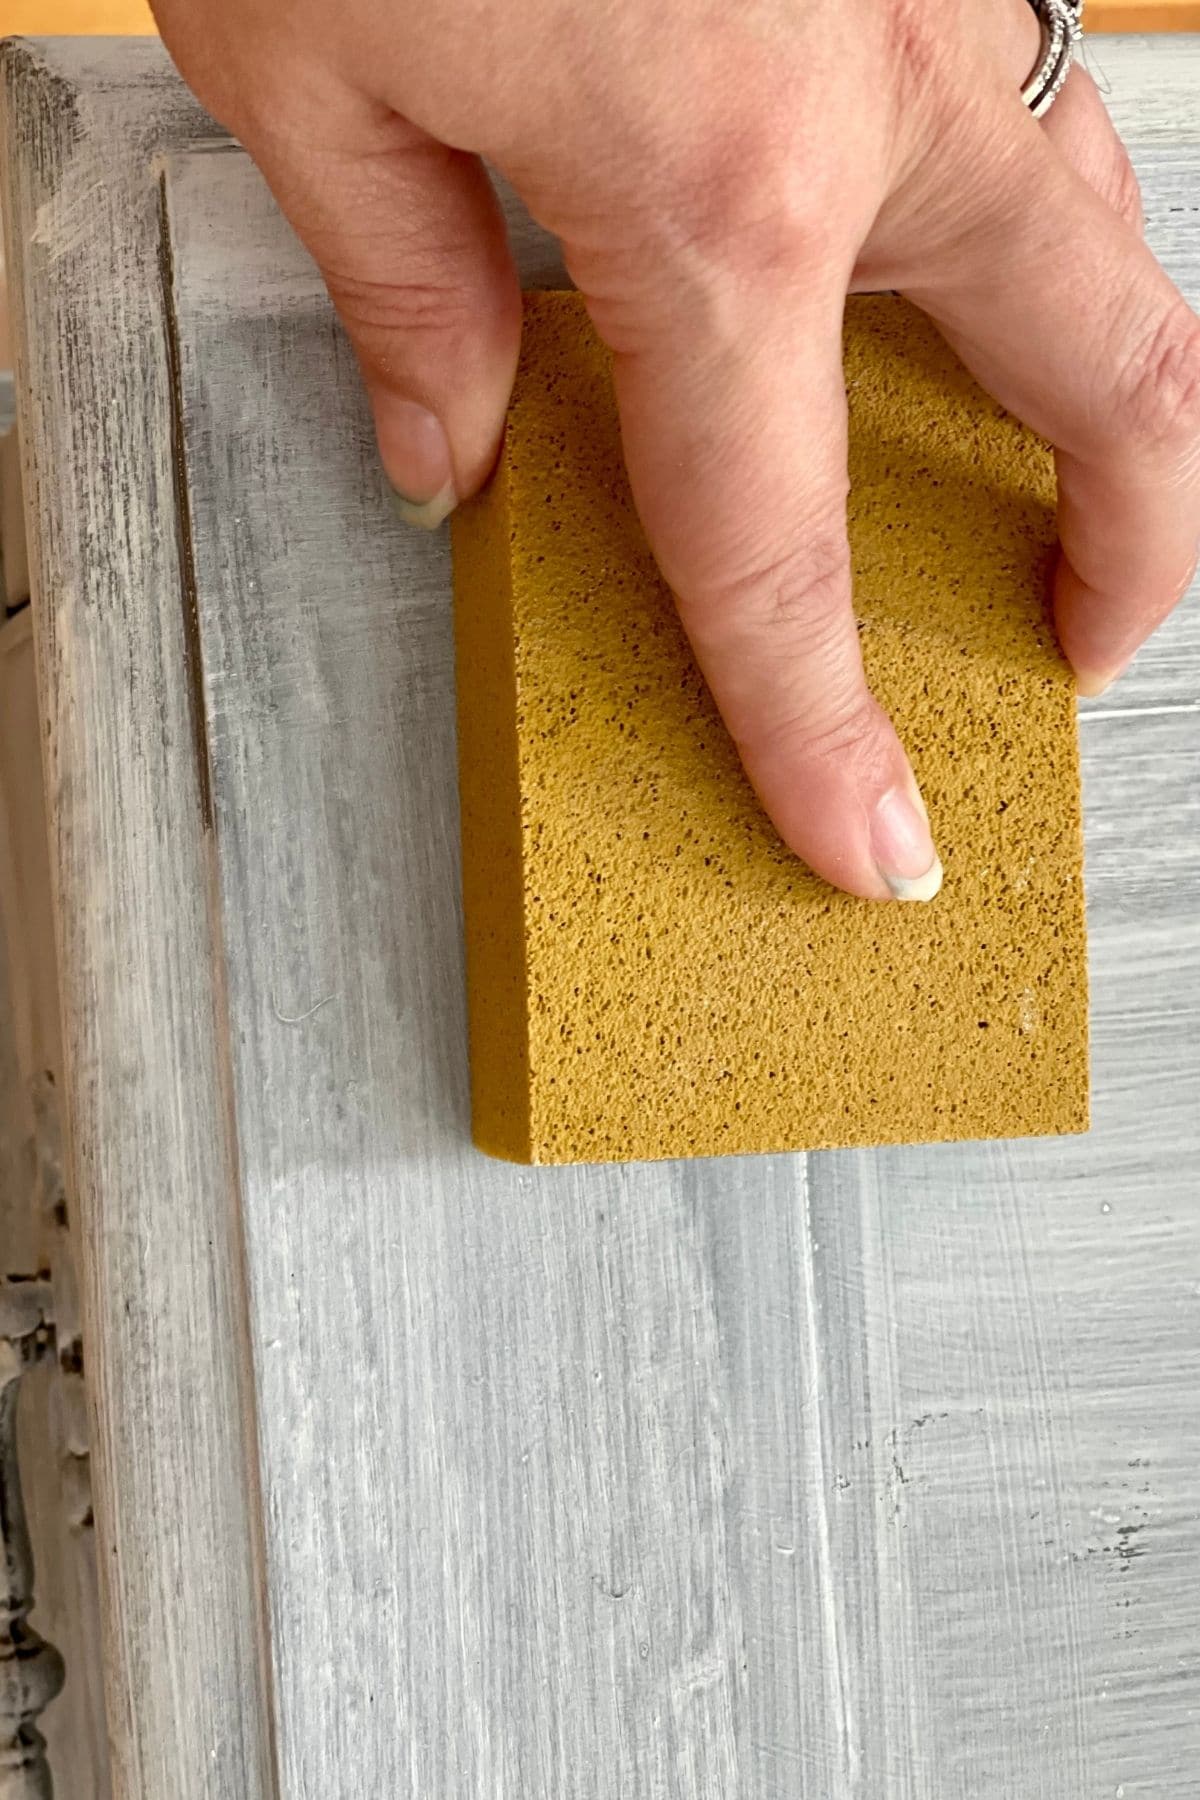
- Take your dusting lint free cloth and remove all dust particles from the sanding process.
- Set a timer for 15 minutes. Start the timer when you begin step 4.
- Using your natural bristle wax brush and Dixie Belle Best Dang Grunge Gray Wax apply a thin coat to the entire piece, except where you applied the Dixie Belle Caviar. You can dip your brush right into the tin. Remember to apply a thin coat. Work quickly.
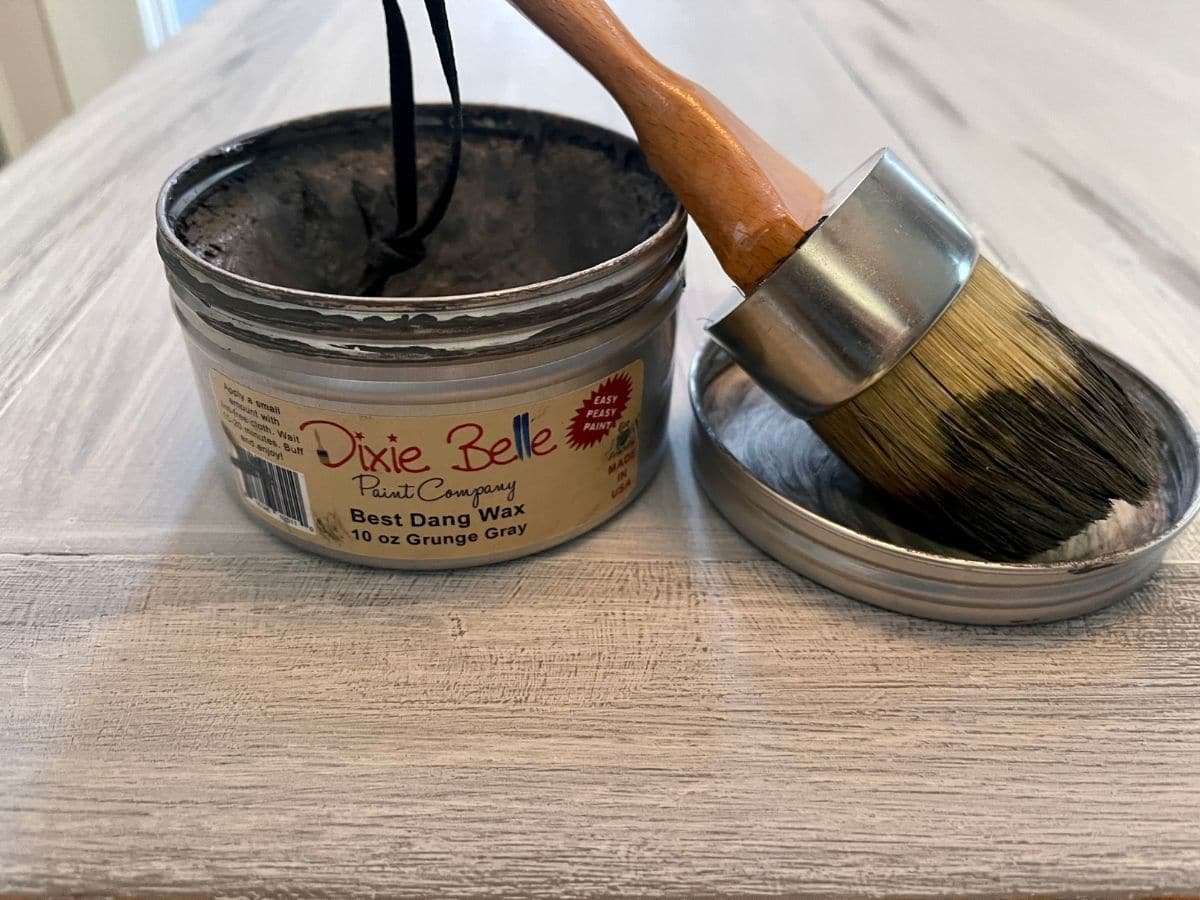
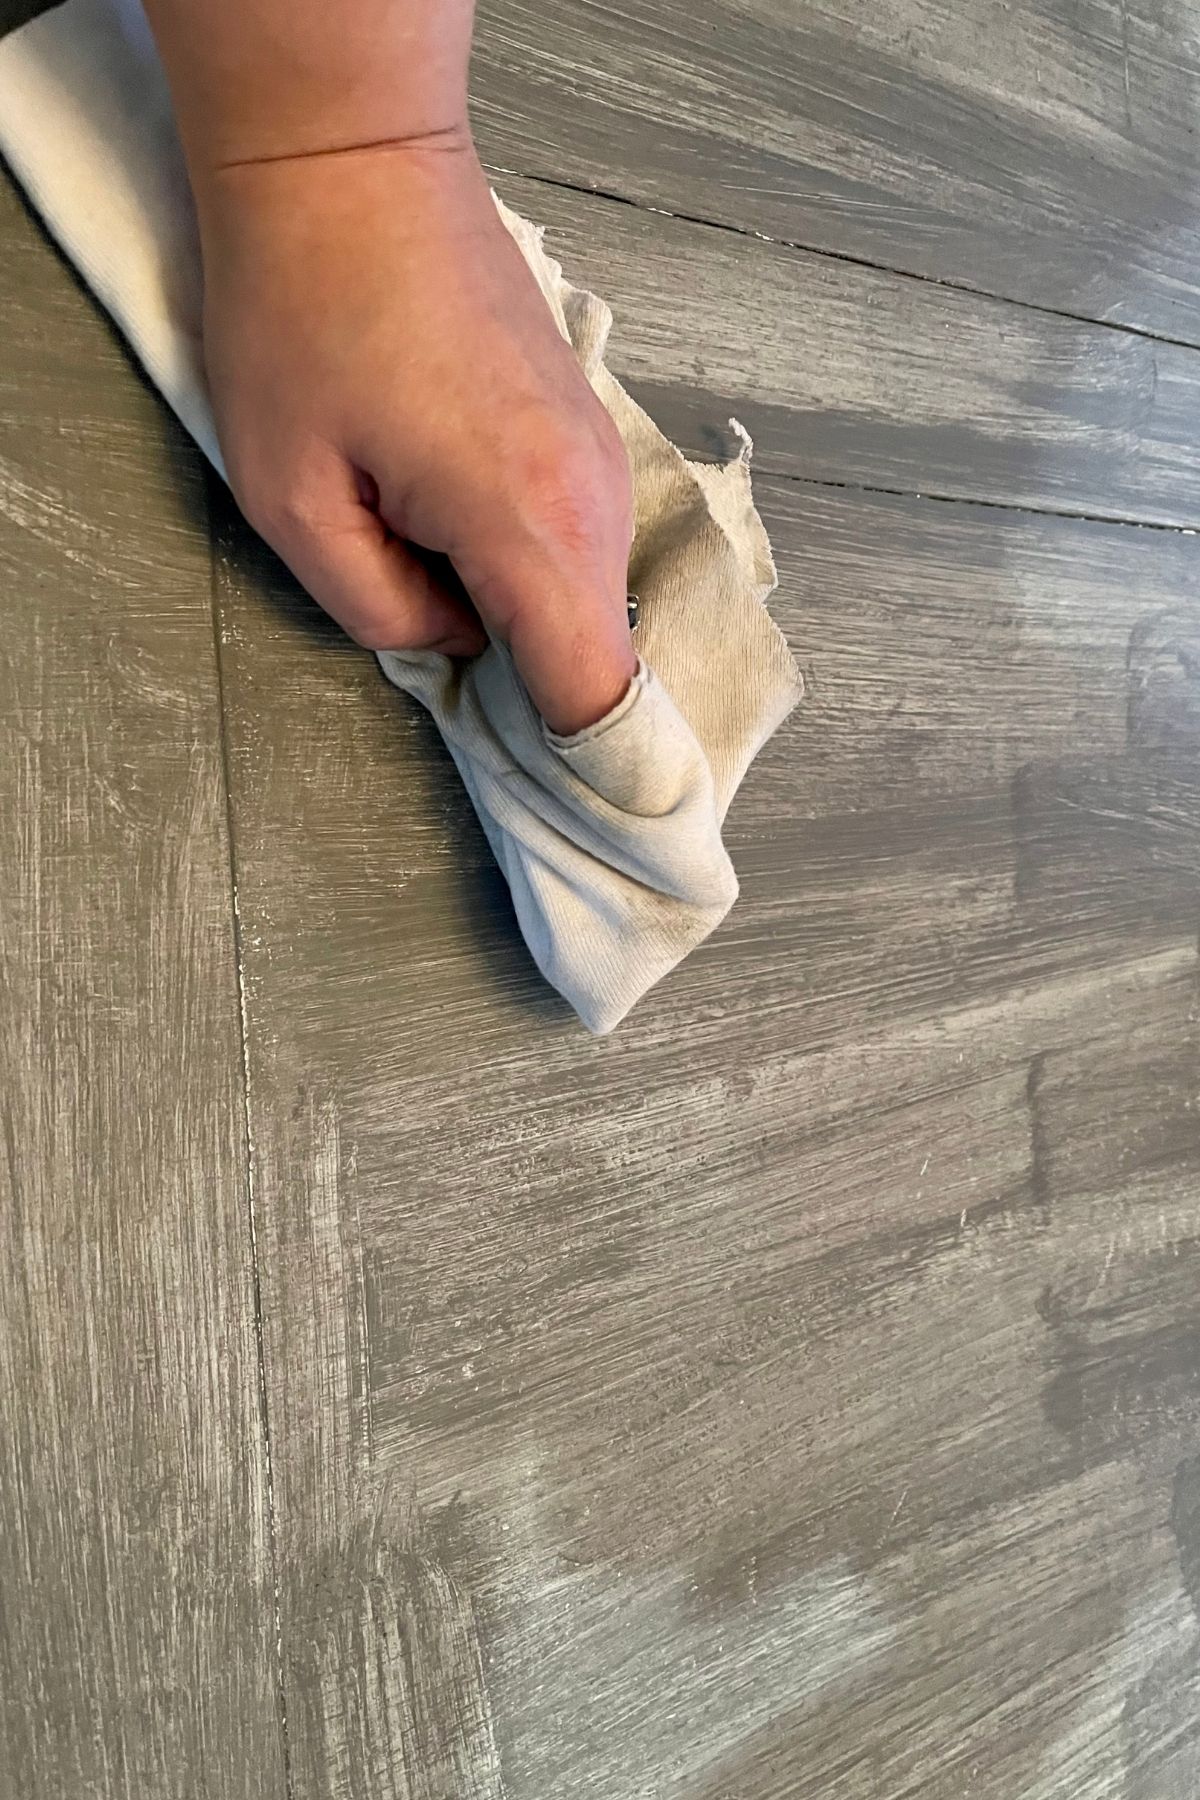
- Once the timer goes off you can start to rub in your wax. Work in the area that you applied first. Using your last lint free cloth rub your wax into your piece. Be sure to rub in all directions and press the wax into the wood. If you're not sweating you're not doing it right. This takes elbow grease.
- Set a timer for 15 minutes. Start the timer when you begin step 7.
- Using your natural bristle wax brush and Dixie Belle Best Dang White Wax apply a thin coat to the trim that you painted with the Dixie Belle Caviar. You can dip your brush right into the tin. Remember to apply a thin coat. Work quickly.
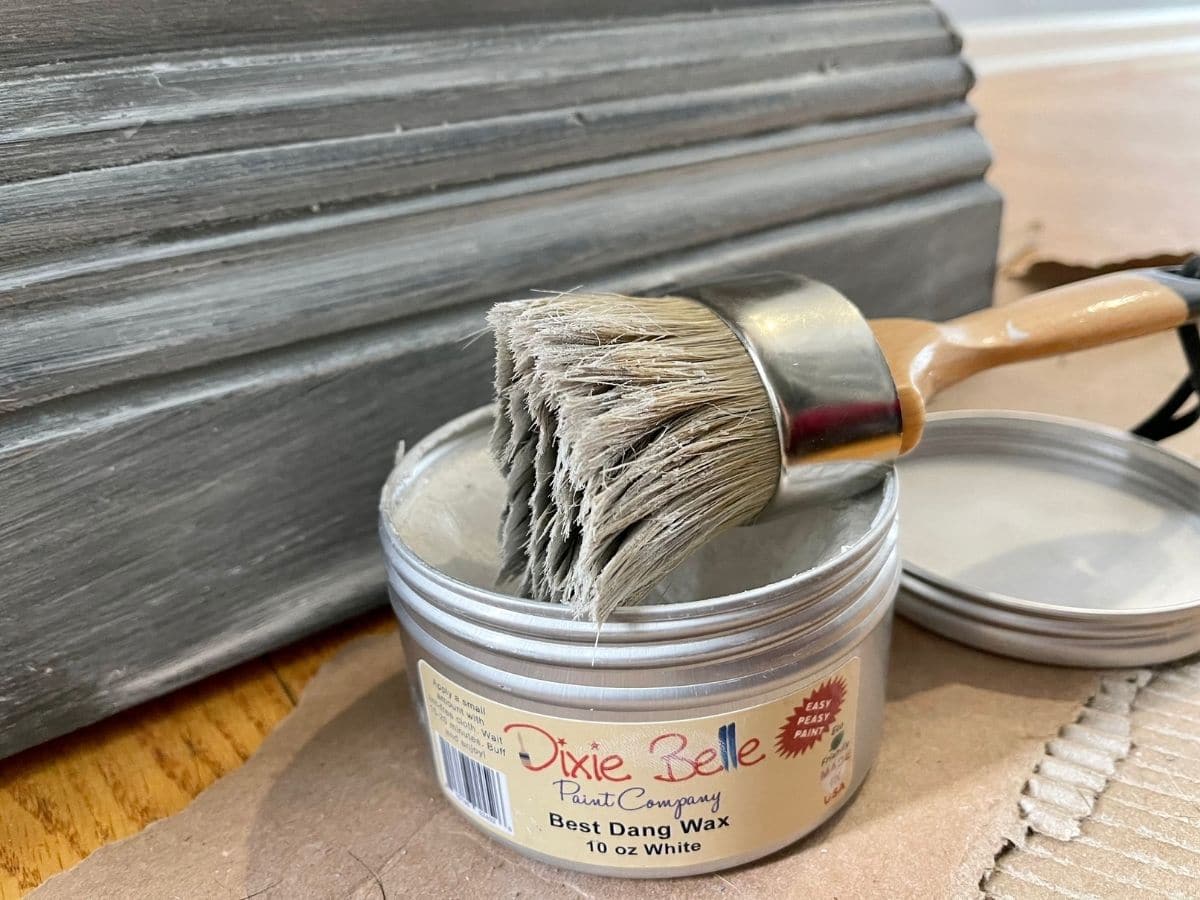
- Once the timer goes off you can start to rub in your wax. Work in the area that you applied first. Using your last lint free cloth rub your wax into your piece. Be sure to rub in all directions and press the wax into the wood. If you're not sweating you're not doing it right. This takes elbow grease.
- Let Cure for 24 hours.
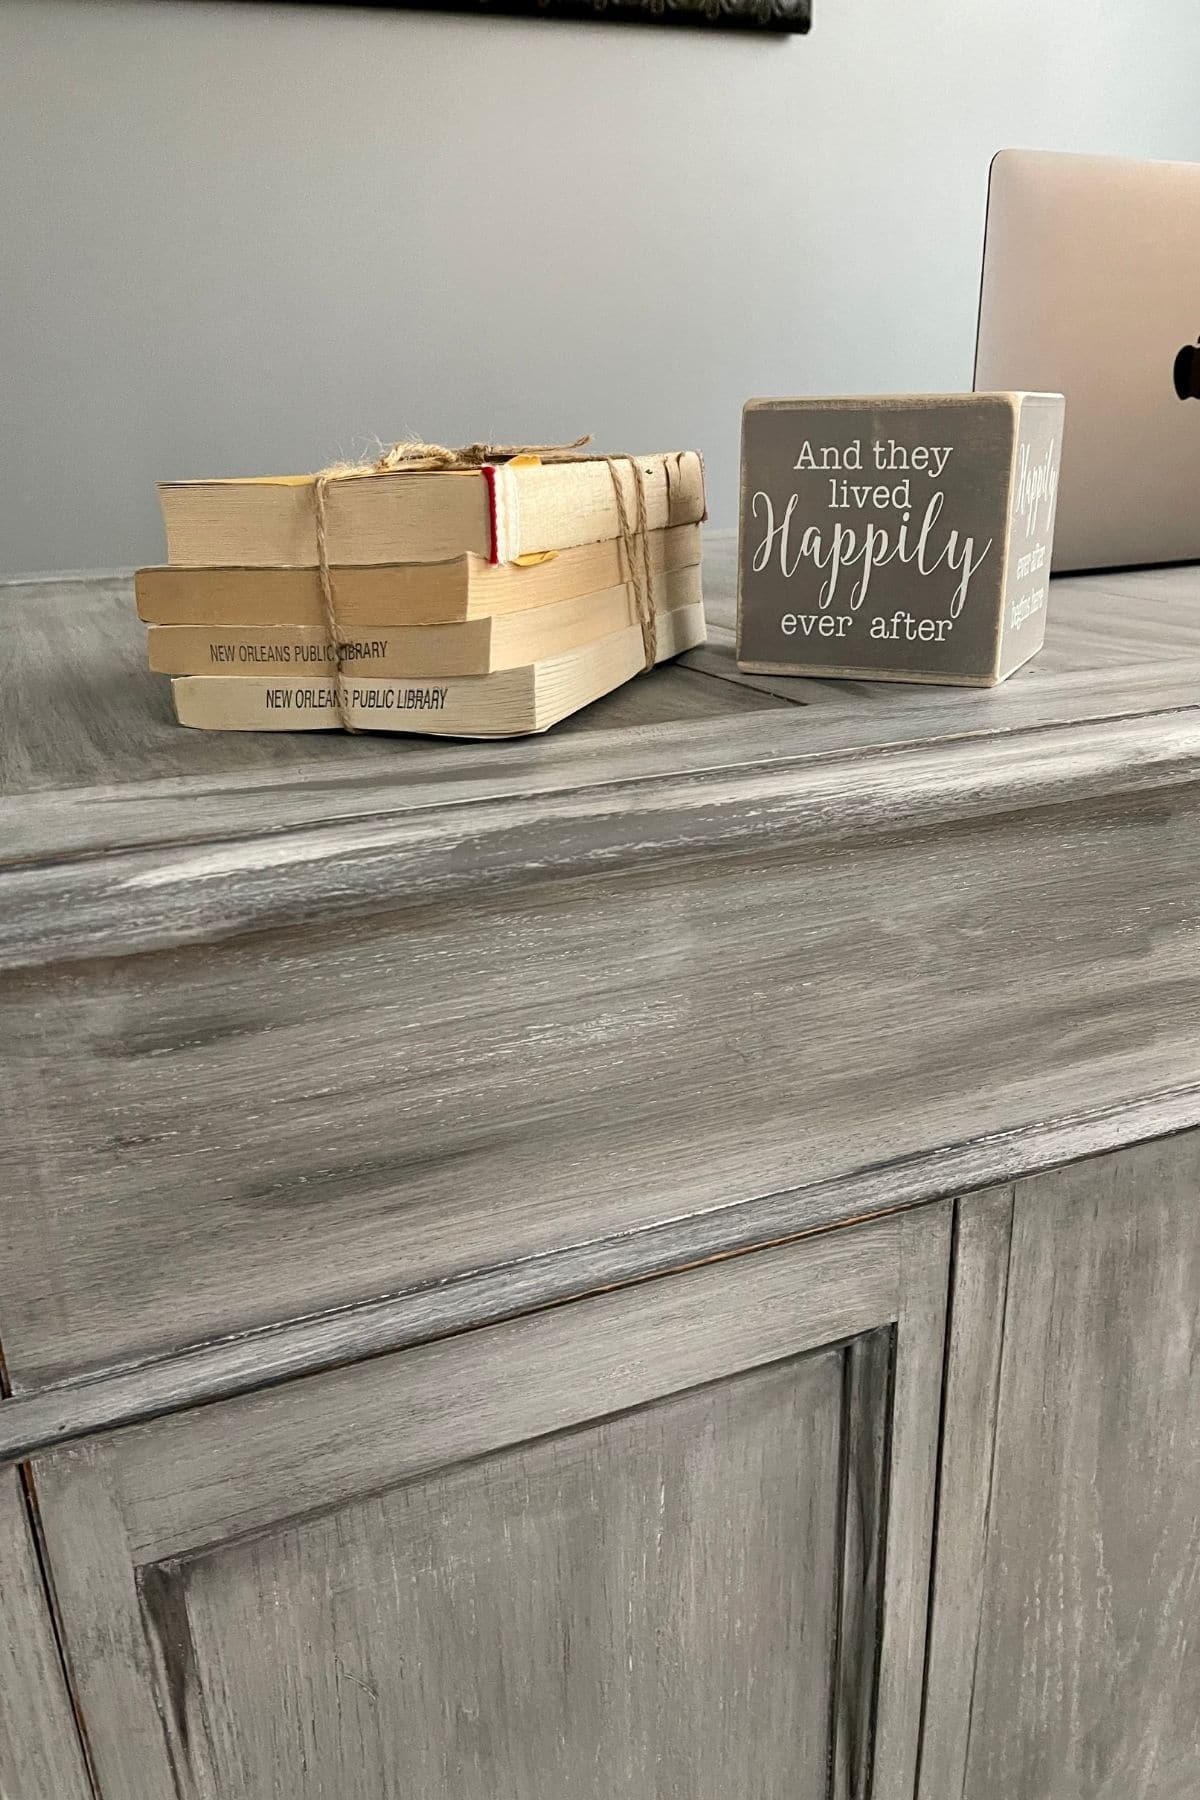
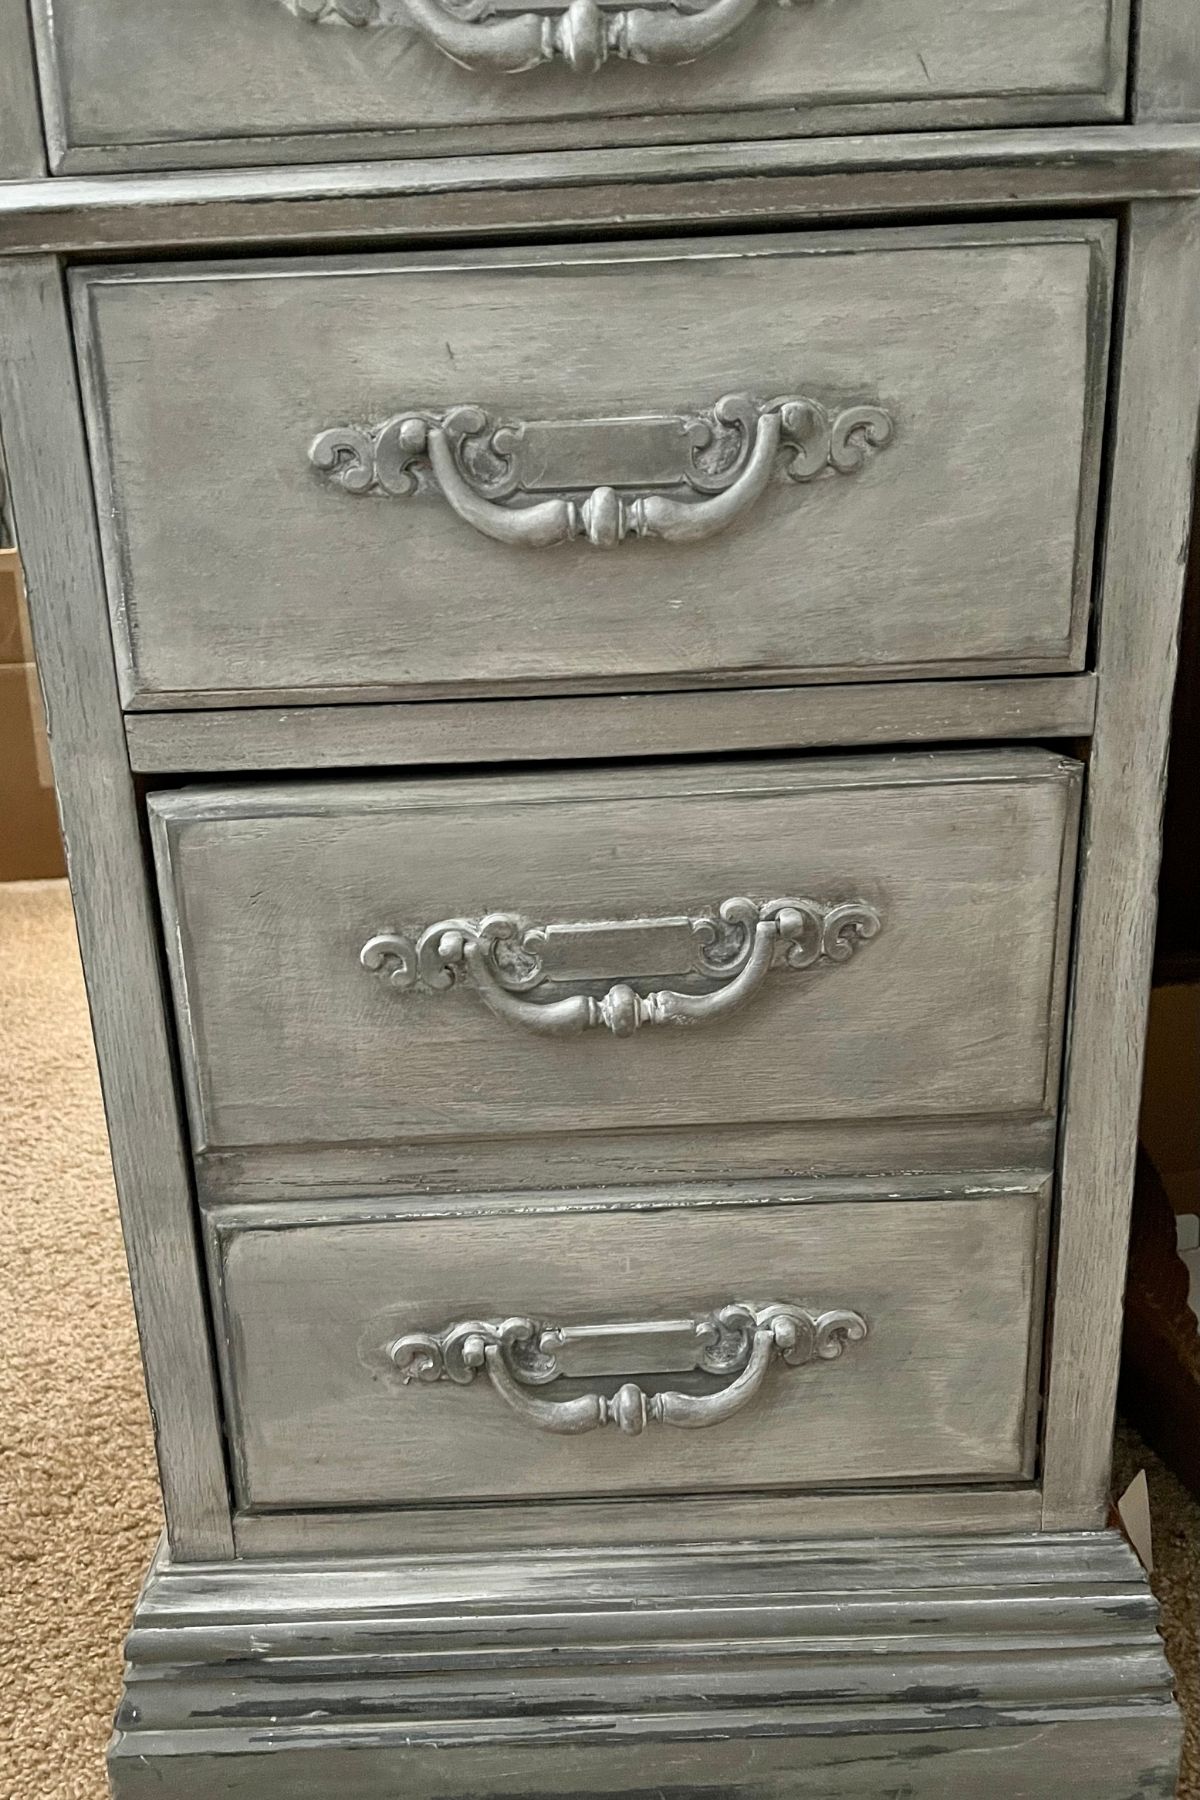
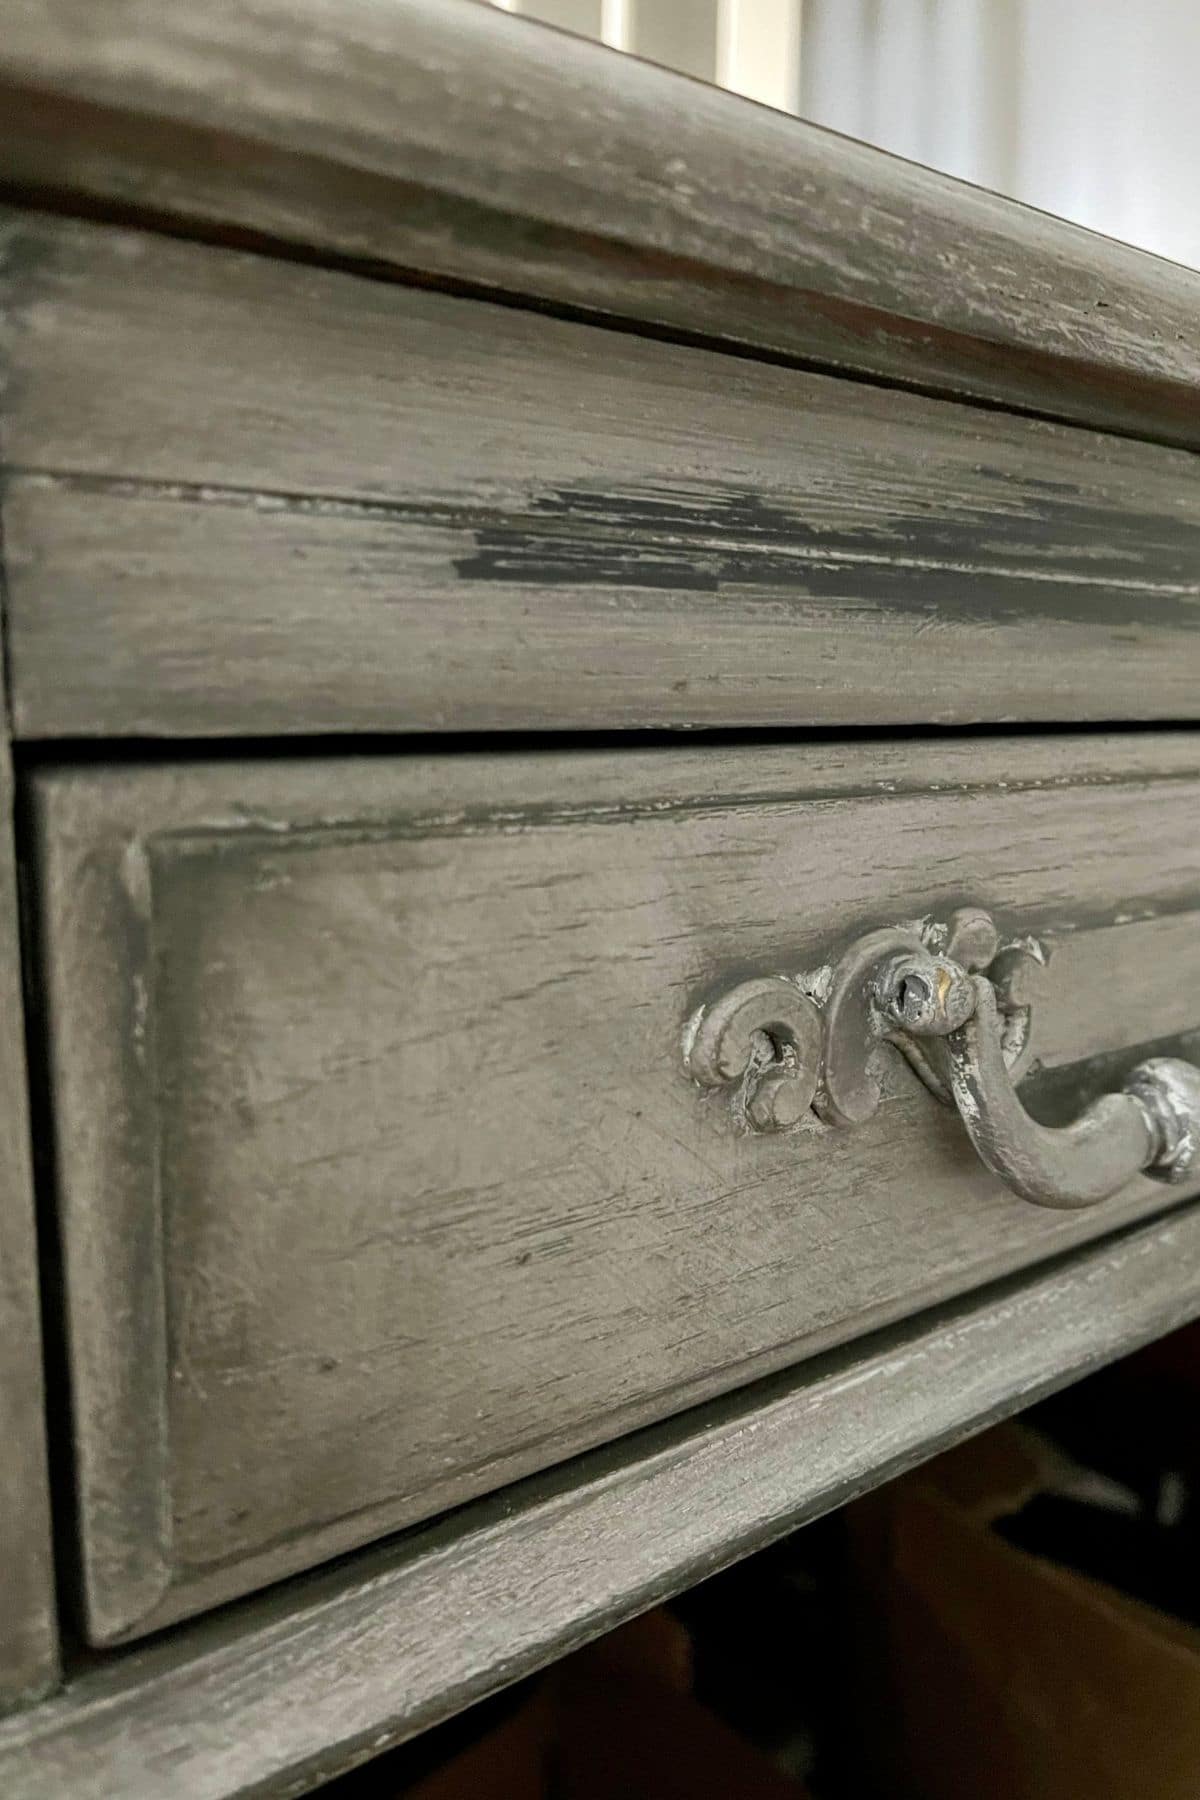
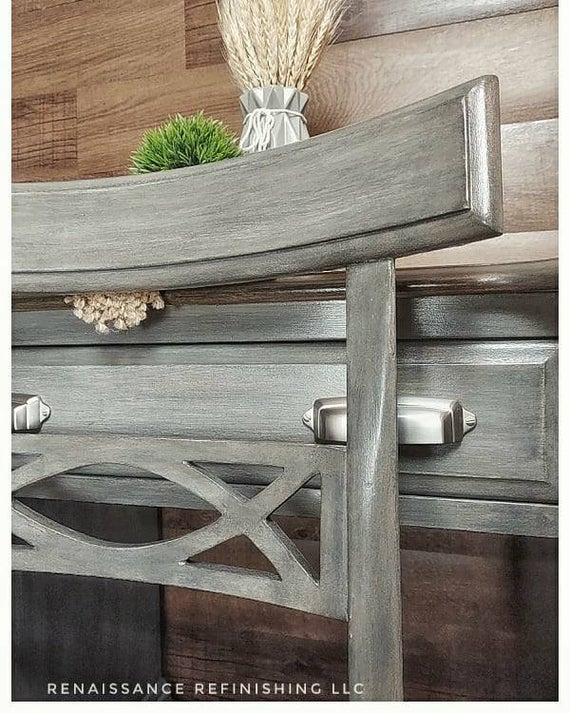
- Using your Dixie Belle Black Gilding Wax and your finger detail any areas you want to darken. For this piece we chose all the edges as well as the corners of the drawers. Be creative, study your piece and decide which areas you wanted to detail and darken.
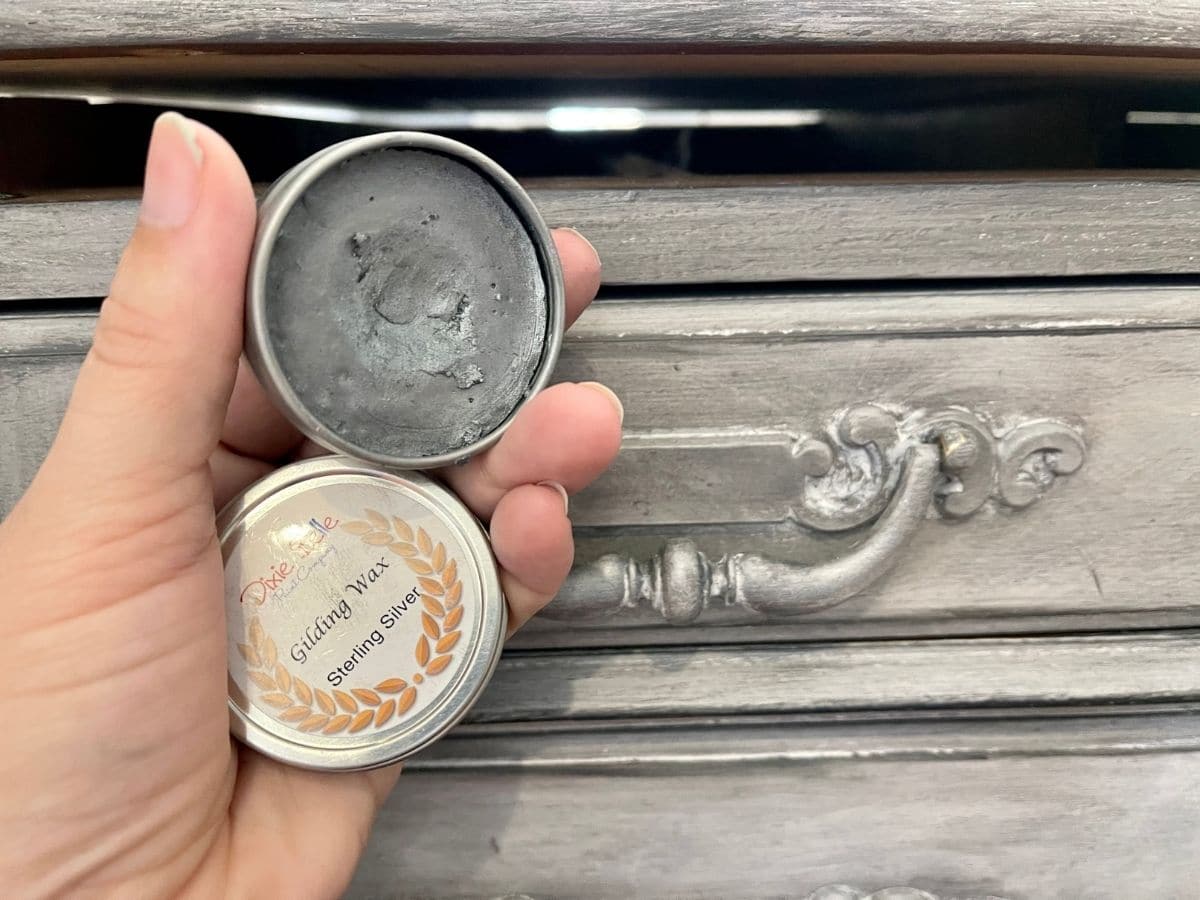
- Using your Dixie Belle Sterling Silver Gilding Wax and your finger detail all hardware. This will shine up the paint on the hardware and add depth to your handles.
- Full Cure time is 30 days. (You can gently use your furniture after the first 48 hours) Be sure not to clean or drag anything across your beautiful creation before your 30 days is up.
Don't Forget to Clean Up
When done with your project, it is a must to clean up everything. Not only does this make it easier the next time you plan to work, but it preserves any leftover supplies so you can use them in the future. This saves both time and money.
- Clean all chalk paint brushes immediately after use with water. If buildup occurs you can gently clean with mineral spirits.
- Place wax brush in a Ziplock bag. No need to clean your brush as long as you only use the same color wax with the same brush. Place in a Ziplock bag immediately when you're done using.
- Double check to make sure all left over paint and wax is tightly sealed.
Follow this step by step tutorial for creating your own extraordinary distressed wood desk or other furniture makeover! Follow this process with any furniture piece. As an Amazon Associate and member of other affiliate programs, I earn from qualifying purchases.Distressed Wood Desk Furniture Makeover Step by Step Tutorial
Materials
Instructions
Prepare Your Workspace
Start the Painting Process
The Finishing Touches
Don't Forget to Clean Up
Notes
Recommended Products


Leave a Reply