
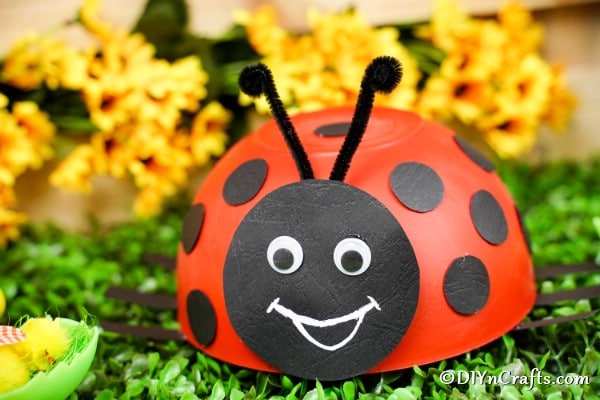
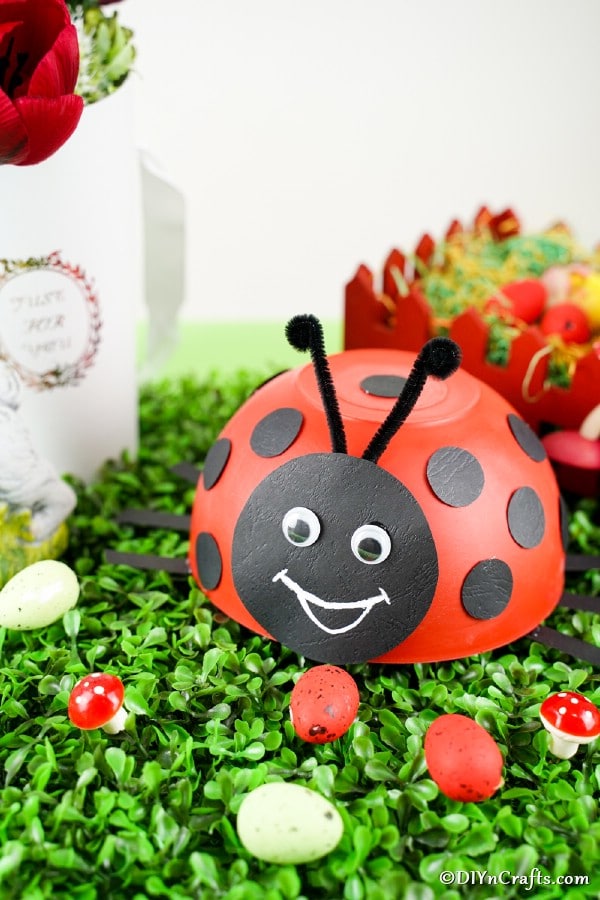
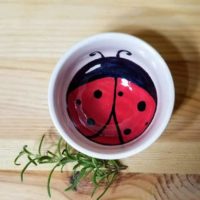
What child doesn’t love ladybugs? This adorable upcycled bowl ladybug decoration is so simple to make and requires only a few supplies. This is the perfect craft for kids when working on gardening crafts or learning about spring. With a craft this cute, you might want to make a few of them to use as decorations everywhere.

Jump to:
Upcycled Bowl Ladybug Decoration
Whether you are looking for a simple craft to entertain kids on a rainy afternoon, want to add some bright spring décor around the house or you are working on a gardening lesson for kids, this adorable ladybug is perfect. I love the idea of adding this not just around the house, but in the garden. A cute ladybug peaking out between planters would be adorable!

Another fun idea is to make this upcycled flower pot ladybug. It's so adorable! Place both in your garden alongside these painted rock ladybugs.
What if I Can't Find a Red Bowl?
If you do not have a red bowl on hand, you can look at the dollar store or in stores like Walmart where they have the picnic supplies. You can also take a plastic container or another colored bowl, and paint it red.
You will want to use spray paint or acrylic paint for the best stick. This is a great way to use up plastic containers from food or takeout.
Tip: Use different colored bowls and make unique bugs to add to your garden. You could attach green ones together to make a caterpillar even!

Did you know you can make golf ball ladybugs? They are so cute and super easy to make. I also love these adorable ladybugs made from plastic spoons. How absolutely genius!
Can I Use Paint or Markers for the Ladybug Dots?
While I use card stock or foam to make the ladybug dots, you can use a black paint marker or permanent marker to make the dots. Kids can get creative and make the spots different colors too.
You can also use felt or construction paper to make the spots. Another fun option is to use recycled cardboard that is cut into circles and painted black. You will need a strong craft glue to make the cardboard stick to the plastic surface.

Want something a bit more appropriate for outdoor decorating? Check out these concrete ornaments for your garden or even these easy DIY rock gardens. So many fun options on the list! Ladybugs are, of course, a great addition to any garden decor, but when you live where there is a lot of rain or snow, one of these ideas may be a better choice.
Supplies Needed
- Large red plastic bowl
- Black craft paper or black foam paper
- Large googly eyes
- Black pipe cleaner
- White paint pen
- Scissors
- Hot glue gun and hot glue sticks
- Pen

How to Make an Upcycled Bowl Ladybug
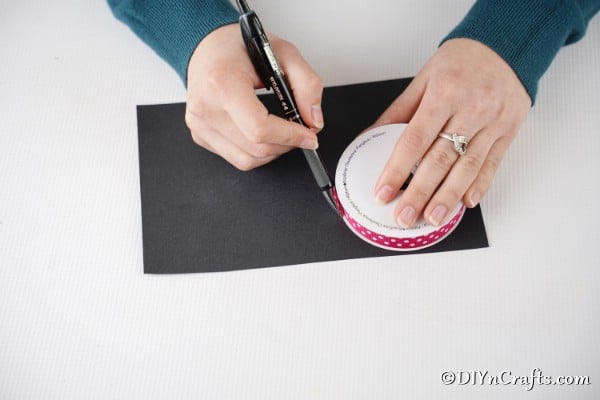
Start by using a small bowl or cookie cutter to trace a circle onto the black paper.

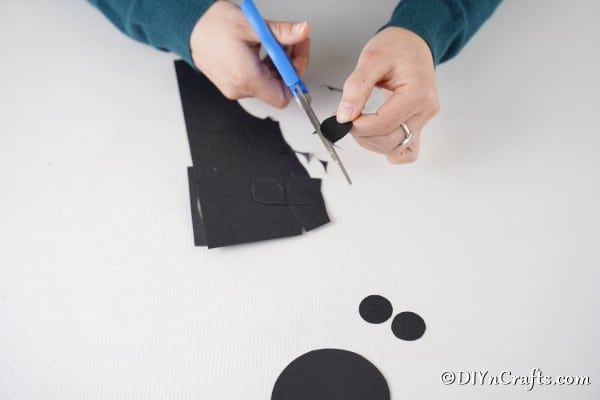
Cut out the large circle, as well as multiple smaller circles to use as the dots on the ladybug.

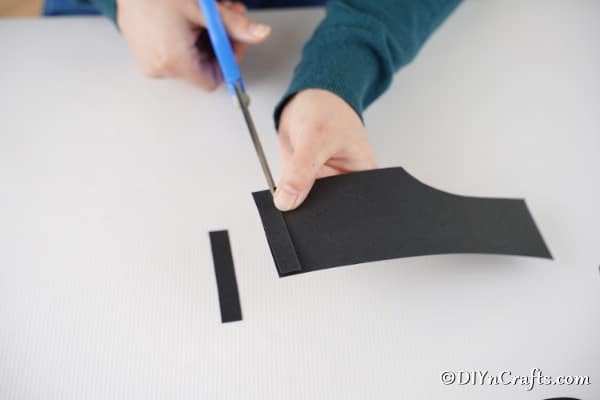
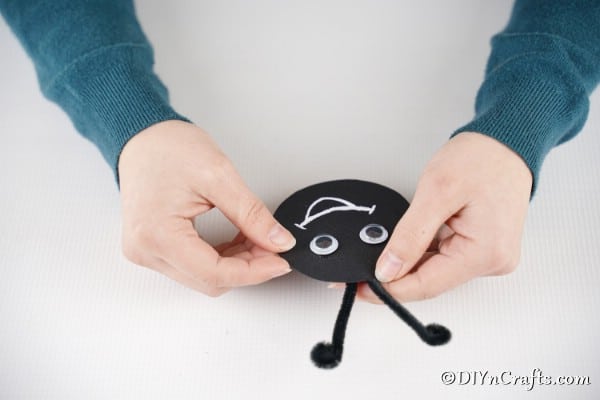
Now, cut 8 strips of paper to be used as the legs.

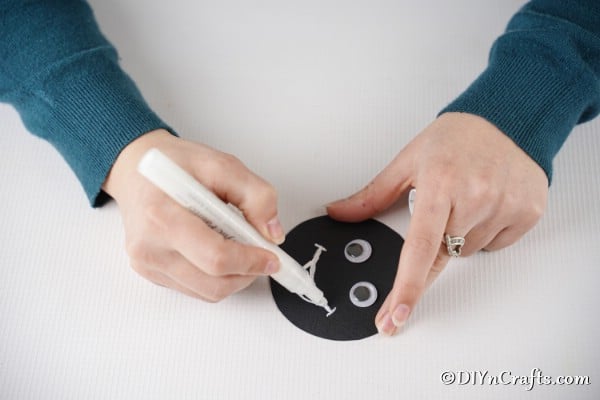
Glue googly eyes onto the larger circle, then use a white paint pen to draw on a smile.

Now, you will curl the ends of two pipe cleaners, then attach them to the back of that circle face to become an antenna.

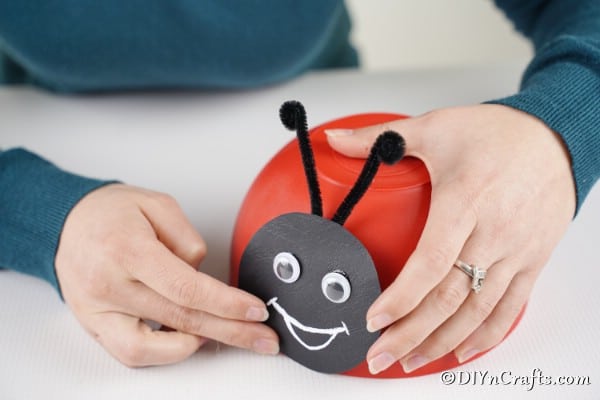
Glue the face onto the side of the bowl.

Now, you will glue the legs onto the underside of the bowl, with 4 on each side.

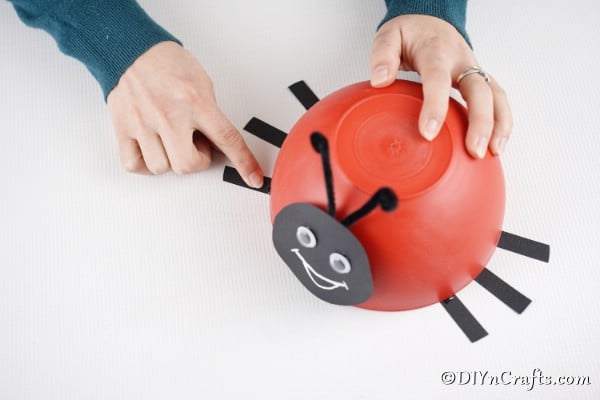
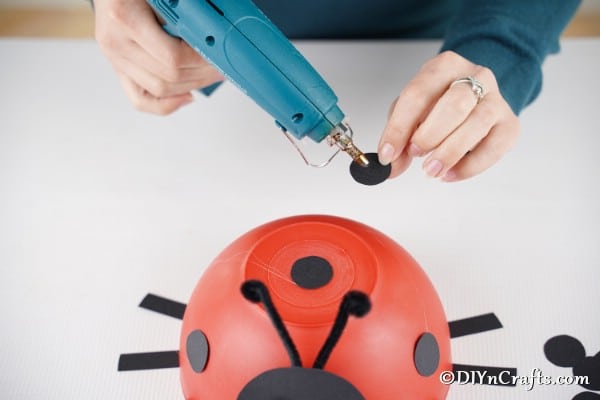
Next, you will glue the small black circles around the bowl to create the ladybug spots.

Add this to a table for party decoration, on a shelf in a kid's room, or on your front porch as a fun decoration.

Crafter's Tips:
When decorating for a party, as shown in the picture above, think outside the box. This fun upcycled bowl was a $1 project that took only a few minutes and saved tons of money. I also recommend checking out Dollar Tree online for boxes of their best products in bulk. Buy your party supplies like cups, utensils, plates, napkins, tablecloths, and streamers for half the price you would elsewhere, then use them to make your own decorations that are unique and adorable!
Cute Upcycled Bowl Ladybug Decoration
This adorable upcycled bowl ladybug decoration is a cute addition to any party or decor! Easy for kids to make, and simple to personalize, this is a fun kids craft.
Materials
Tools
Instructions
- Begin by using a smaller bowl or cookie cutter to trace a circle onto your black paper along with several smaller circles (these will be the face and spots);

- Cut out the large and small circles and set aside;
- Cut out 8 equal strips of paper to use as the ladybug legs;
- Now you will glue the googly eyes onto the larger circle and use a white paint pen to draw on a smile;
- Use 2 pipe cleaners and curl one end on them to look like an antenna, then attach them to the back of the ladybug face;
- Glue the face onto the side of the bowl;
- Now, glue 4 of the leg strips onto each side of the bowl, attaching underneath;
- Lastly, you will glue the spots onto the bowl at random places;
- Now you can use your ladybug as a fun decoration for your next party!

Notes
If you can't find a red bowl, feel free to spray paint any bowl with red paint instead!
Recommended Products
As an Amazon Associate and member of other affiliate programs, I earn from qualifying purchases.


Leave a Reply