• Skip to primary navigation
  • Skip to main content
  • Skip to primary sidebar
DIY & Crafts
  • Home
  • Repurpose
  • Crafts
    • Cricut
    • Kids
    • Paper
    • Winter
  • Holidays
    • Valentine's Day
    • Easter
    • Halloween
    • Christmas
  • Fashion
    • Sewing
    • Beauty
    • Hairstyles
  • Gifts
    • Baby Shower
    • Father's Day
    • Mother's Day
  • Homemade
  • Home
    • Furniture Makeovers
    • Lifehacks
    • Decorating
    • Organization
    • Parenting
    • Gardening
    • Health
  • Food
    • Recipes
  • Knitting & Crocheting
menu icon
go to homepage
  • Decor
  • Repurpose
  • Paper
  • Crafts
  • Kids
  • Cricut
  • Fall
  • Fashion
  • Father's Day
  • Baby Shower
  • Food
  • Beauty
  • Recipes
  • Furniture Makeovers
  • Gifts
  • Hairstyles
  • Health
  • Holidays
  • Christmas
  • Easter
  • Halloween
  • Home
  • Gardening
  • Parenting
  • Homemade
  • Kids Crafts
  • Knitting & Crocheting
  • Lifehacks
  • Mother's Day
  • Organization
  • Party
  • Sewing
  • Spring
  • Upcycling
  • Valentine's Day
  • Videos
  • Wedding
  • Winter
  • Woodworking
search icon
Homepage link
  • Decor
  • Repurpose
  • Paper
  • Crafts
  • Kids
  • Cricut
  • Fall
  • Fashion
  • Father's Day
  • Baby Shower
  • Food
  • Beauty
  • Recipes
  • Furniture Makeovers
  • Gifts
  • Hairstyles
  • Health
  • Holidays
  • Christmas
  • Easter
  • Halloween
  • Home
  • Gardening
  • Parenting
  • Homemade
  • Kids Crafts
  • Knitting & Crocheting
  • Lifehacks
  • Mother's Day
  • Organization
  • Party
  • Sewing
  • Spring
  • Upcycling
  • Valentine's Day
  • Videos
  • Wedding
  • Winter
  • Woodworking
×

Home » Beauty

Secret Hair Styling Technique - Fabulous Bumped Ponytails Without Teasing

Modified: Feb 1, 2016 by Vanessa Goodpaster-Beaty · This post may contain affiliate links · 6 Comments

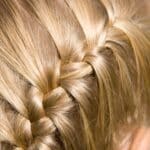
Secret Hair Styling Technique - Fabulous Bumped Ponytails Without TeasingActually, you can create a fabulous bumped ponytail without a bump-it or without teasing. And, you can do it in about three minutes. This is a great method for those of you who like the bumped ponytail look but have little time to create it.

The trick is to tighten the ponytail and then use your fingers to “bump” your hair up a bit after the ponytail has been secured. This gives you the perfect “lift” and you can do this with hair of all lengths. Bumps are very attractive, especially with ponytails and they help you to create a bit more depth than if you just wore a plain ponytail.

You really don’t have to buy those bump-its or tease your hair until it frizzes in order to get the bump look. This is a great way to achieve that look without taking forever to fix your hair every morning.

More Beauty

  • braid diy
    How to Make a Simple Braid with Ribbon Hairstyle
  • Fishtail braids collage
    Fishtail Ponytail Pigtails with Bow Accent {Hairstyle Tutorial}
  • Princess style hairstyle collage
    Braided Crown Princess Hairstyle With Video Tutorial
  • Brunette with low bun in front of grey background
    Low Bun Updo Hairstyle with Rose Accents
143.8K shares

Subscribe to Blog via Email

Enter your email address to subscribe to this blog and receive notifications of new posts by email.

Join 12,165 other subscribers

Reader Interactions

Comments

    Leave a Reply Cancel reply

    Your email address will not be published. Required fields are marked *

  1. Amanda

    September 10, 2015 at 3:16 am

    I hate to be a naysayer, but this technique doesn't work well! It's really difficult to pull the right amount of hair out in the right shape once the hair is already in a ponytail. I've tried this and it never ends up right. I always end up using another tried and true technique.

    Reply
    • ChRistine

      February 29, 2016 at 1:28 pm

      Hi can you help me with the other technique you use please.

      Reply
  2. Marit

    October 26, 2015 at 11:33 pm

    Thank you so much for sharing?? Gonna try this tomorrow ??

    Love from Norway

    Reply
  3. Debra

    November 25, 2015 at 1:55 am

    very cute, I'm going to give it a go.

    Reply
  4. Hailey

    December 29, 2015 at 6:31 pm

    Sorry but I agree with Amanda, at best what your describing would give you either a frizzball or some uneven and misshapen "bump" at least that's all i'd get.
    I recommend just pulling back your bangs or the hair at your crown, no further down than the top of your ears tie it securely semi tight. Then just pull the hair tie slowly just a tiny bit with your hand flat holding the hair so it stays even. How far down you pull the hair tie determines the size of the "bump" then hold at the hairtye and place it (don't tighten but just pick up and nicely place) however high back up to where it started. pin and done. a little bit of hairspray doesn't hurt either. Plus it's perfectly even, centered and you get to control how big/wide/tall etc. your bump is.
    Anyway I never comment on blogs and stuff so that's just my two cents, hope it semi makes sense and can maybe help somebody out there.

    Reply
  5. Kris Alvarez

    July 22, 2019 at 8:31 pm

    This was perfect! Worked the first try, I can't believe how easy it was, even with a plain hair tie! Thank you so much, I have been earching for soemthing just like this!

    Reply

Primary Sidebar

DIY n Crafts Avatar

Hi, I'm Leah! I started DIYnCrafts long ago to spread crafts and happiness. Currently, we have thousands of easy crafts and tutorials, making us the biggest crafty site on the internet.

More about the team → and me

Recent:

  • love sign made of matches
    Framed Love Sign Made of Matches
  • purple and white heart shaped box on table by coffee mug
    DIY Heart-Shaped Gift Box from Upcycled Plastic Bottle
  • woman in pink holding red paper butterfly
    Simple DIY Paper Butterfly Kids Craft
  • gold jewelry stand on black table with jewelry on top of stand
    Upcycled Plate Earring and Jewelry Holder

Pages:

  • About Us
  • Be Featured
  • Contact Us
  • Email and Push Notification Subscriber Settings.
  • Privacy Policy

Categories

Footer

↑ back to top

About

  • Privacy Policy
  • About Us

Contact

  • Contact

As an Amazon Associate, I earn from qualifying purchases.

Copyright © 2022 DIYnCrafts LLC.

143.8K shares
  • 285